

Since our van, Summit, is our full-time home, we knew we needed to install a van air conditioner. While we planned to chase 80, we knew that inevitably, there would be heat spells or tough nights sleeping. An AC gives us flexibility and comfort while living on the road full-time! In this article, we will go over our research, which led us to purchase our AC, what AC we installed, and our thoughts after living with it on the road!
Note: We use affiliate links which provide us a little kickback each time you use one of our links and make a purchase, without any additional cost to you. We do not recommend products that we don’t already love or have heard great things about, so you can trust we’re only suggesting great products to you.
What kinds of van air conditioners are available?
There are a few different options for van air conditioners, and they are split into two categories: 120V AC-powered air conditioners and DC-powered air conditioners. Both have pros and cons, so let’s break them down individually.
120V Air Conditioners
AC-powered (alternating current) or in the US, 120V Air Conditioners have been the standard for many years. They are very strong, and have a long history in our homes and on various RVs and vans over the years.
Because they’ve been on the market for so long, they are typically less expensive than the newer 12V air conditioners. They use more power than their 12V counterparts, so they are a good candidate if you do not plan on boondocking often. If you are in a campground with access to shore power, you can run your 120V air conditioner for as long as you like.
Traditionally 120V air conditioners are large and heavy, which are two qualities not really desirable on Campervans.
DC Air Conditioners (12V, 24V, 48V)
DC-powered (12V, 24V, and 48V) air conditioners have come out recently as technology has improved. They are expensive but have a much lower footprint – both in power consumption and physically compared to 120V air conditioners.
The differences in 12V/24V/48V are mostly educational and depend on your build. If you run a 24V electrical system, you’ll most likely want a 24V air conditioner. Typically, with higher voltages, you’ll see better efficiency, although you would not normally implement a 48V AC on a 12V electrical system as, with any sort of conversion, you’d lose any gains. We chose a 12V air conditioner because we are installing a 12V electrical system in our van, Summit.
Van Air Conditioners Compared
| Air Conditioner Type | Average Cost | Average Power Consumption (Watts) | Average BTU |
|---|---|---|---|
| DC Power (12V) (e.g. ) | $3,000 | 500W | 8,000 |
| AC Power (120V) (e.g. ) | $1,500 | 1500W | 14,000 |
Why did we decide on a Van Air Conditioner?
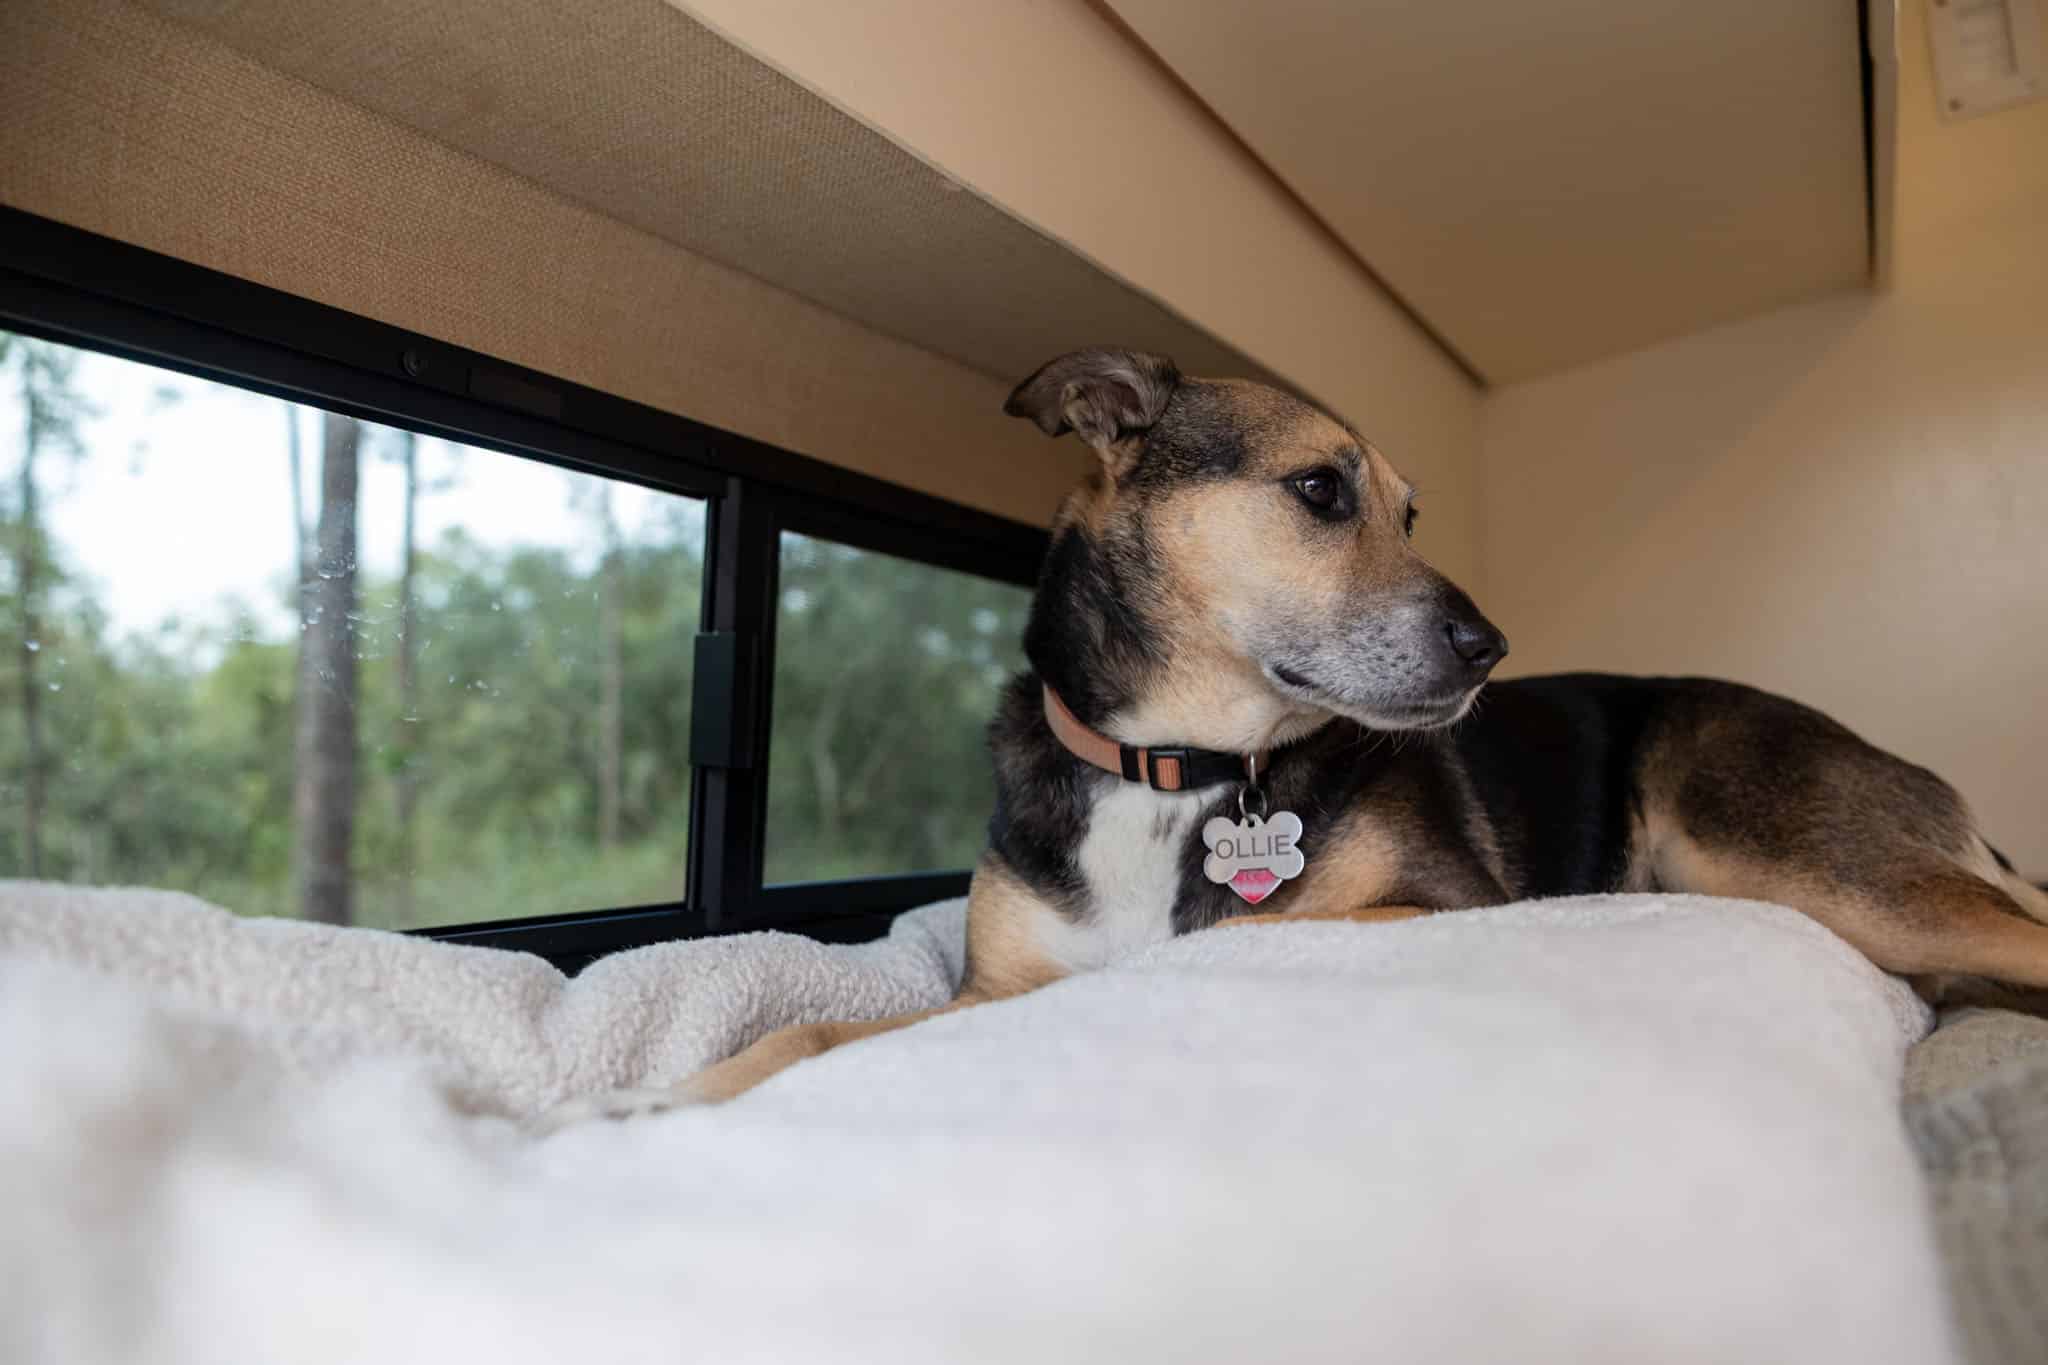
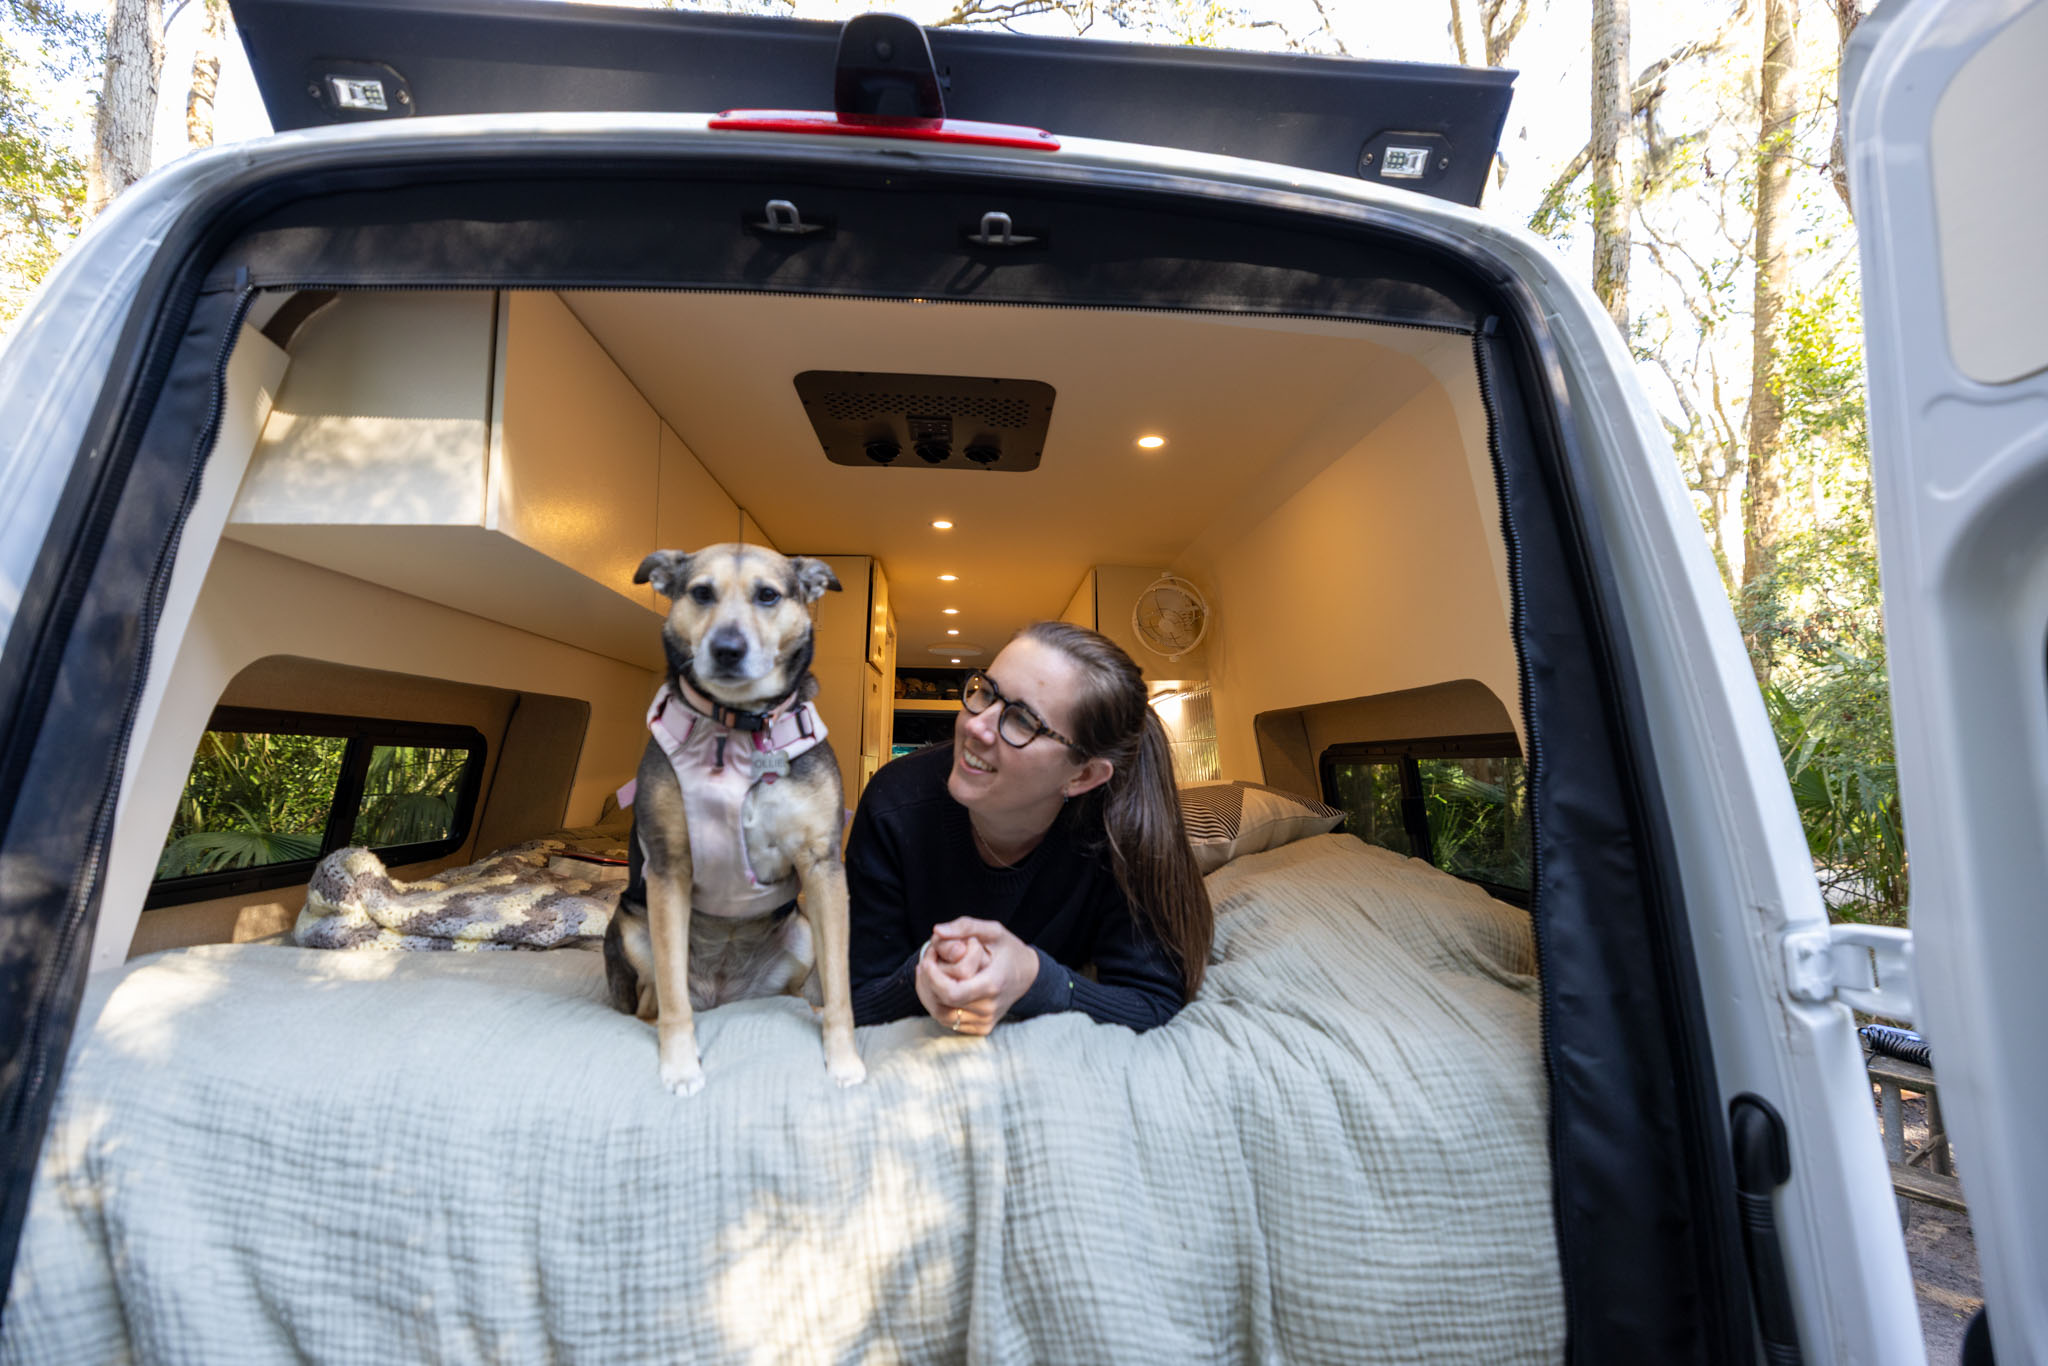
Since our van Summit is our full-time home, getting a van air conditioner was pretty much determined right off the bat. We traveled with our dog, Ollie, and keeping her comfortable while we’re away from the van is of the utmost priority. So we knew we had to get an air conditioner from the start of our van build.
We hike and explore regions where dogs are not allowed. In these situations, on hot days, we wanted the capability to keep the van cool while Ollie waited for us to get back.

An air conditioner will also greatly help the resell value if we decide to sell our van, so we felt that there was no better time than to install it while building out our van, even though there was a high upfront cost.
Top DC Air Conditioners on the Market (2025)
Well Known Brand
| Dometic RTX2000 | 12V | 6800 BTU | $3,0000 |
|---|
There is the Dometic 12V RTX2000, which is a well known brand in the RV and Van communities, however we have some friends with this AC and they told us that it isn’t really for van life – rather was marketed to Truckers instead for some reason. The RTX2000 also has a high price and BTU’s on the lower side. Even though the brand is well-known and reliable, we felt like we could find a better option for our build. Also, because of the uncertainty regarding intended use, if we had an issue, we would be concerned about dealing with the warranty.
The Budget Option
| Velit 2000R | 12V | 7500 BTU | $1,679 |
|---|
Velit has been making high-quality, low-priced Air Conditioners for a while, but you may not have heard of them. When we were building our van, we flip-flopped between the Velit and the Nomadic (below). The Velit is just such a good deal, but at the end of the day, we opted for the slightly higher BTU just in case, because of our pup Ollie.
Our Van Air Conditioner Choice
| Nomadic X2 | 12V | 8100 BTU | $3,0000 |
|---|
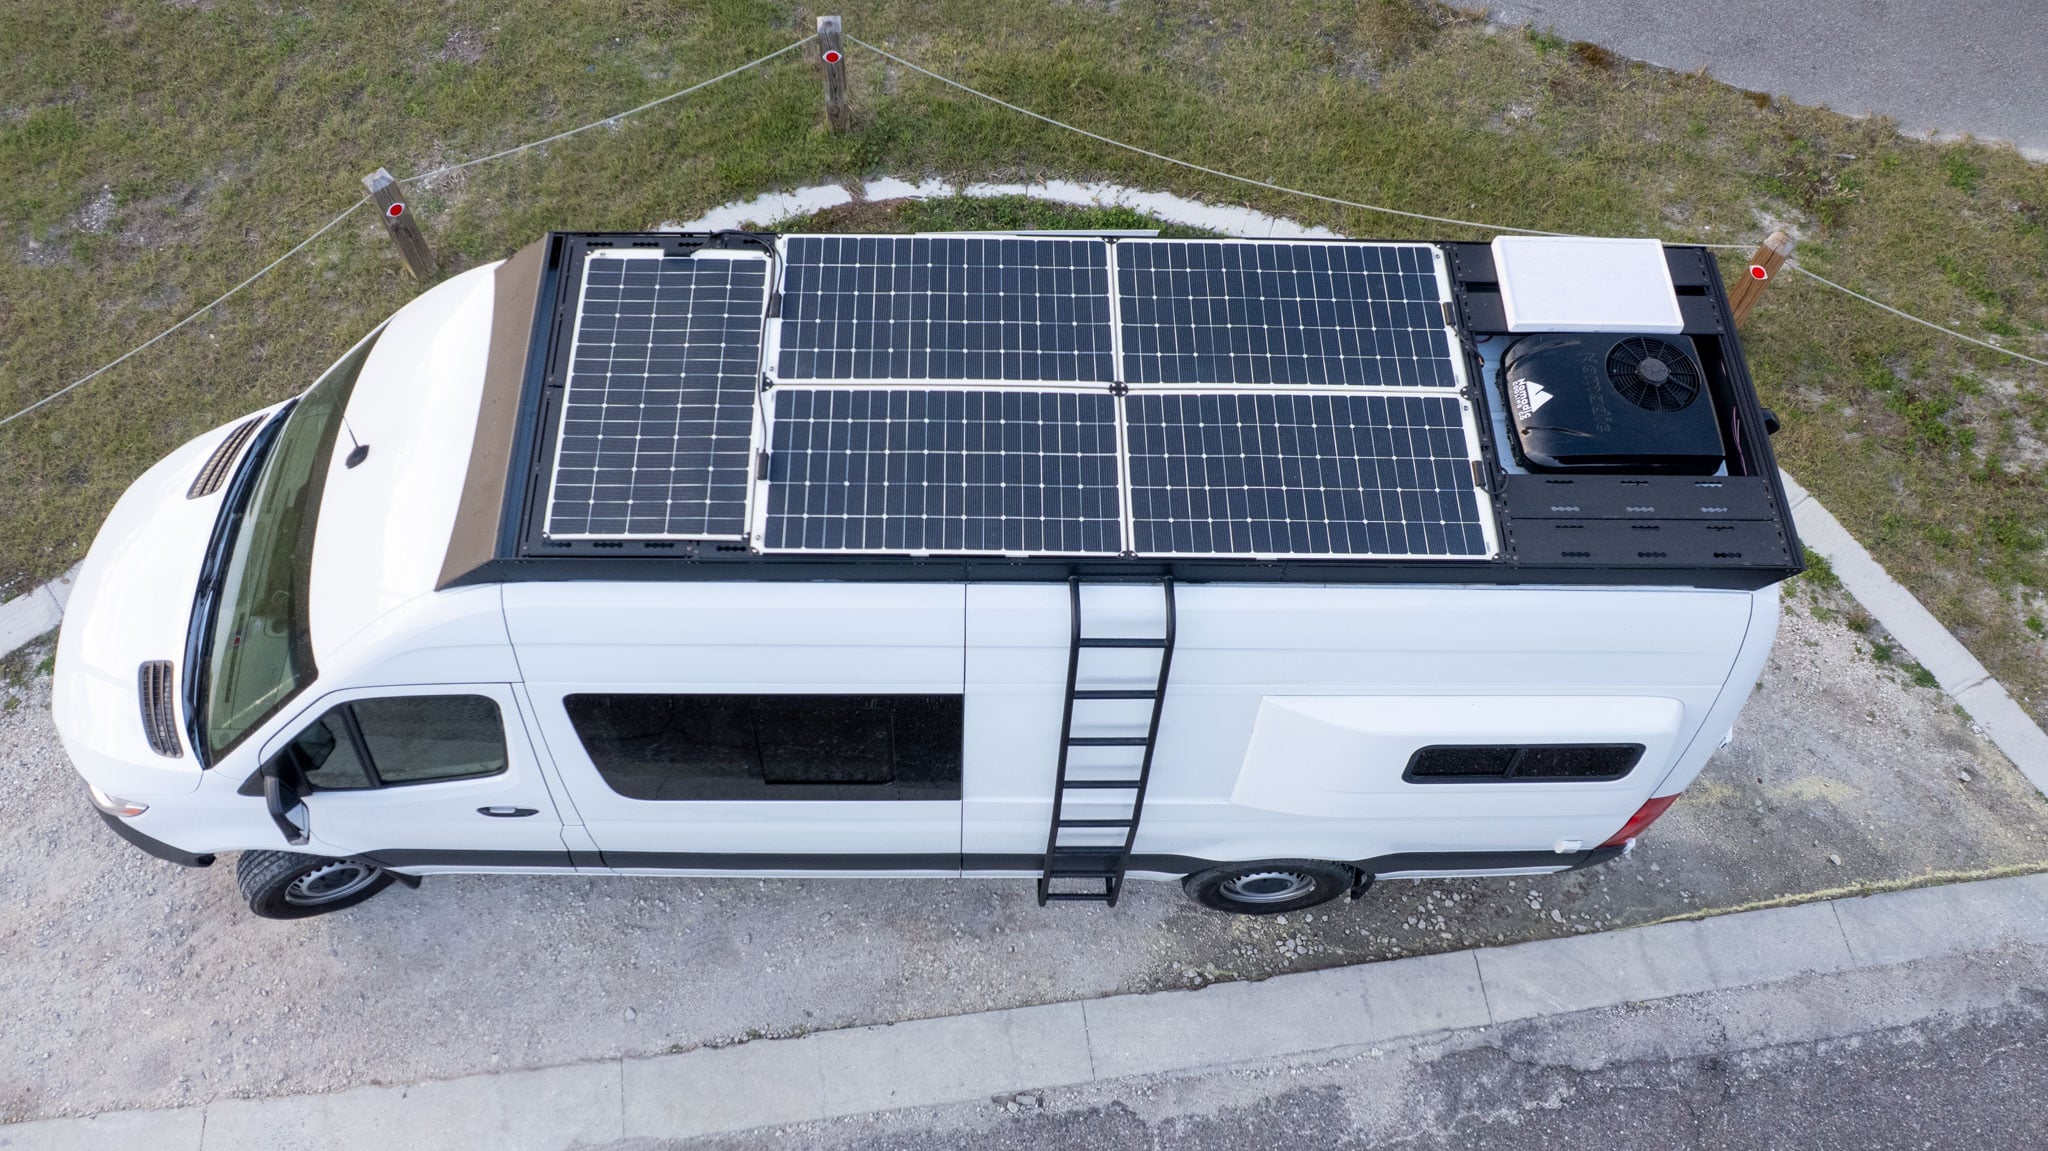
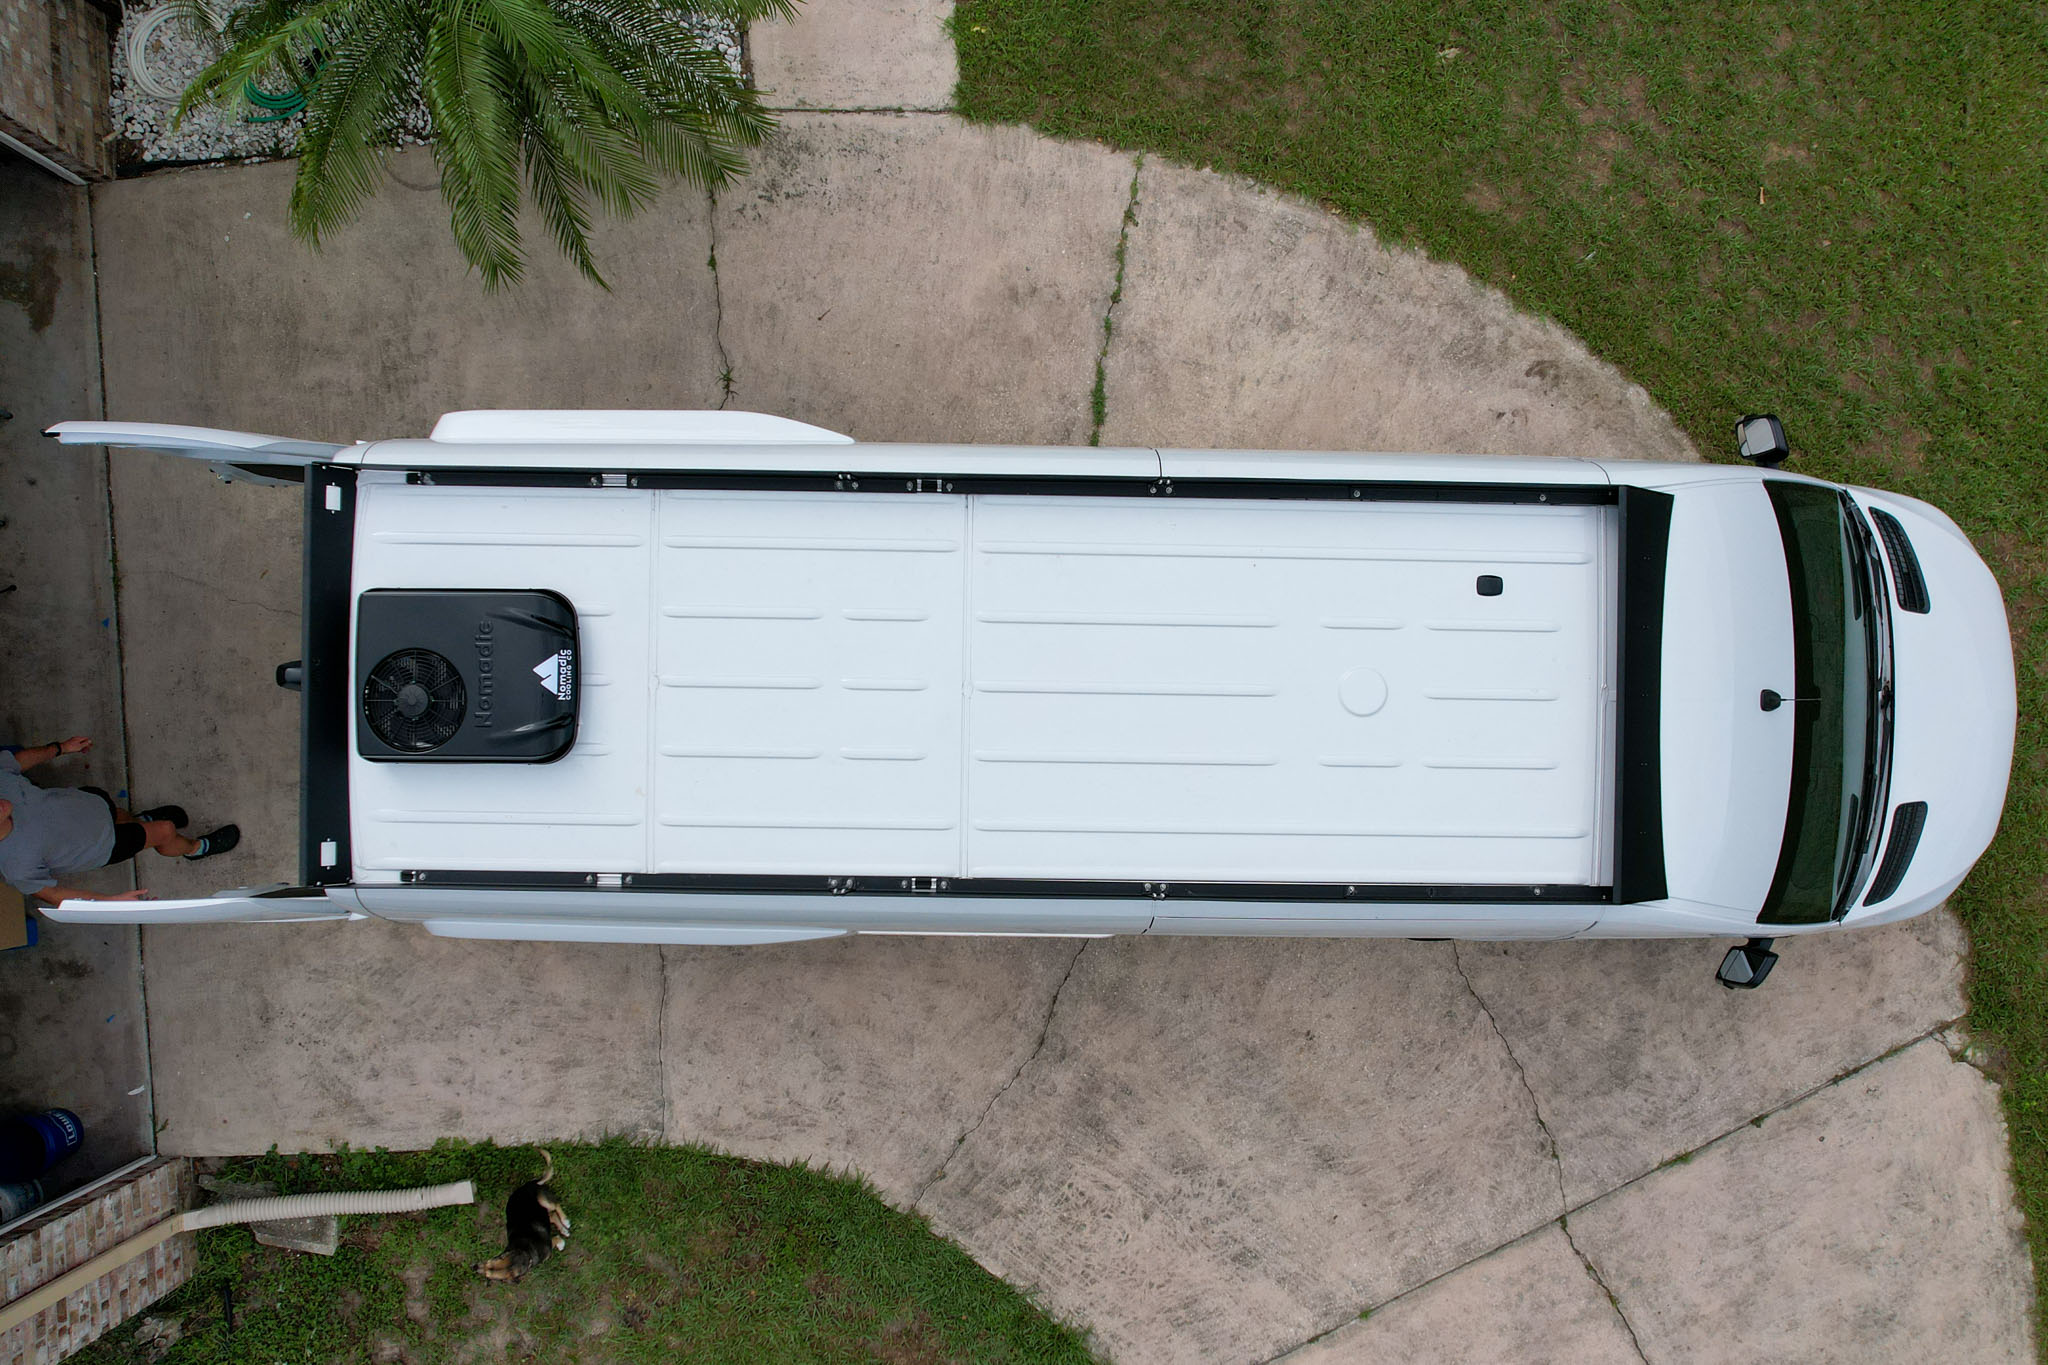
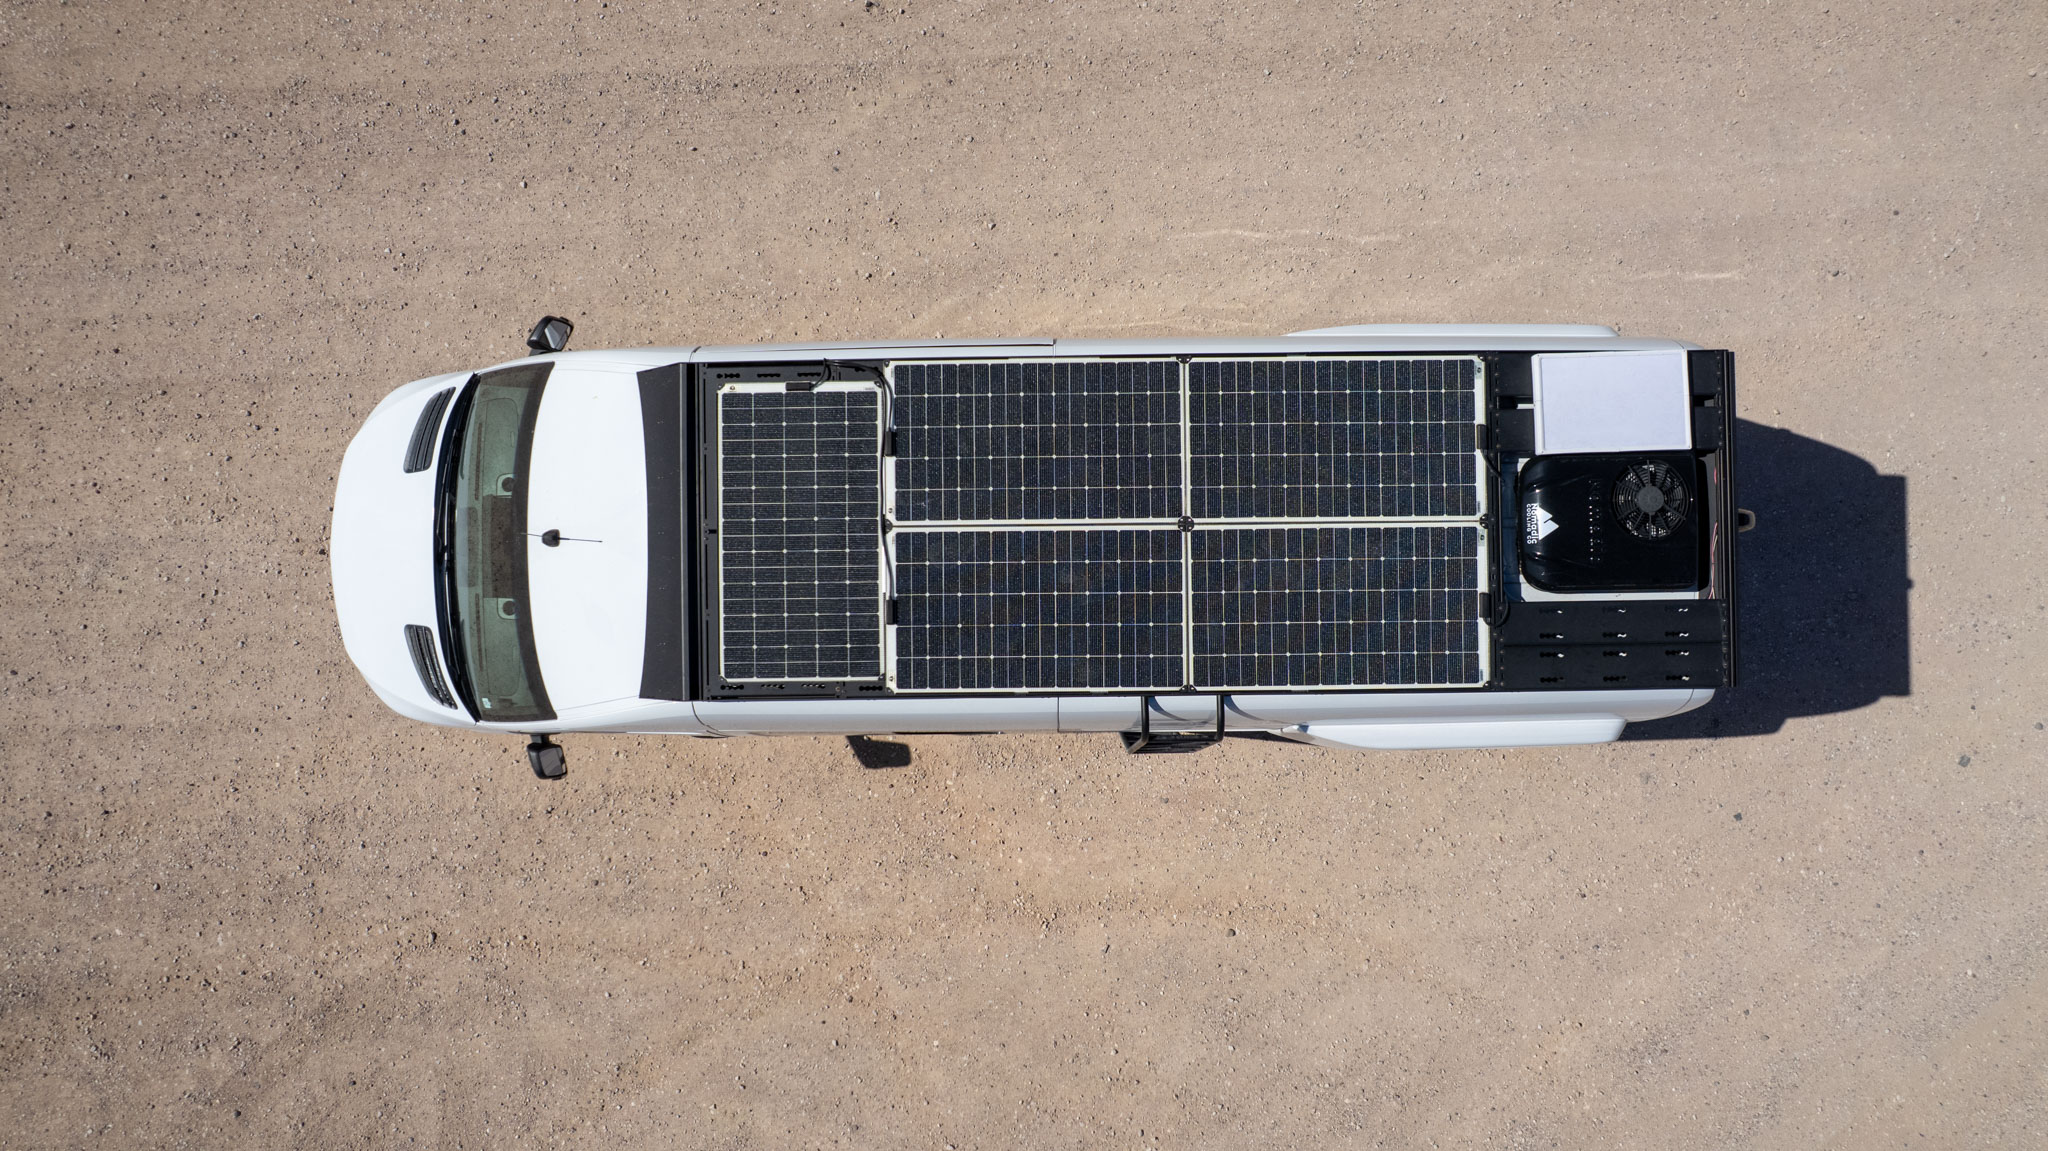
We chose the Nomadic X2 because it was powerful and has an extremely small profile. Needing only a 14×14 opening (the same as a MAXXAIR Fan) and having a small external profile meant we could fit our Starlink next to it, giving us maximum solar power. This allows us to run our AC for longer!
Read our article on Van Fans for another method of cooling your van.
How we Installed our Nomadic X2 12V AC
We installed our Nomadic X2 AC in one day and learned quite a bit from the installation! The manufacturer’s instruction manual was thorough, but there were a few “gotchas” that we wish we had known in advance. We hope you learn from our mistakes!
Required Tools
First off, you’ll need to make sure you have all the required tools. We list here what we used each tool for, so if you have a slight variation but serves the same purpose then you shouldn’t need to buy a new tool!
| Tool | What we used it for |
|---|---|
| Power Drill | Creates the pilot holes for cutting into the van |
| Jigsaw with metal blades | Cuts the panel out of the van |
| Step Bit | Used with the power drill for the initial holes |
| Deburring tool | For cleaning up metal points |
| Grinder | We used this for tidying up any metal we couldn’t get with the Jigsaw |
| Painters’ tape | Outlining the Cut Hole |
| Anti-rust paint | Used for all your newly cut exposed rust |
| Paintbrush | For applying the anti-rust paint |
| Mineral Spirits | A cleaning solvent that won’t damage your van |
| PPE: Goggles, ear protection, and gloves. | Safety first! |
| Caulking gun | For cleaning up metal shavings it is not hard to get to locations |
| Magnet extender pole. | Used for cleaning up any metal shavings in hard to get to cracks |
| Shop vac | For cleaning up metal shavings, it is not hard to get to locations |
| Scotchbrite Pad | Scuffing the van’s glossy paint before applying adhesive |
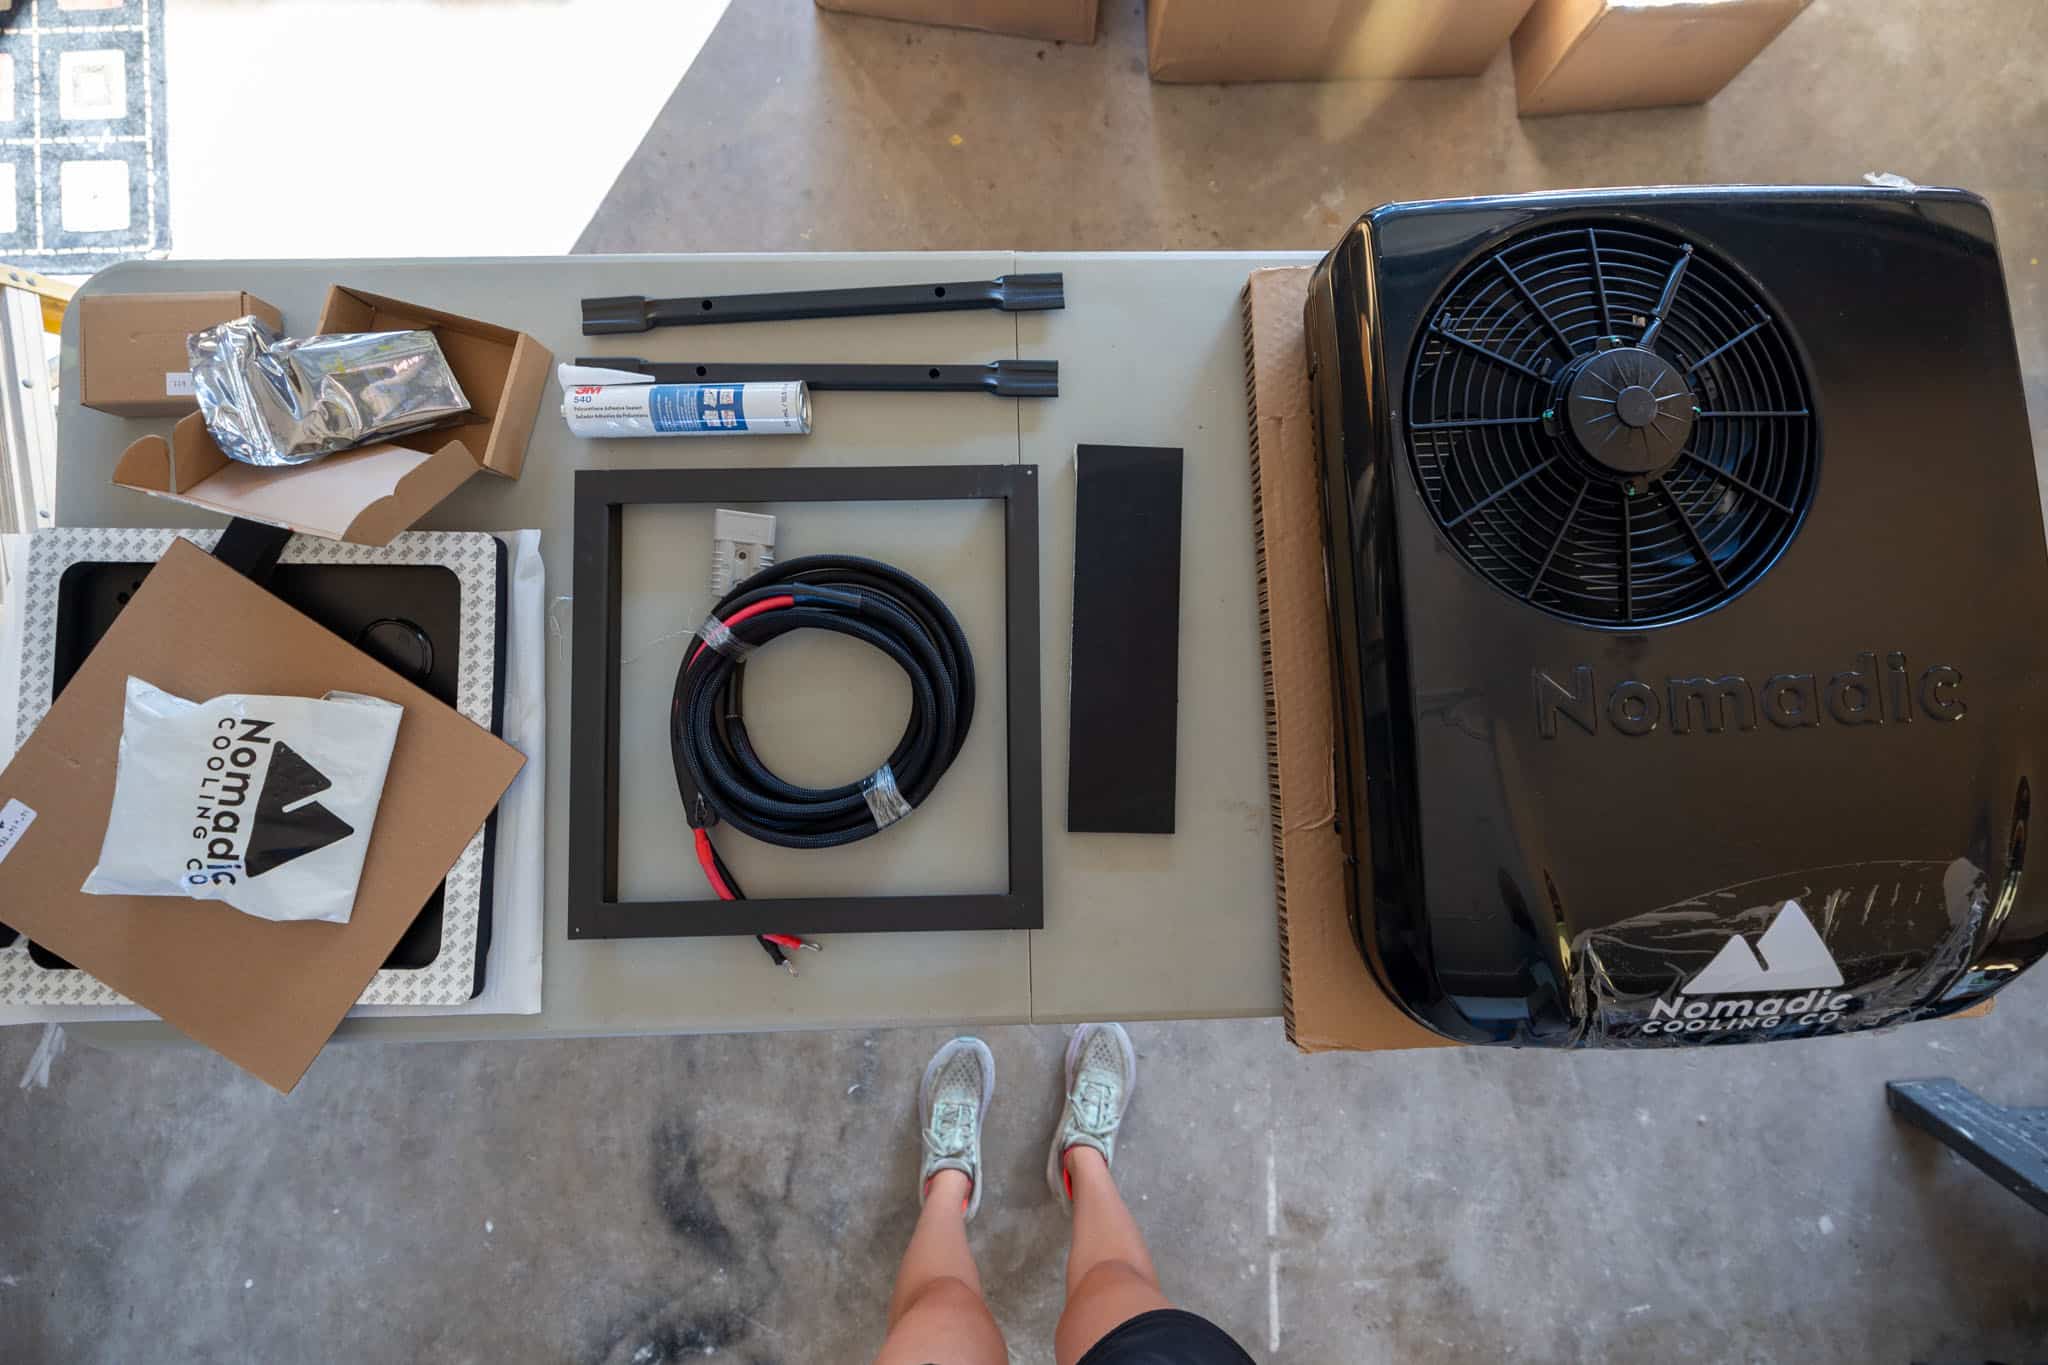
Bench-test your air conditioner
The first step in installing the Nomadic AC is to verify it works. You don’t want to go through the long process of cutting into your van, sealing the gasket, attaching the AC and then finding out it has some defect! To prevent that we do what’s called “bench testing” which (as it sounds) is simply placing the AC on a bench, attaching it to power, and ensuring it works.
Key Points:
- Ensure your AC is faced right-side-up. They are only meant to be run one way.
- Ensure your power connections are secure, and you are using a fused power line – we don’t want any sparks or to damage the AC in this test.
- Check the wires to ensure you don’t accidentally pinch any wires when you place the AC on the bench.
Make a Template
Next up is making a template for your AC. If you purchased the DIY install kit, it comes with a 14×14 template.
Key Points:
- Our 14×14 template was more like 14×14.25 so there is a little wiggle room.
- Keep in mind that the interior will be covered by trim so just try to get as close to 14×14 as possible but don’t stress the small stuff.
Determine the exact location for your air conditioner
There are a couple things to keep in mind when determining where to mount your air conditioner. The first is, thinking about your use of the van, where makes the most sense? Secondly, due to your roof arrangement, where can your Air Conditioner live?
For us, we installed AC primarily for those heat waves and to help us sleep at night. This coincided with our roof layout and it fight in the farthest aft segment of our ceiling.
Key Points
- Center your AC in your ceiling. It is easiest to determine the center point from the roof, but you’ll have to be careful of the beams inside. We determined the centerpoint from inside for this reason.
- Ensure you don’t cut your ceiling support beams, those are structural!
- If you place it in the middle of your van, you may need the optional trim ring to support your roof. Plus, you’ll want to purchase the Nomadic X3 instead of the Nomadic X2 so it can cool more of the vehicle.
Prep for cutting
Before you cut the hole for you AC, you need to prepare your work area! An ounce of prevention is worth a pound of cure, so ensure you have all your materials on the roof and you have the inside of your van secure from metal shavings.
Key Points
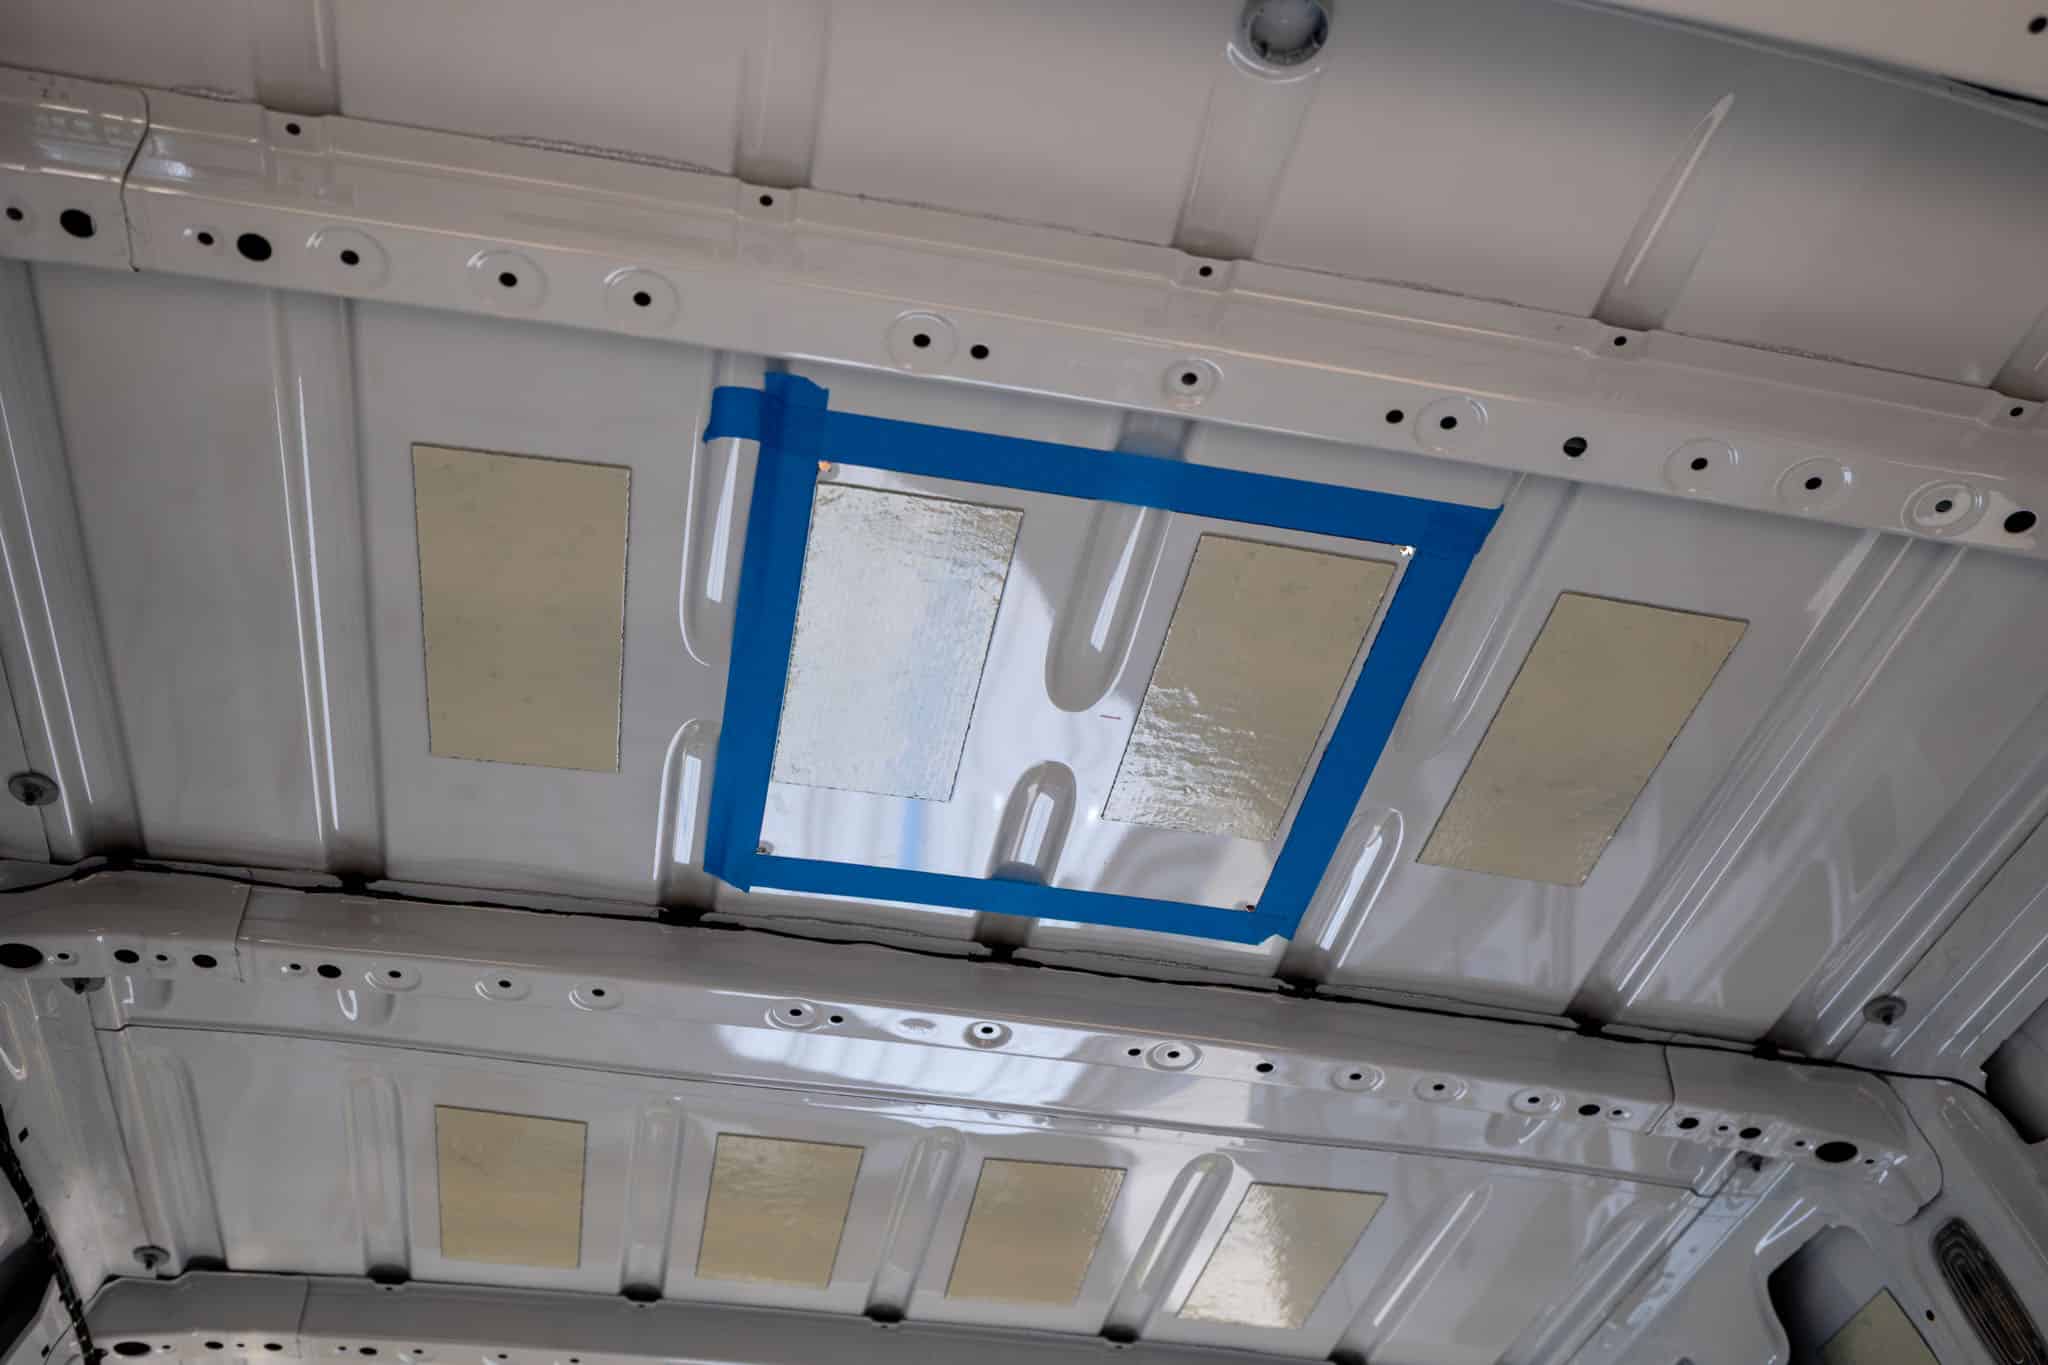
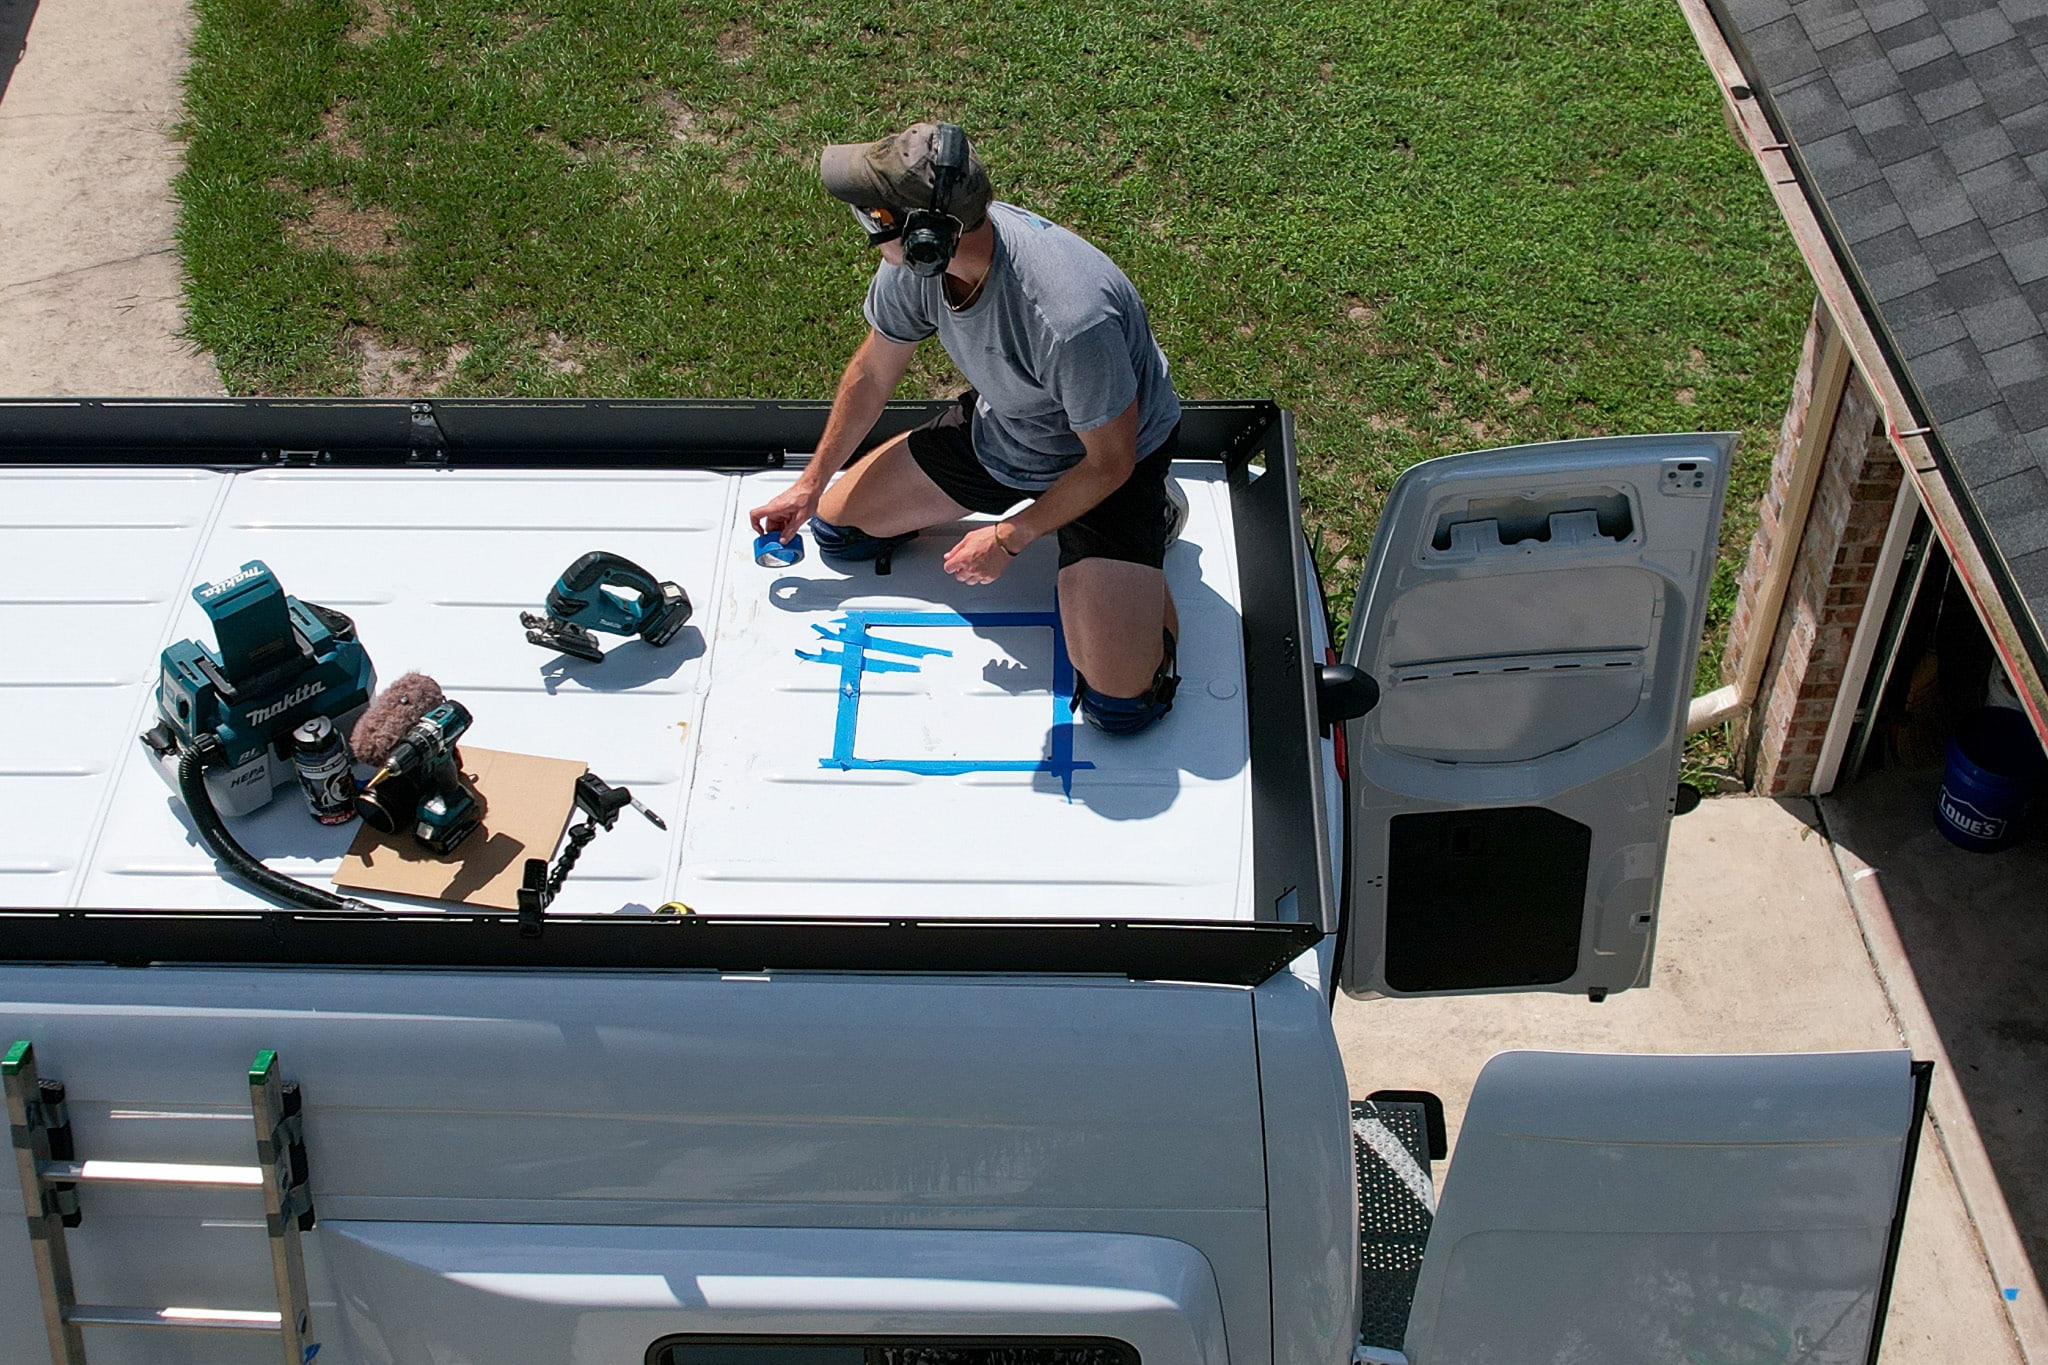
- Tape around your 14×14 opening on your roof. This helps ensure you have a clean cut line as well as adds protection from any unintended scratches.
- Affix a cardboard box, or garbage bag to your ceiling (using ducktape for example) so your 14×14 opening is fully contained. Any and all metal shavings should fall in, making clean up simple.
Cut the Opening
We started our cuts from the inside of the van. Once we determined the 14×14 location, we drilled 4 pilot holes – one in each corner. This was both an entry point for our jigsaw as well as ensured we got our corners correctly.

Then use your jigsaw with a metal blade to trace out your opening, effectively connecting the dots. Once you have 3 sides cut, tape the opening back to the van. This will keep the metal opening a bit more stable as you cut, otherwise it will wobble like crazy and affect your line.
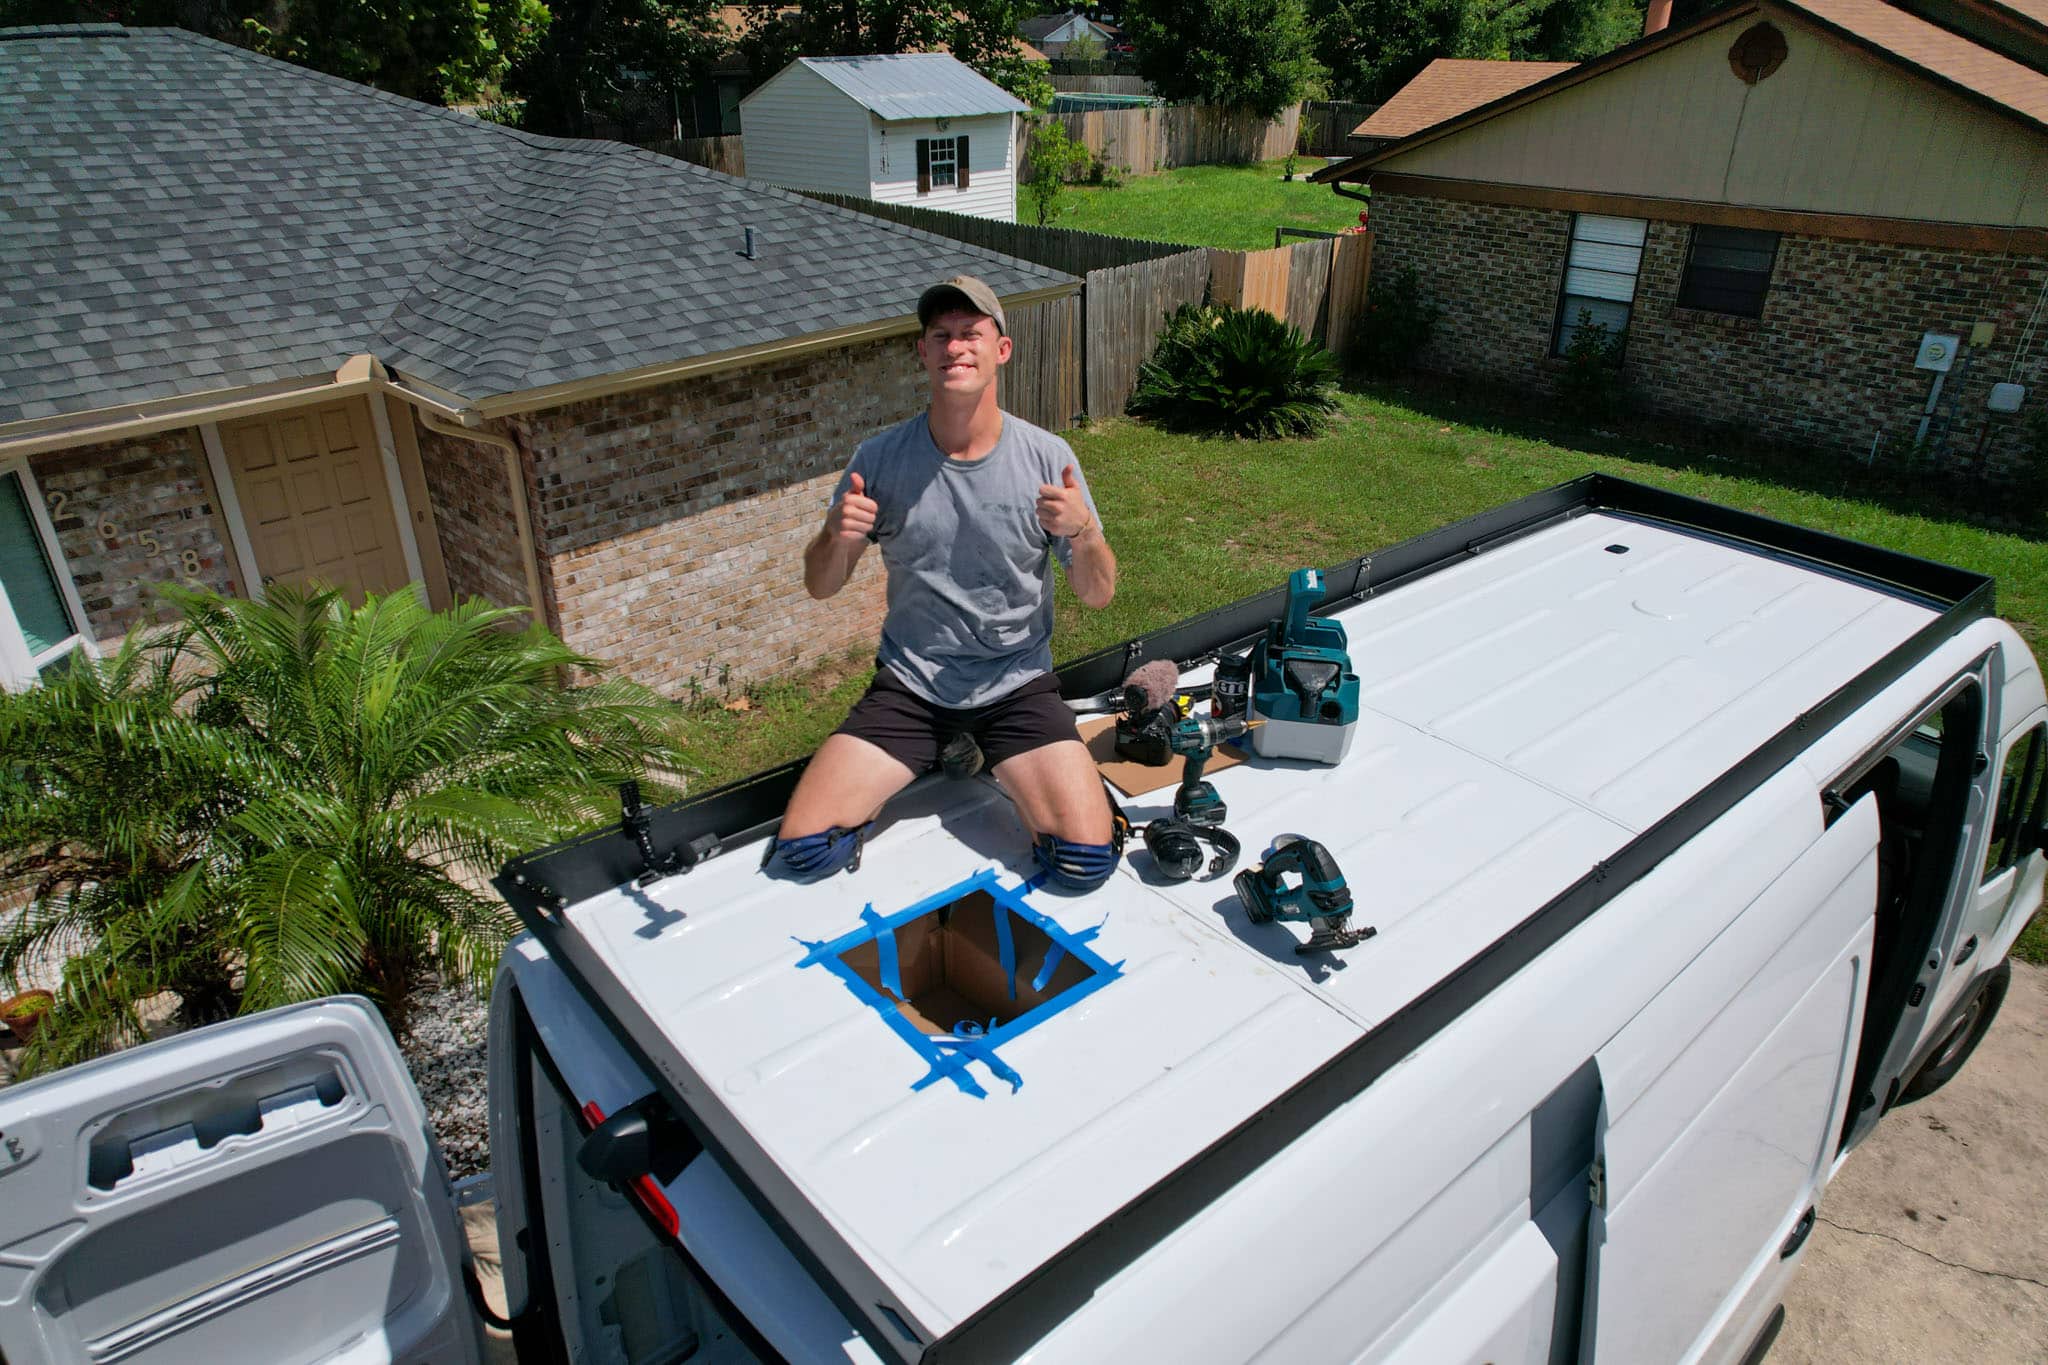
After you finish the cut, remove the piece of metal and prepare the cut line. You’ll need to deburr the edges to remove any metal shavings and soften the edge. Finally paint the edge with some anti-rust paint to finish this cut step!
Key Points
- If you’re doing this outside (like we were) make sure you’re practicing sun-safety with a sun shirt and sunscreen!
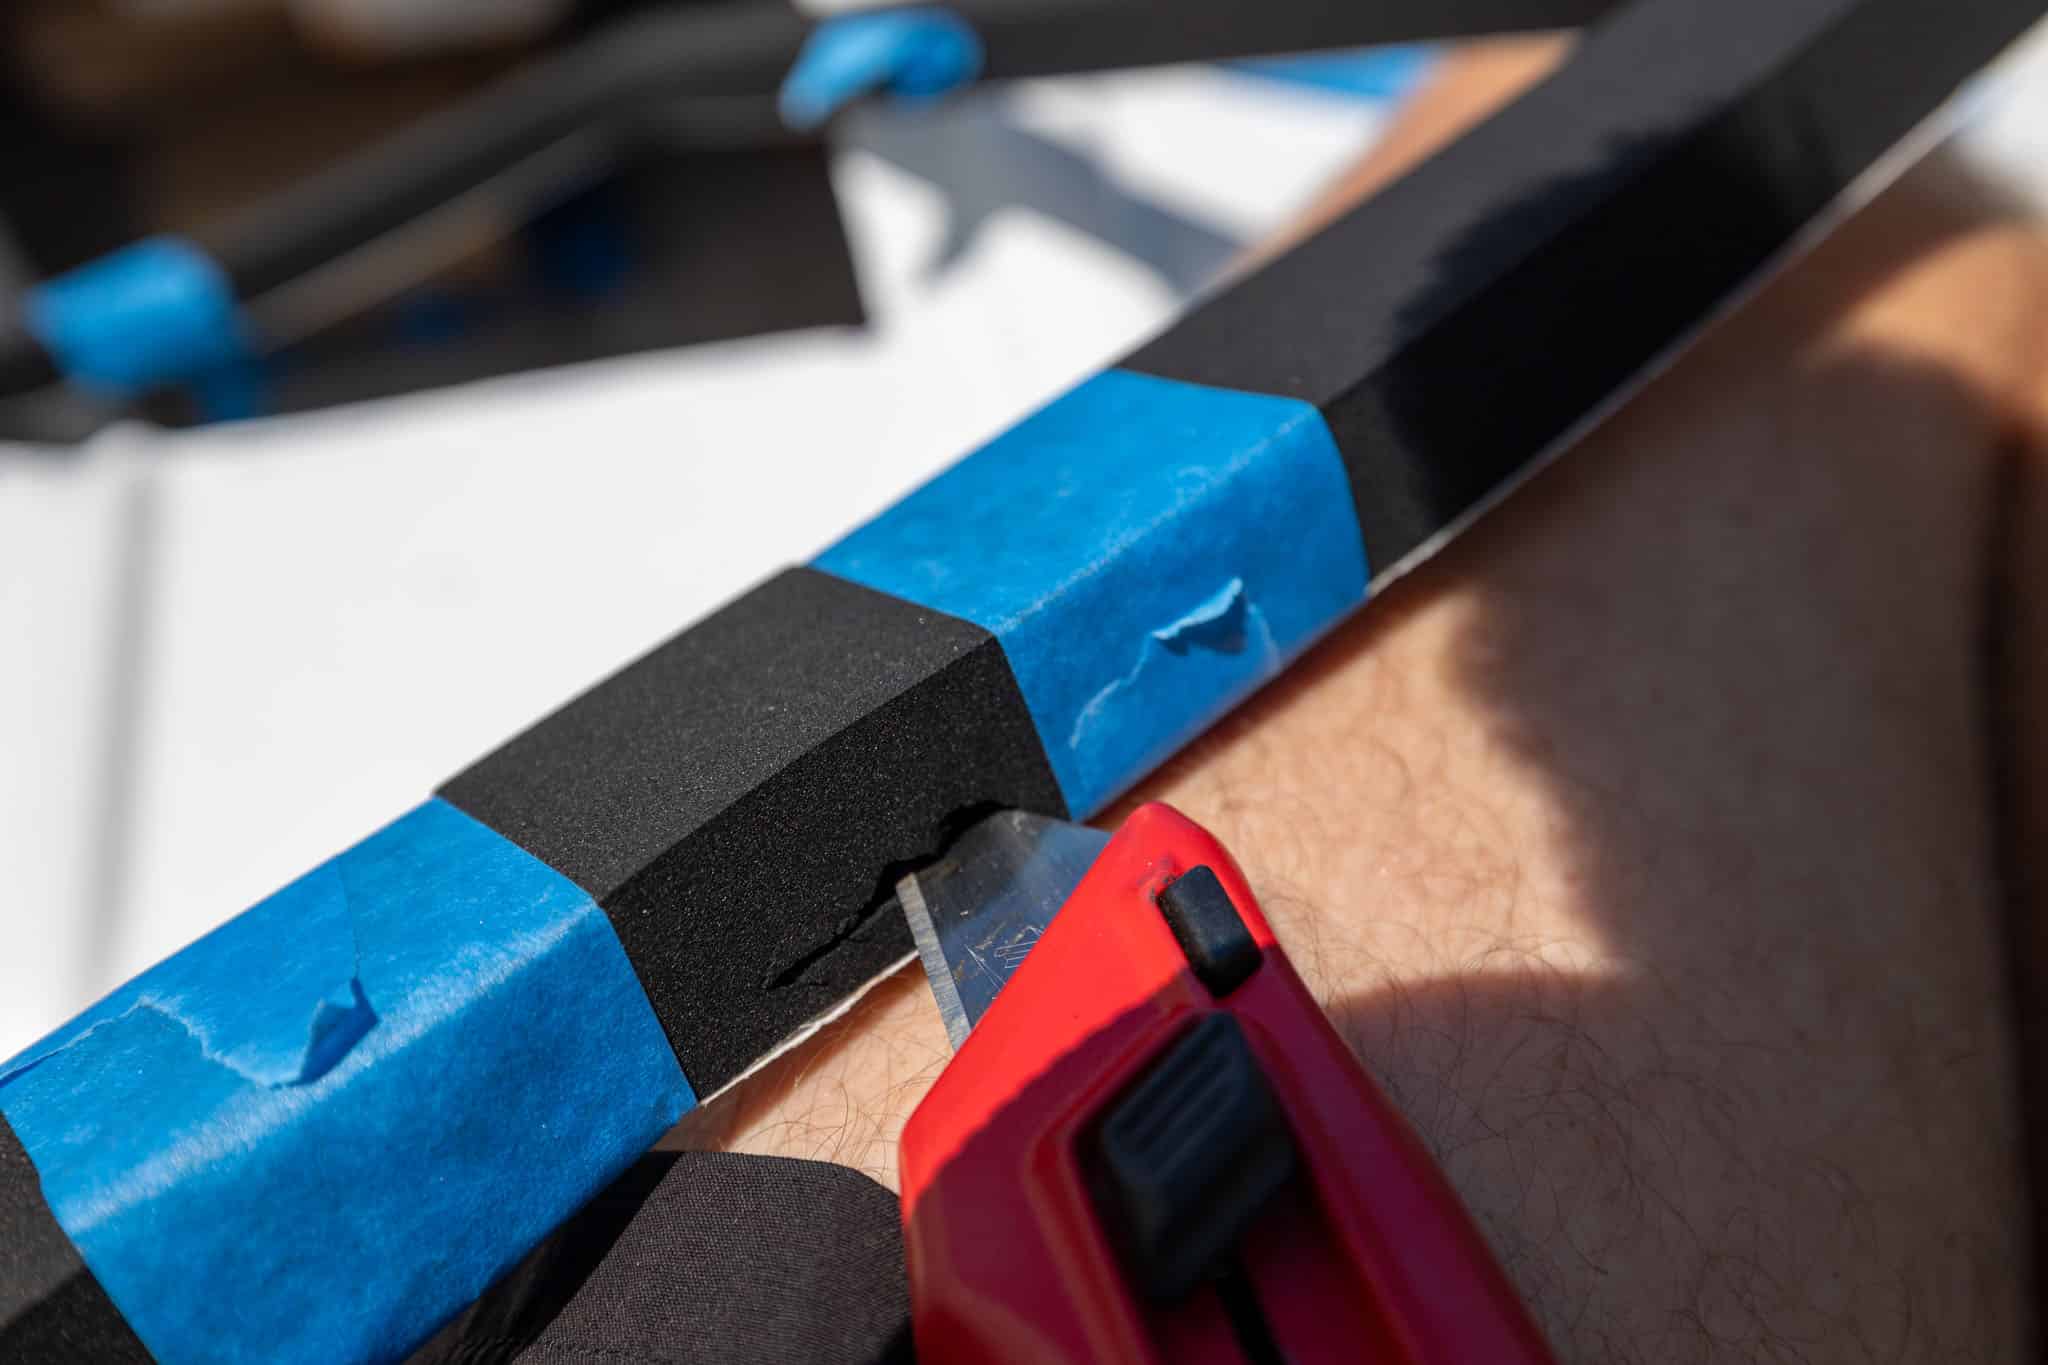
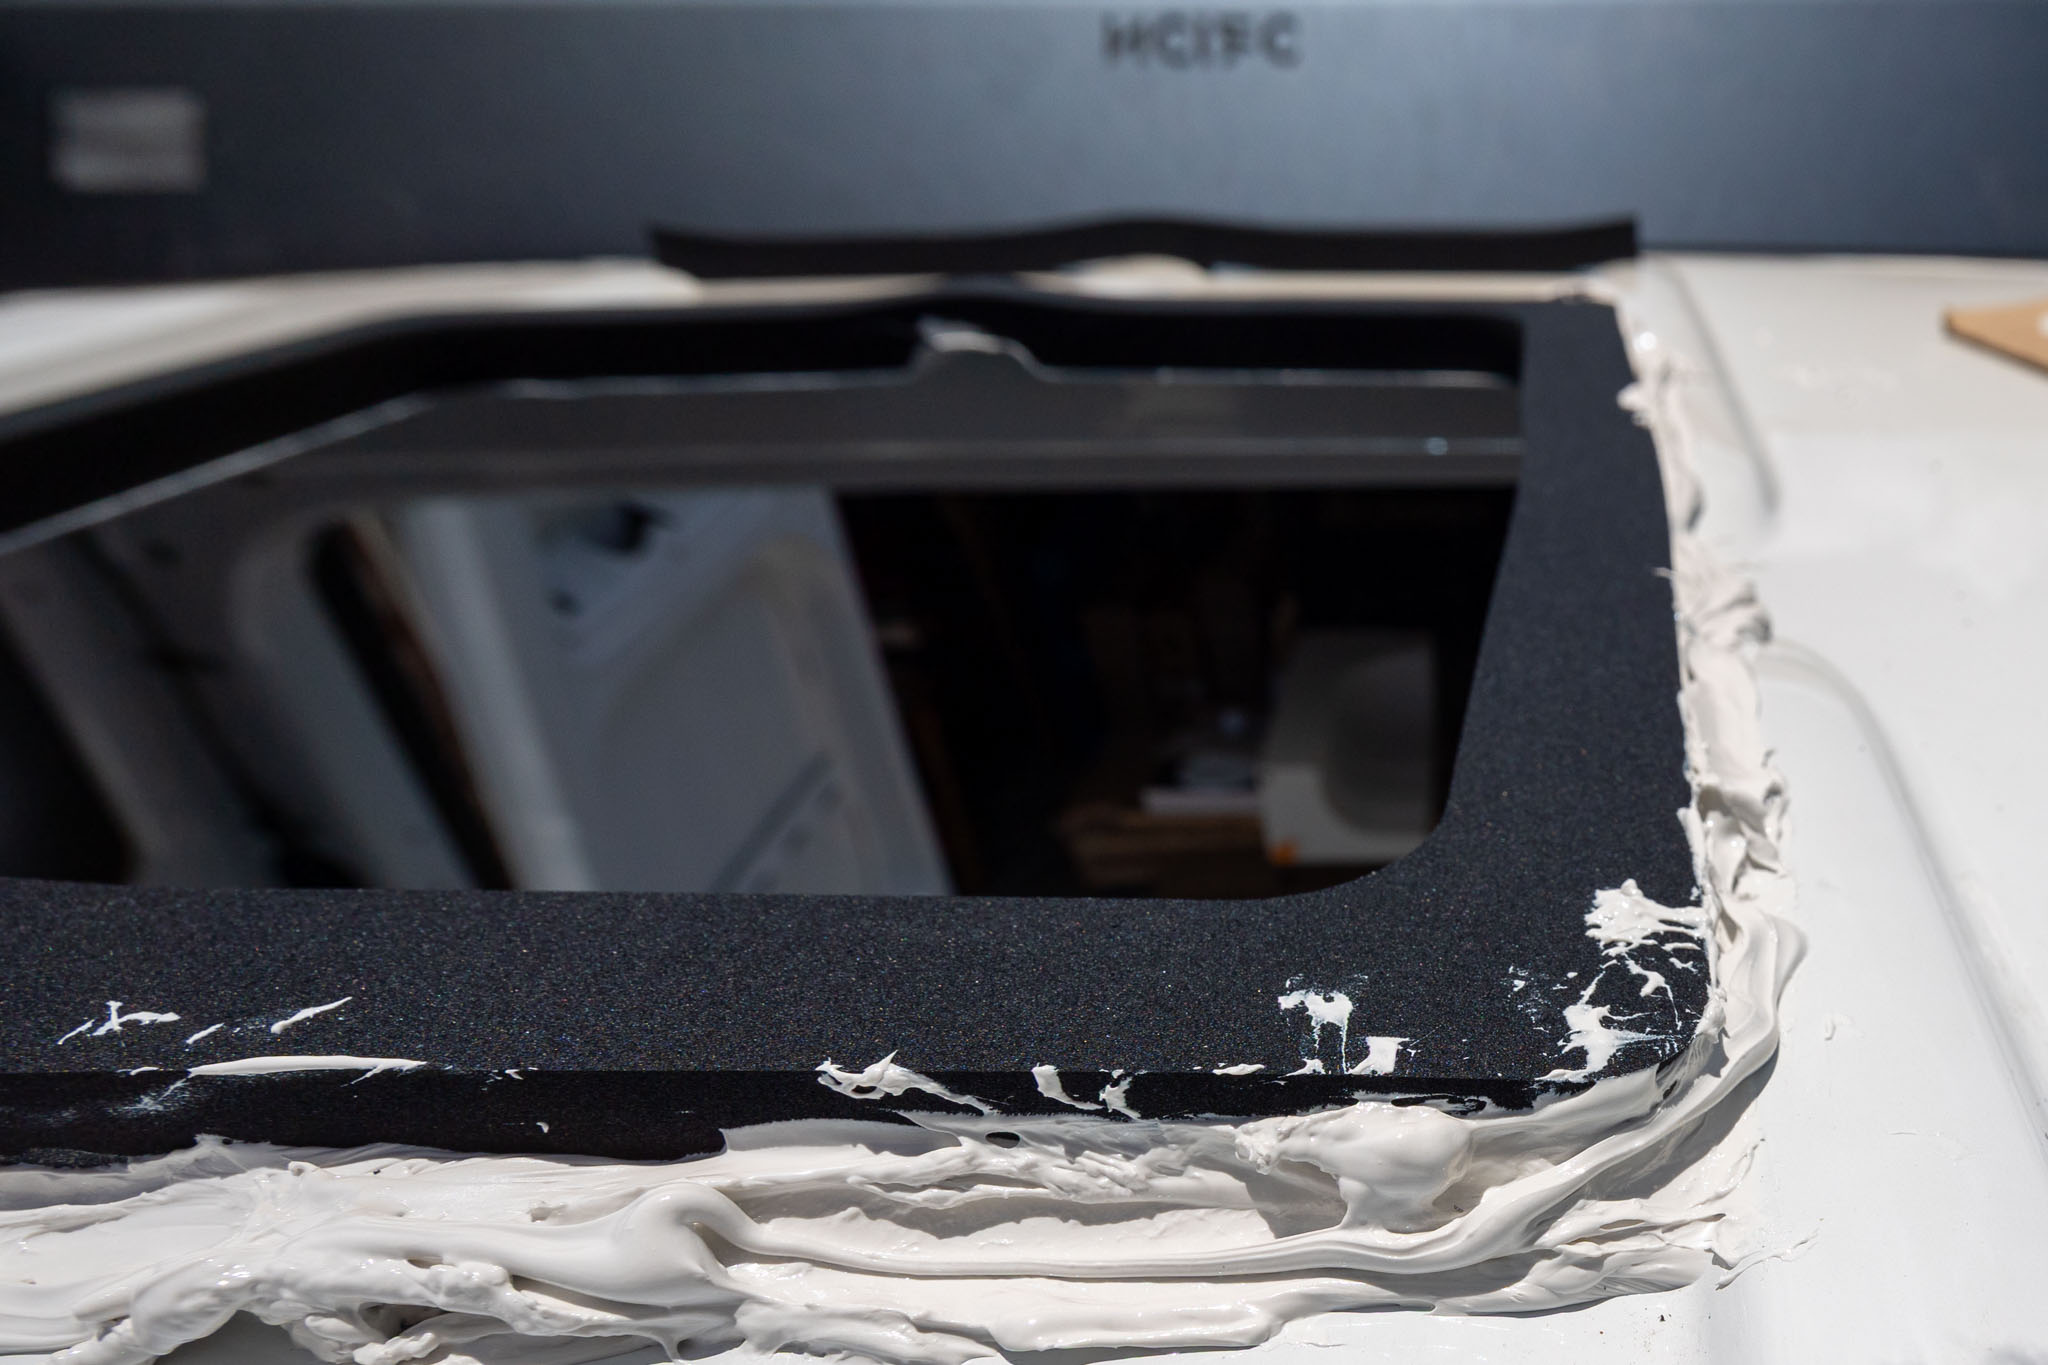
Lay Gasket for the AC
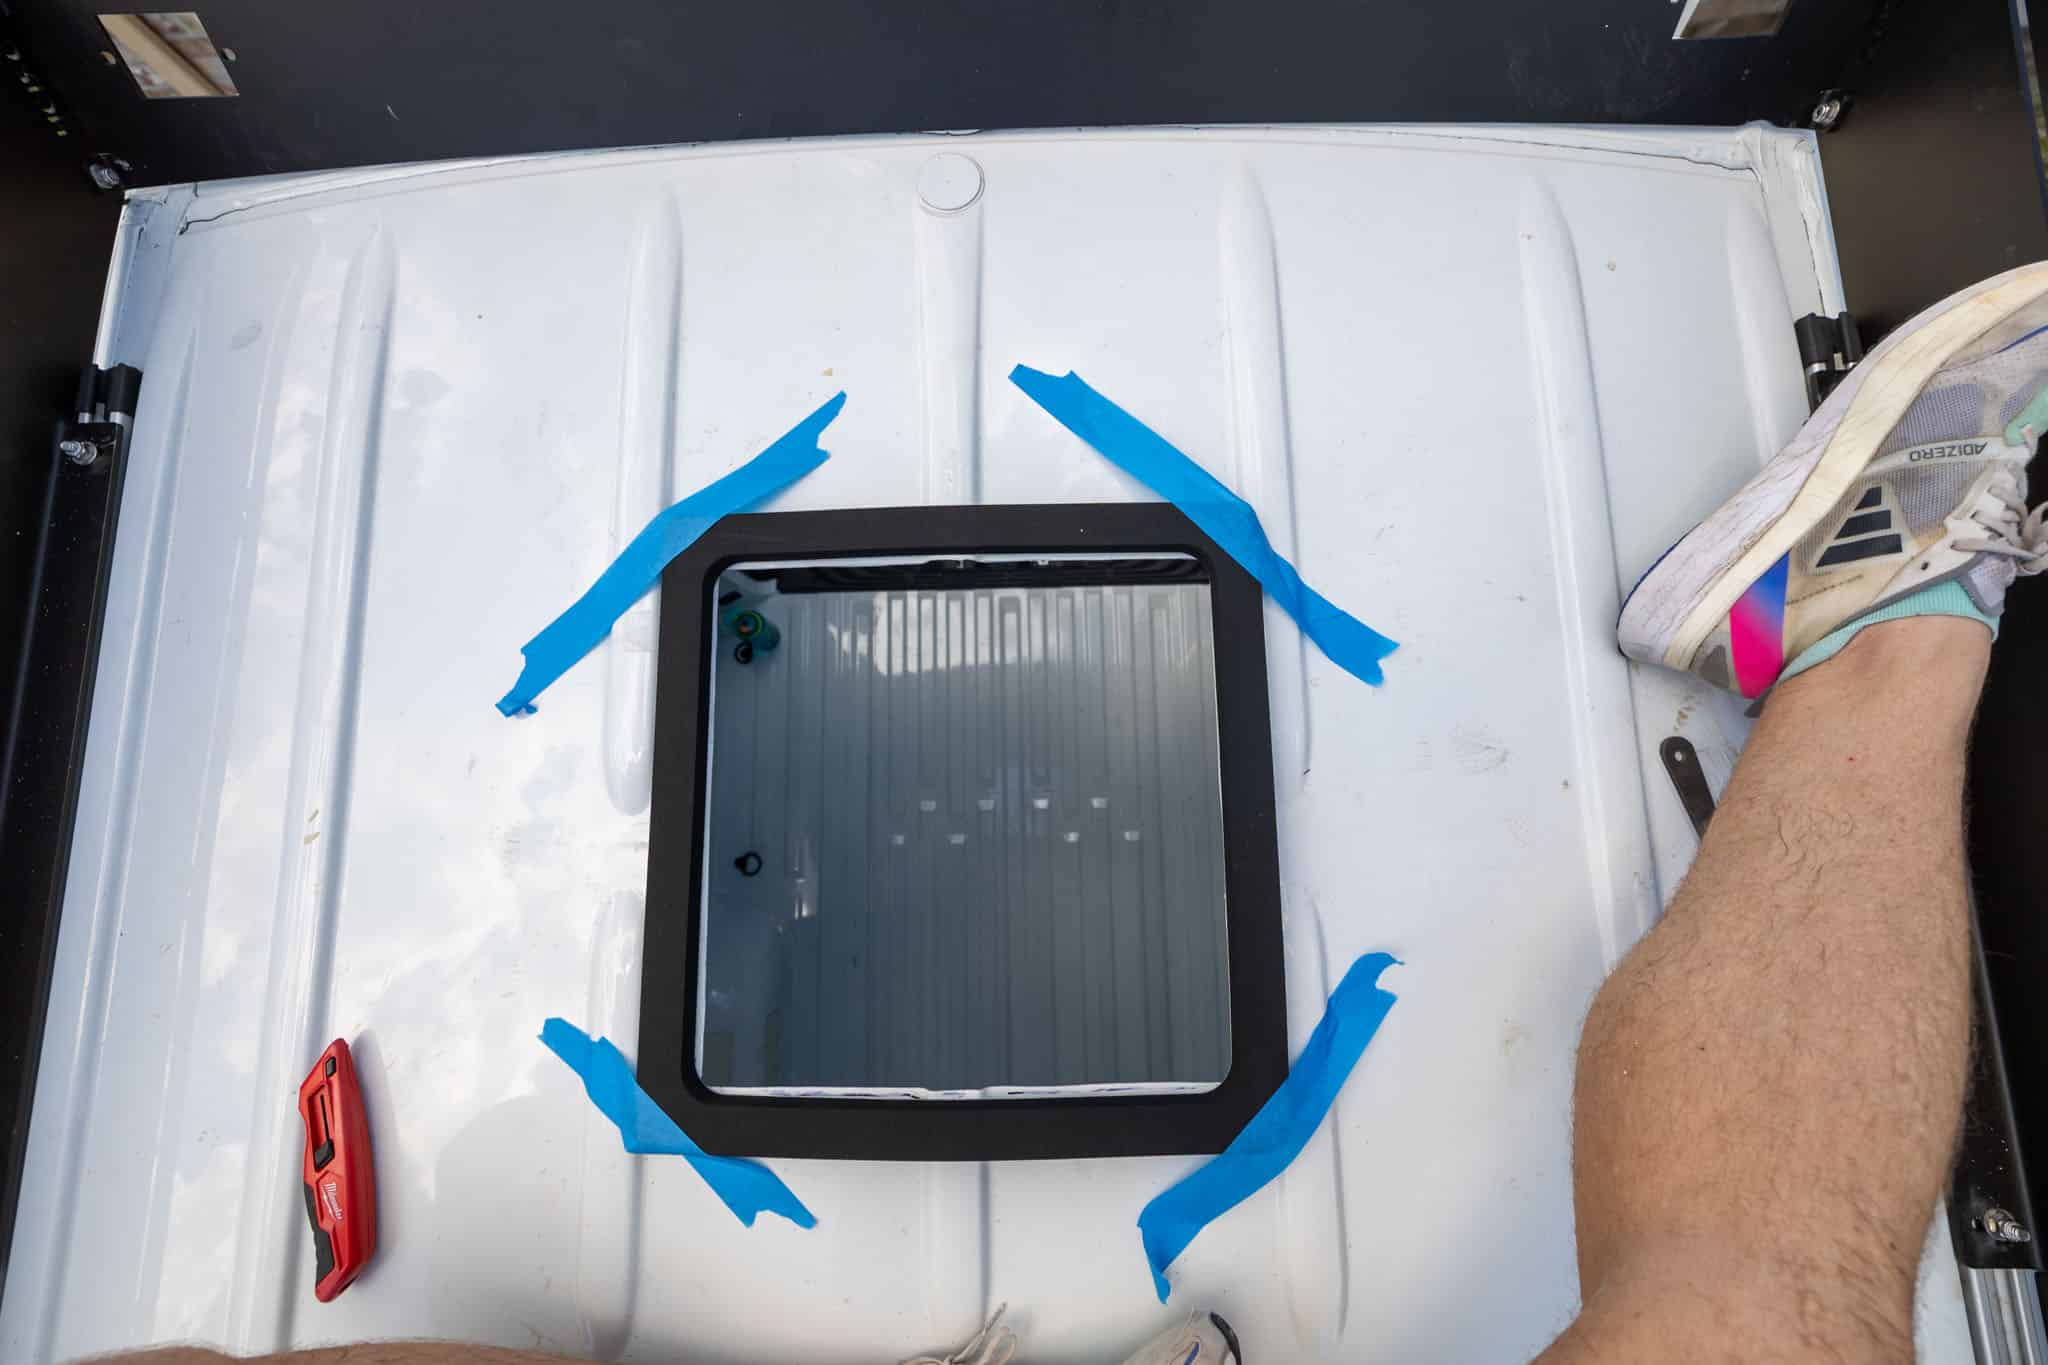
Now this step, was probably the most time consuming for us. You need to take the gasket, which is what is used to mainly seal the opening and trim it to any ridges on your roof so it lays evenly. I spent probably 30 minutes to an hour in the sun on our roof trimming a little bit with an exact knife and then test fitting it. I found that the blade didn’t do a great job of cutting the gasket, but eventually it did the job – just took a little patience!
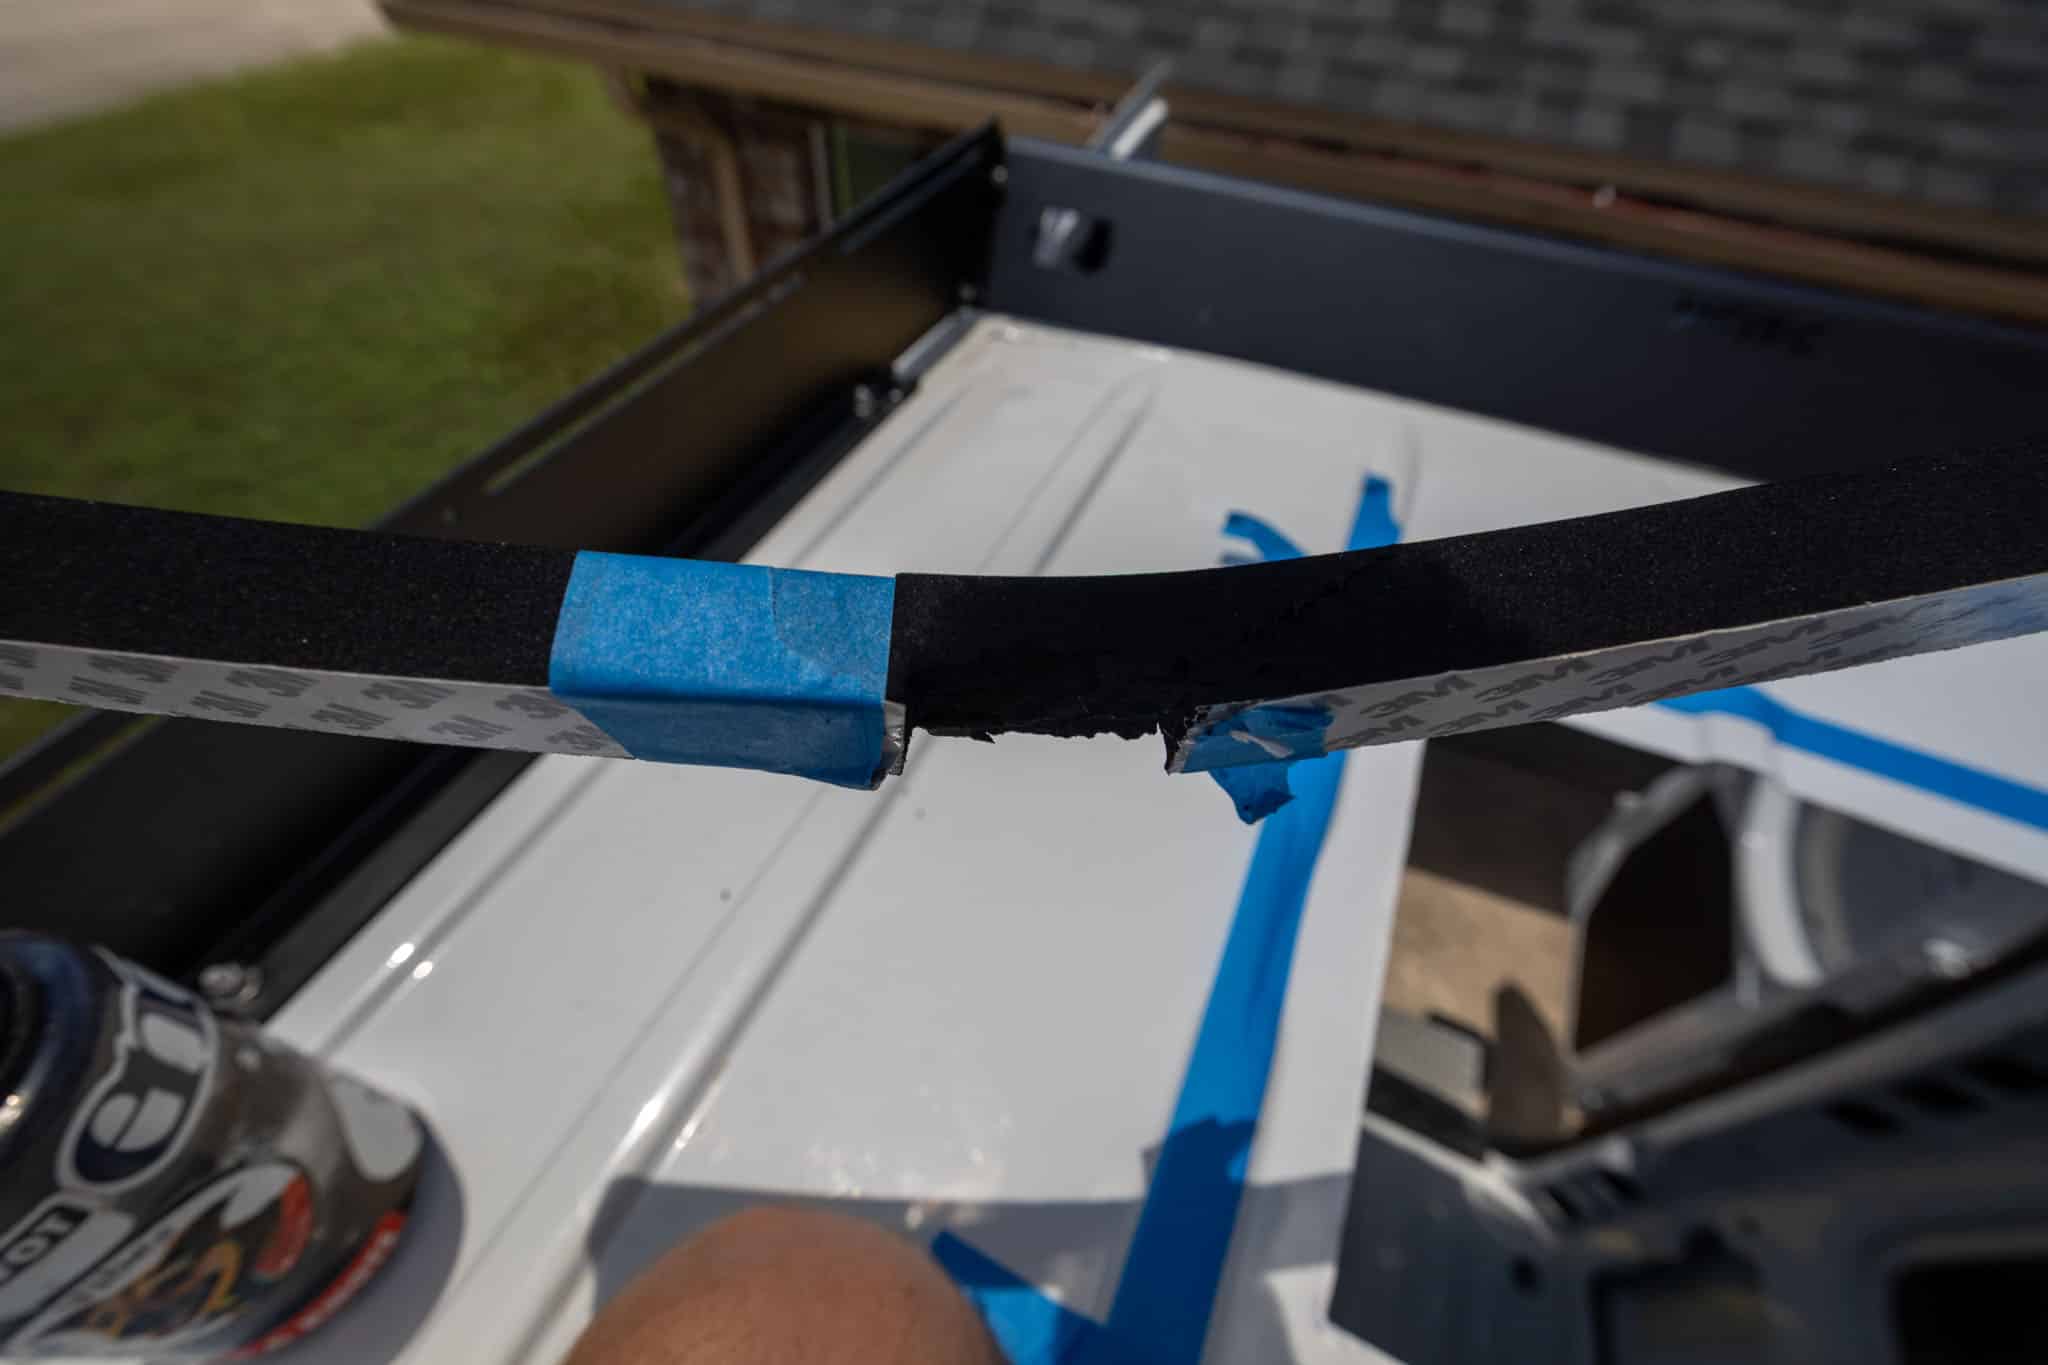
After your gasket is trimmed appropriately you can peel off the tape and affix it to your roof, just make sure your surface is clean! Next you’ll take the provided sealant and route that around the gasket to fully seal and prepare the opening for your air conditioner.
Install the AC
Now for the fun part, installing the Air Conditioner in the hole in our roof! This is also the easy part, essentially you just set the AC into the hole you just cut. Finally you’ll use the bars to screw into the AC, what actually holds the AC onto your roof.
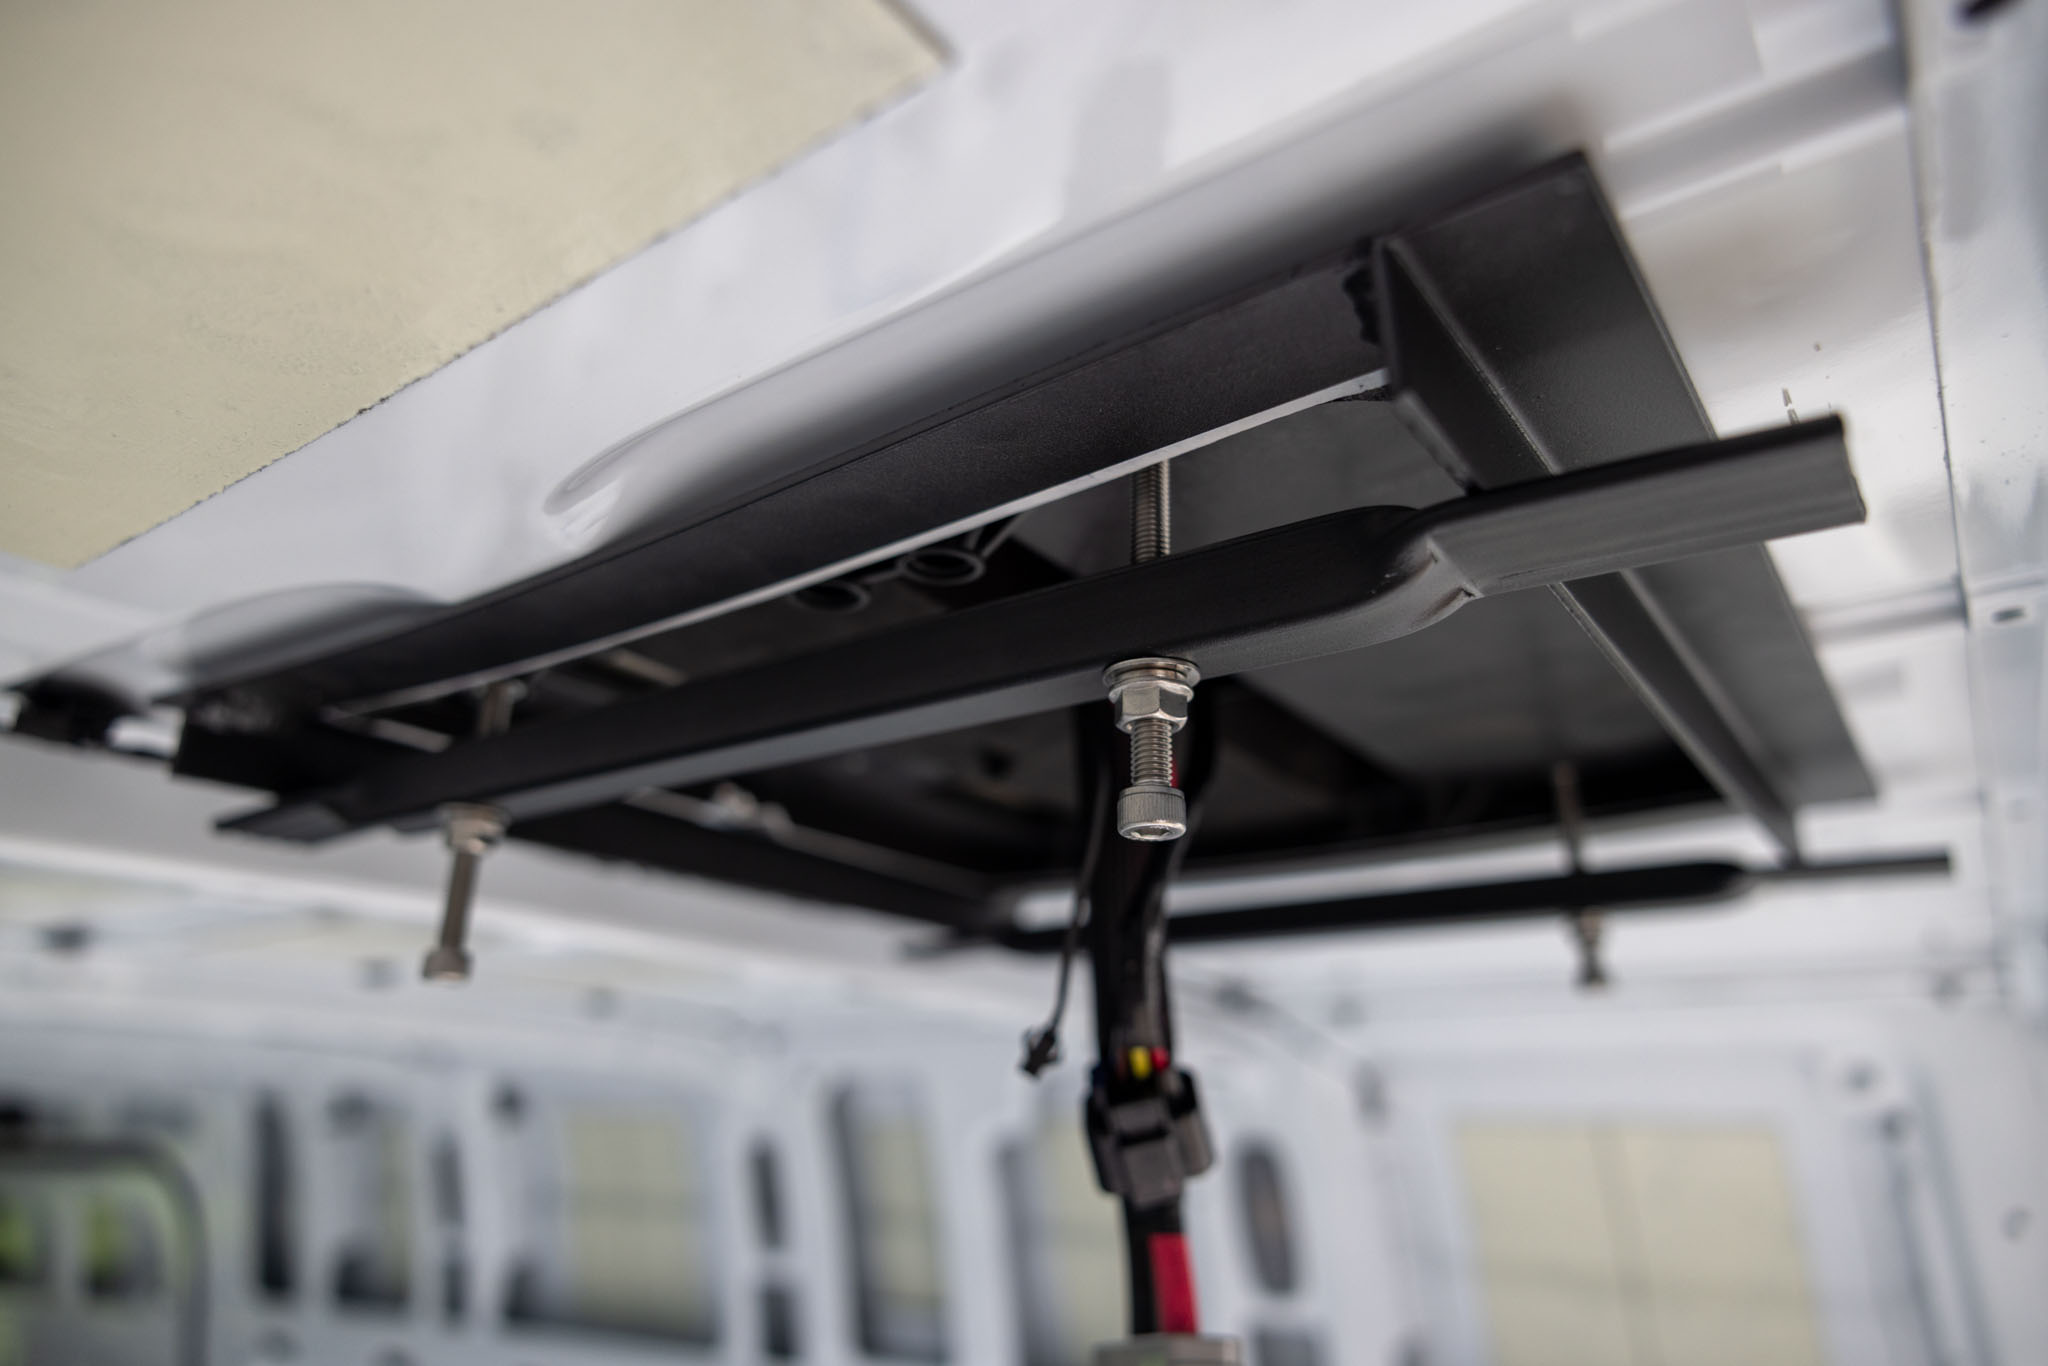
Key Points
- Getting the AC onto the roof was actually pretty difficult. Our van is lifted, and the AC, while not weighing much, is a bit unwieldy. We had three helpers to get it safely up on the roof, although it was still a bit sketchy!
- I set the AC on the top of a step ladder. My Mom helped ensure the AC didn’t fall off as I climbed the ladder (thanks Mom 😁) while Jen was on the roof, with a cloth prepared to pull the AC up as I pushed it from the ladder!
- It is very important to ensure you don’t pinch any wires on this step. It helps to have a second person near by!
- DO NOT OVER TIGHTEN the bolts! Just go finger tight here otherwise you may strip your screws and void your warranty. It is very enticing to over tighten and “secure it” but follow the manufacturers instructions to the T.
Frame the AC with Trim
The Nomadic X2 comes with a faceplate, which makes finishing and framing simple! Just cut out the air conditioning vent from your ceiling, and install the faceplate with the screws into your roof!
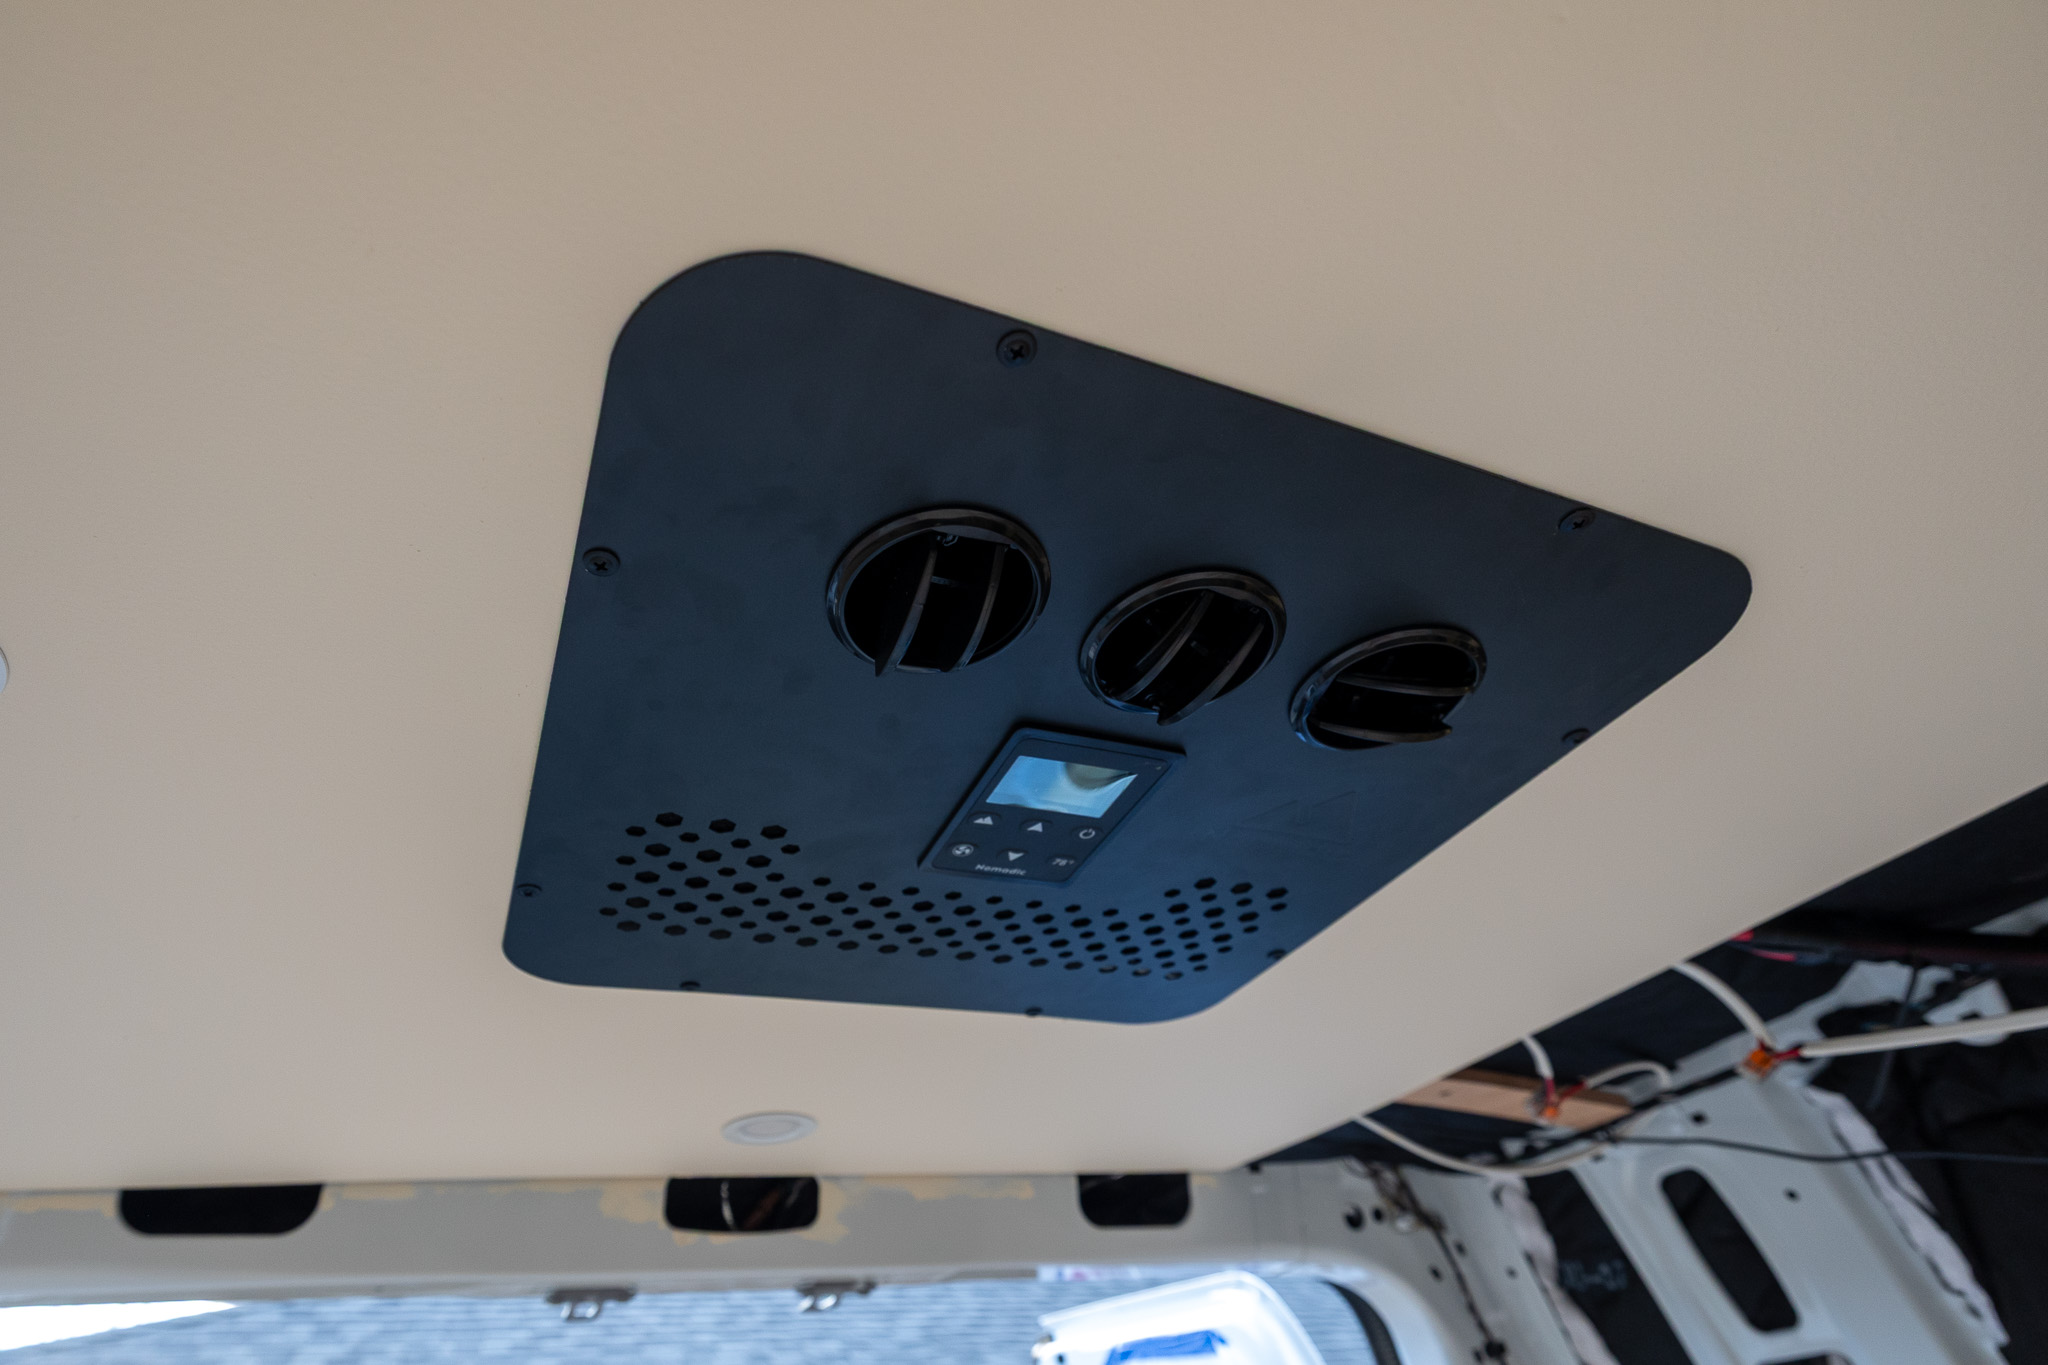
💡 There is some lee-way around your cut, which the face frame will cover; however, ensure that you don’t cut too much to where your faceplate doesn’t cover it. It’s always better to cut less!
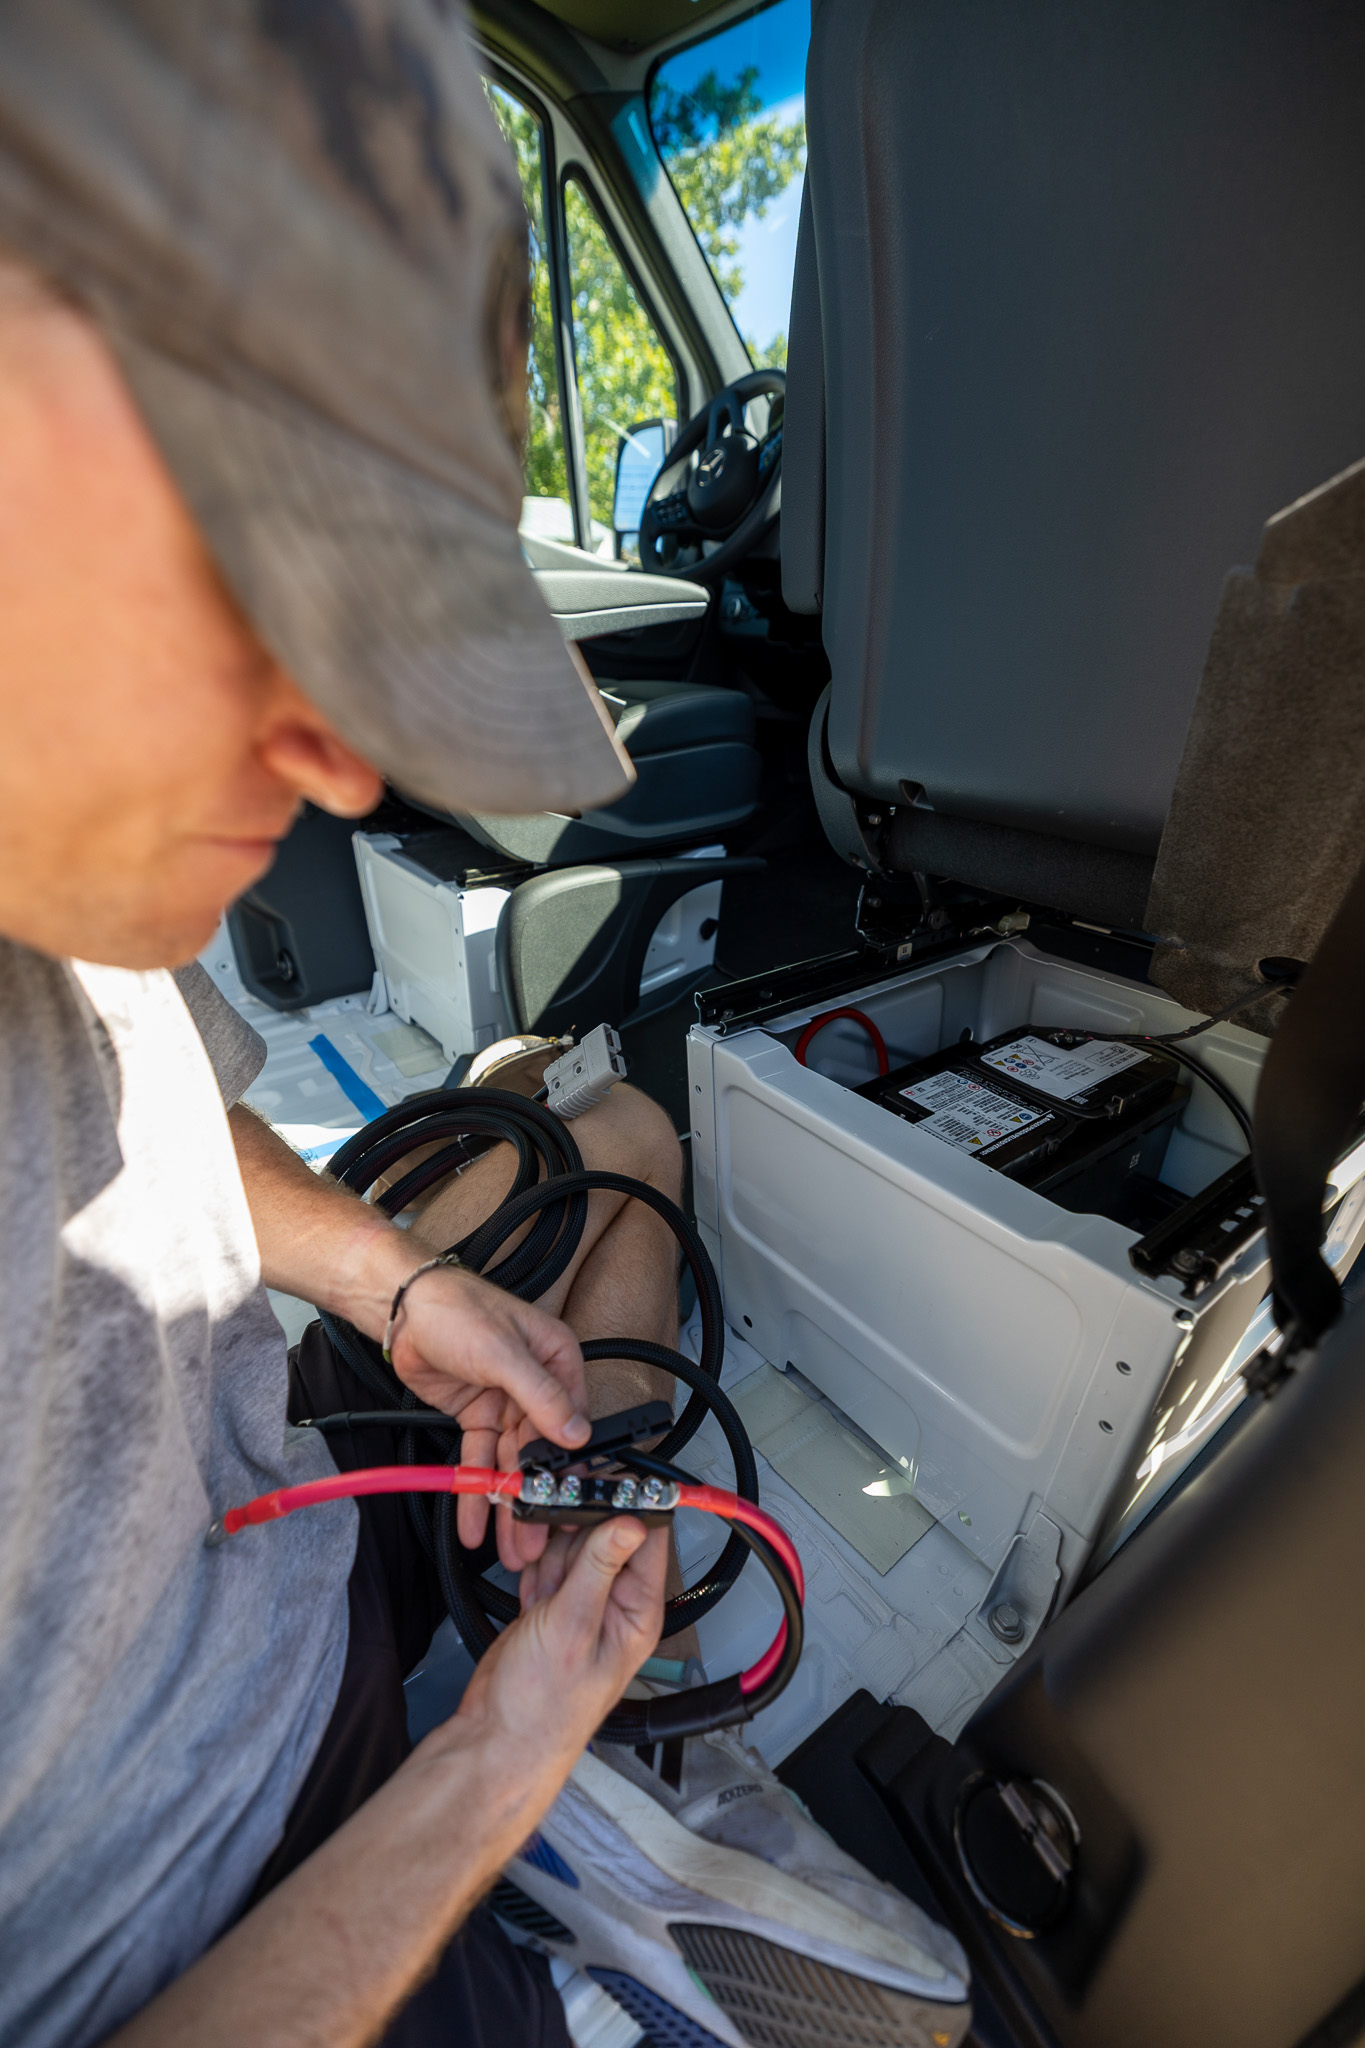
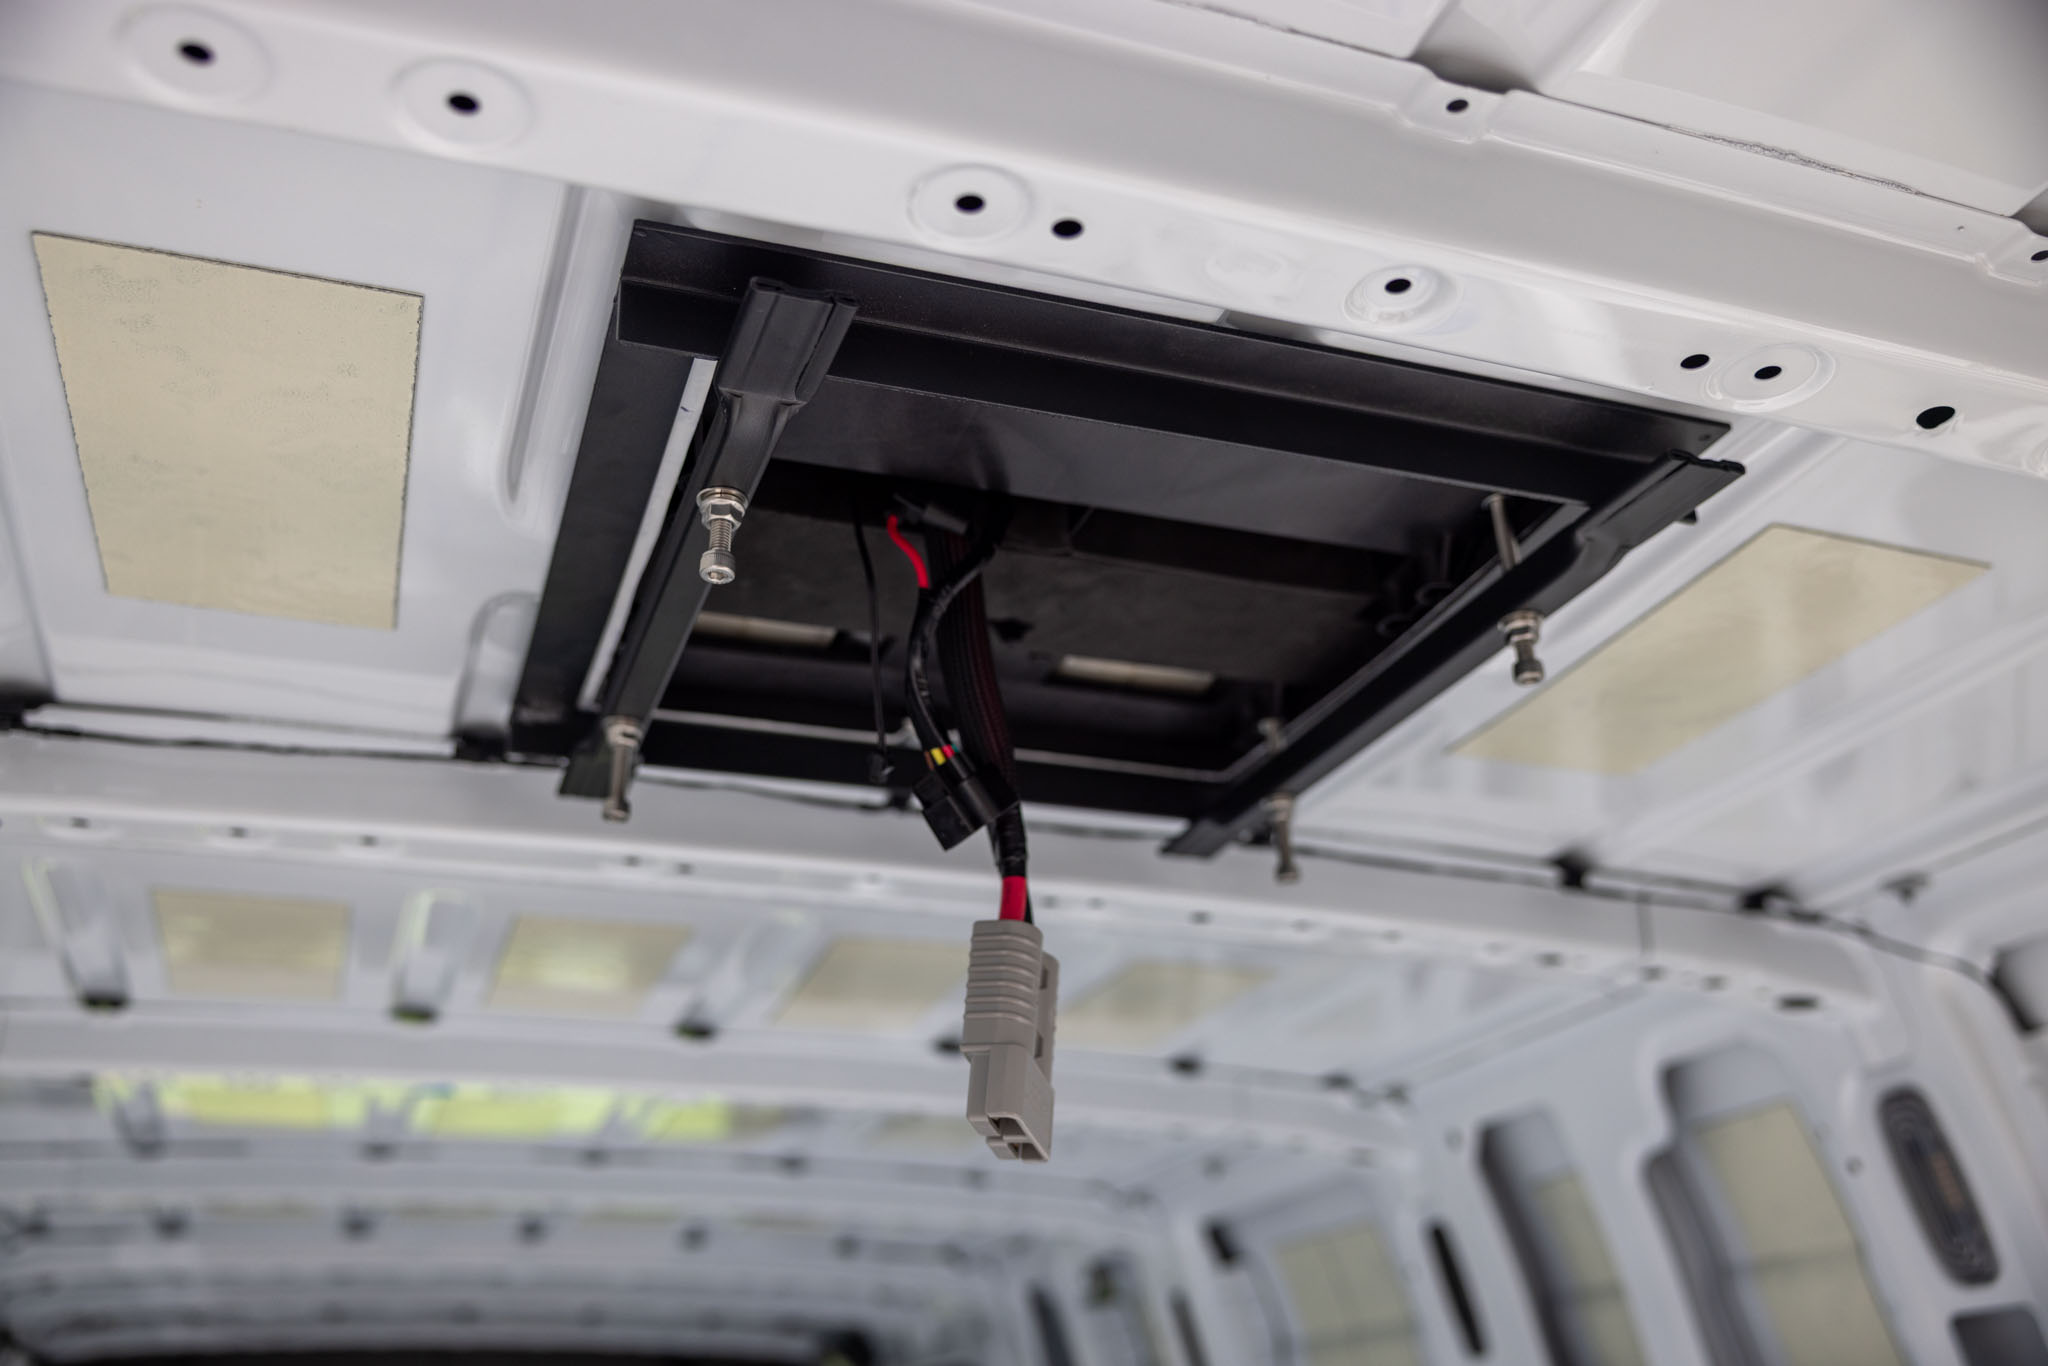
Wiring the AC
We used the included wire from Orion, which comes fused. All we needed to do was connect the positive and negative wires it to our lynx distributor and all is done! Very simple!
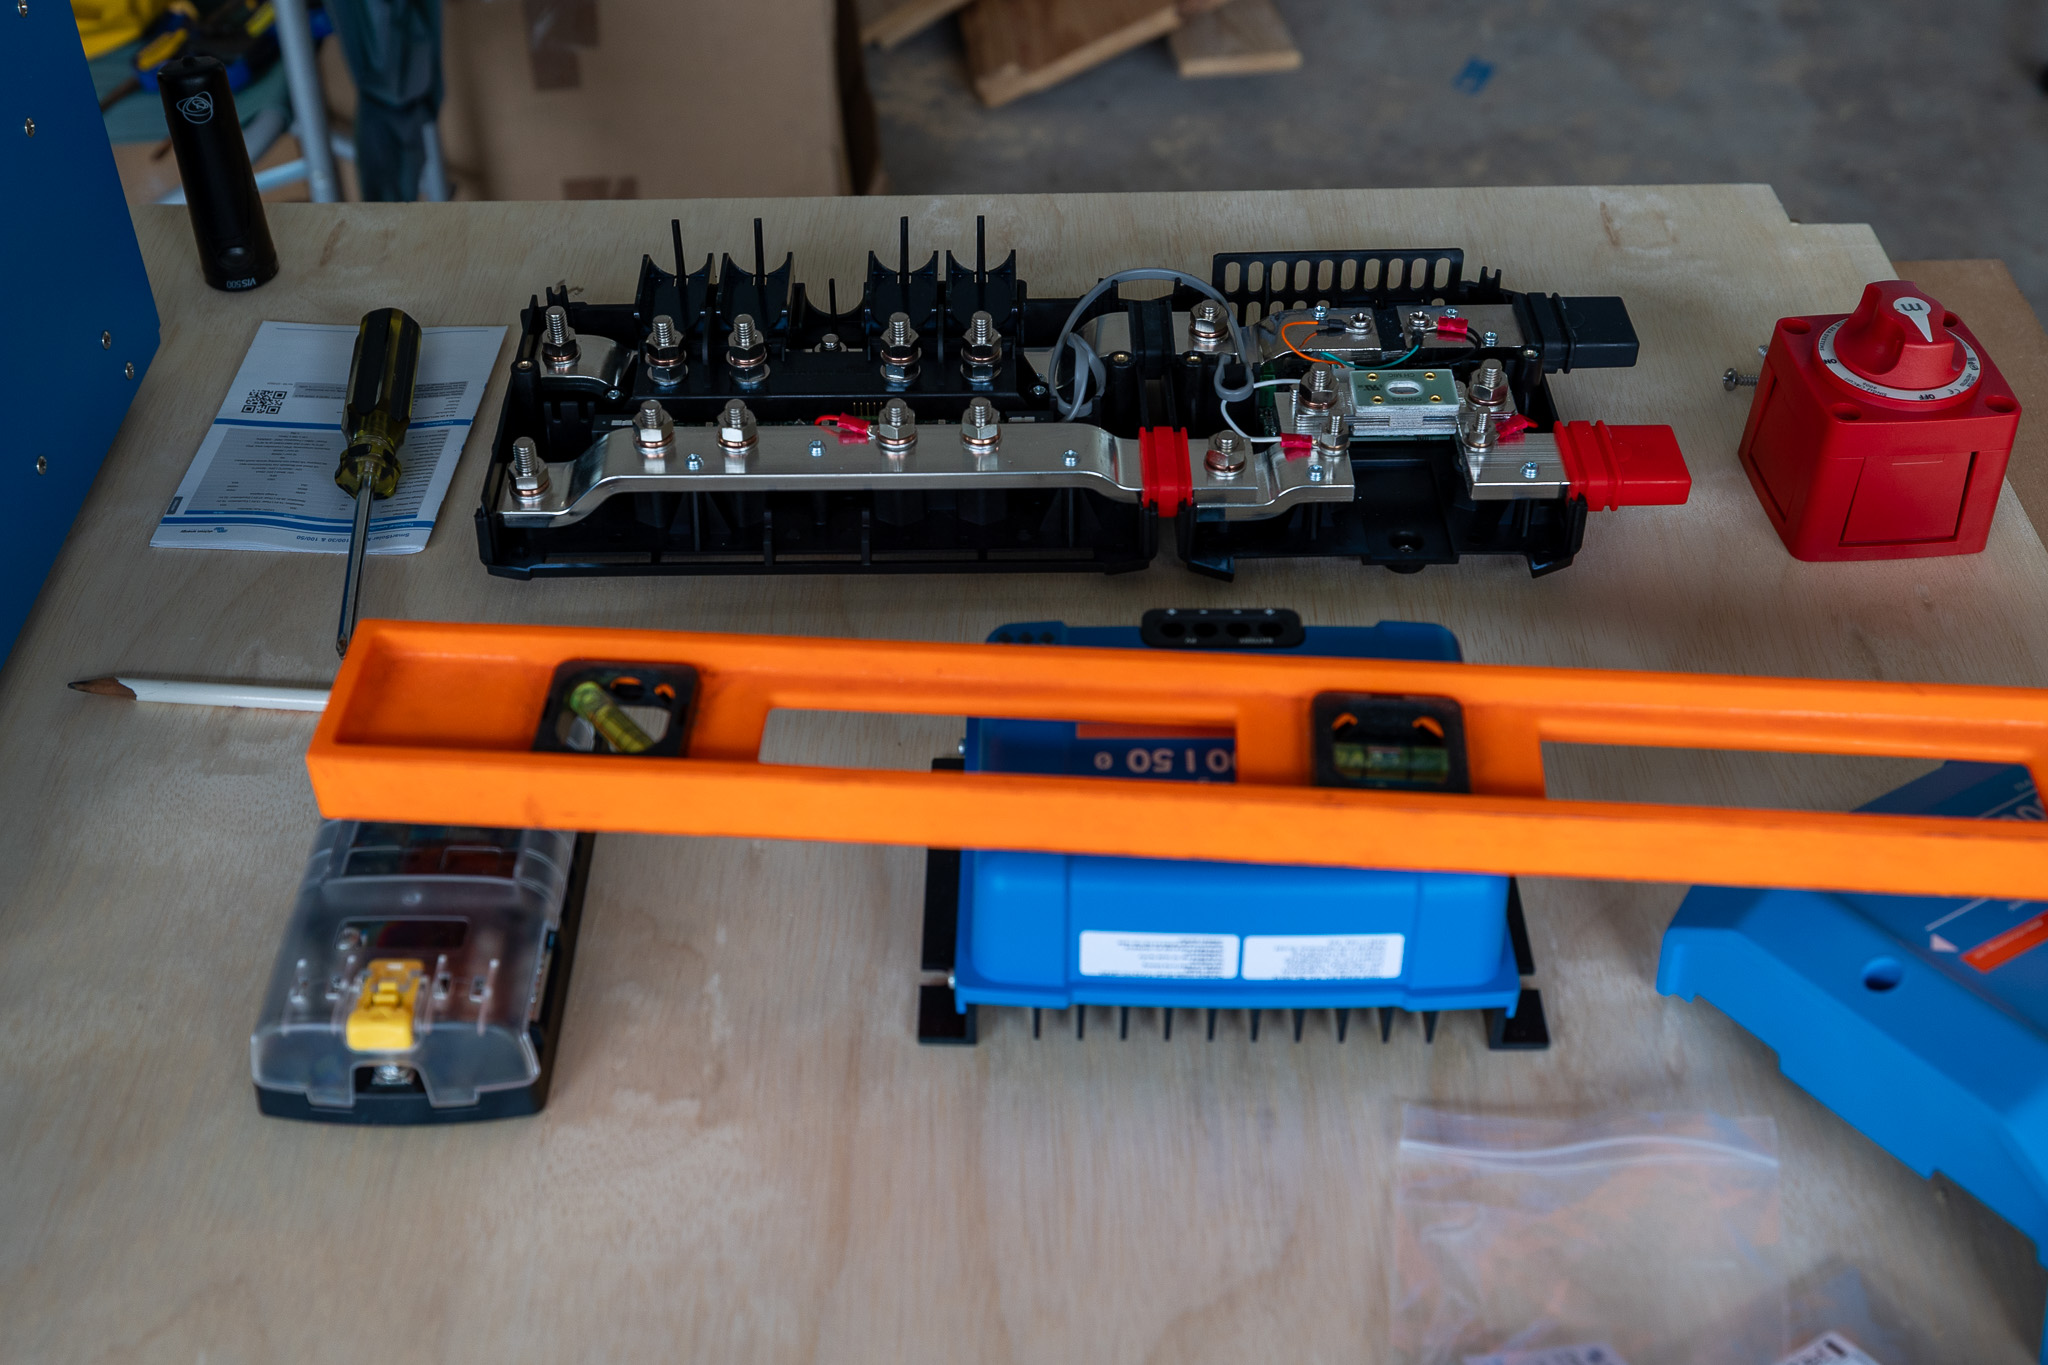
⚡️ Ensure you’re using the appropriate fuse, for us thats a 70A fuse.
Living with our Nomadic x2 12V AC, would we purchase it again?
We’ve been living in our van for three months now, and we can fully say we are very satisfied with our Nomadic X2 Air Conditioner. Here are some of the things that have worked out.
- It’s extremely low power. We’ve run it all night and only lost 5% of our batteries, which equates to roughly 35 amp hours.
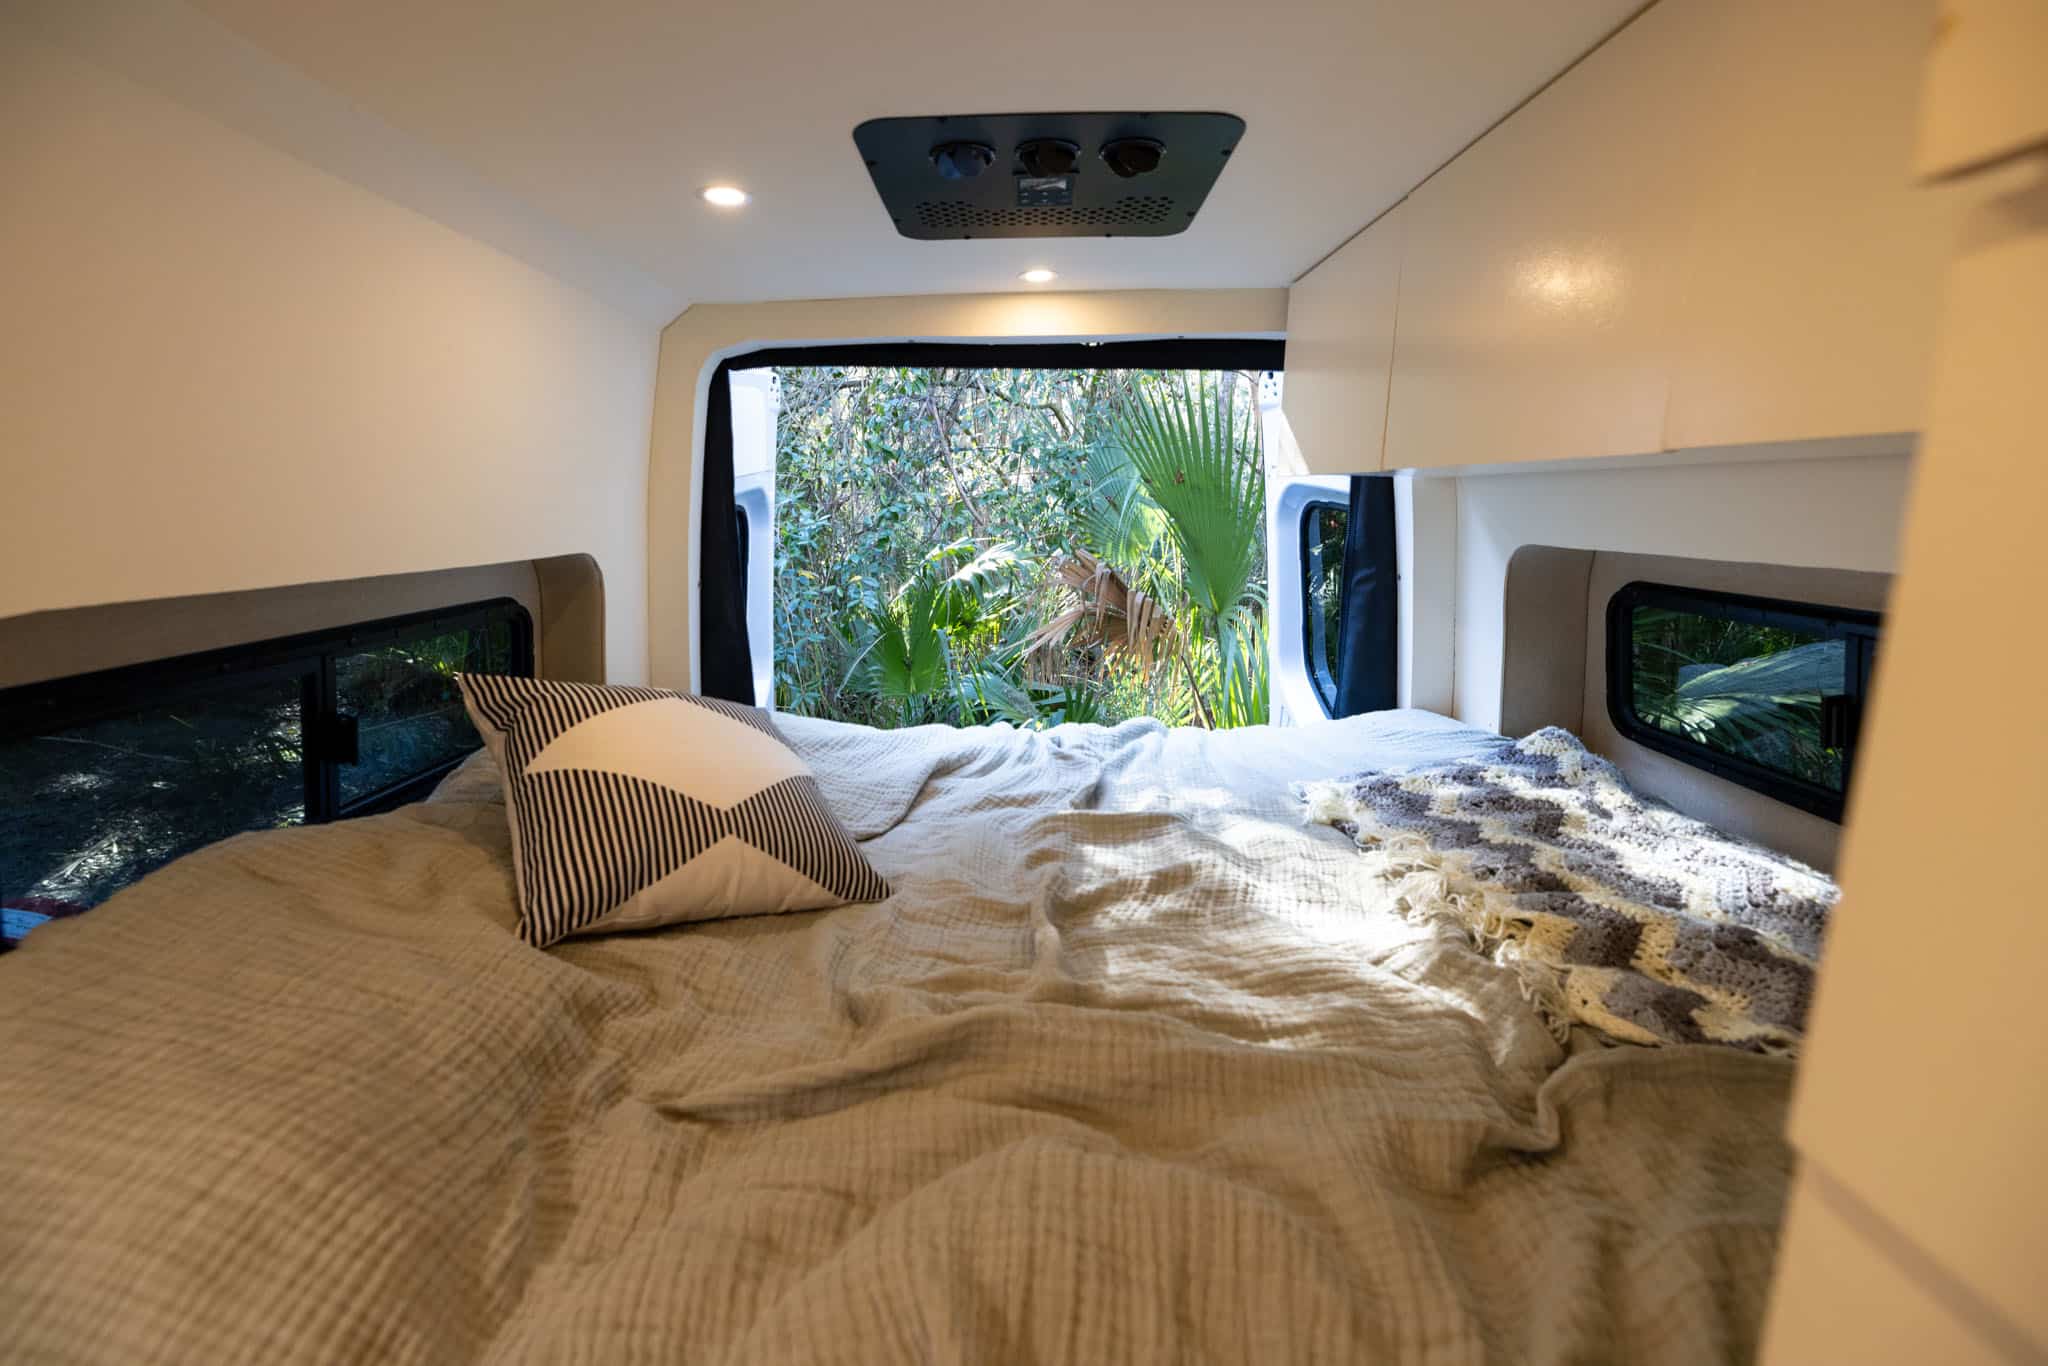
- Its location above our bed cools the bed significantly. When running it at night, the bed is very temperate because the AC is directly on top of where we sleep. If we had it upfront or mid-way through the van, the van would not nearly be as temperate! We strategically chose to locate our Nomadic X2 Air Conditioner above our bed so we would be cool at night. That being said, it doesn’t cool the entire van very well. We are still happy with it, regardless.
- It helps keep our dog, Ollie, cool. We’ve had to leave Ollie in our van quite a few times throughout the first few months on the road, and keeping the air conditioner on has been an enormous help as we know she stays comfortable.
Watch our install on YouTube
FAQ
Let us know if you have any questions in the comments below!
Ready to Install Your Van AC?
Pin this guide to installing your van’s 12V AC to make planning your van renovation a breeze!


Leave a Reply
You must be logged in to post a comment.