

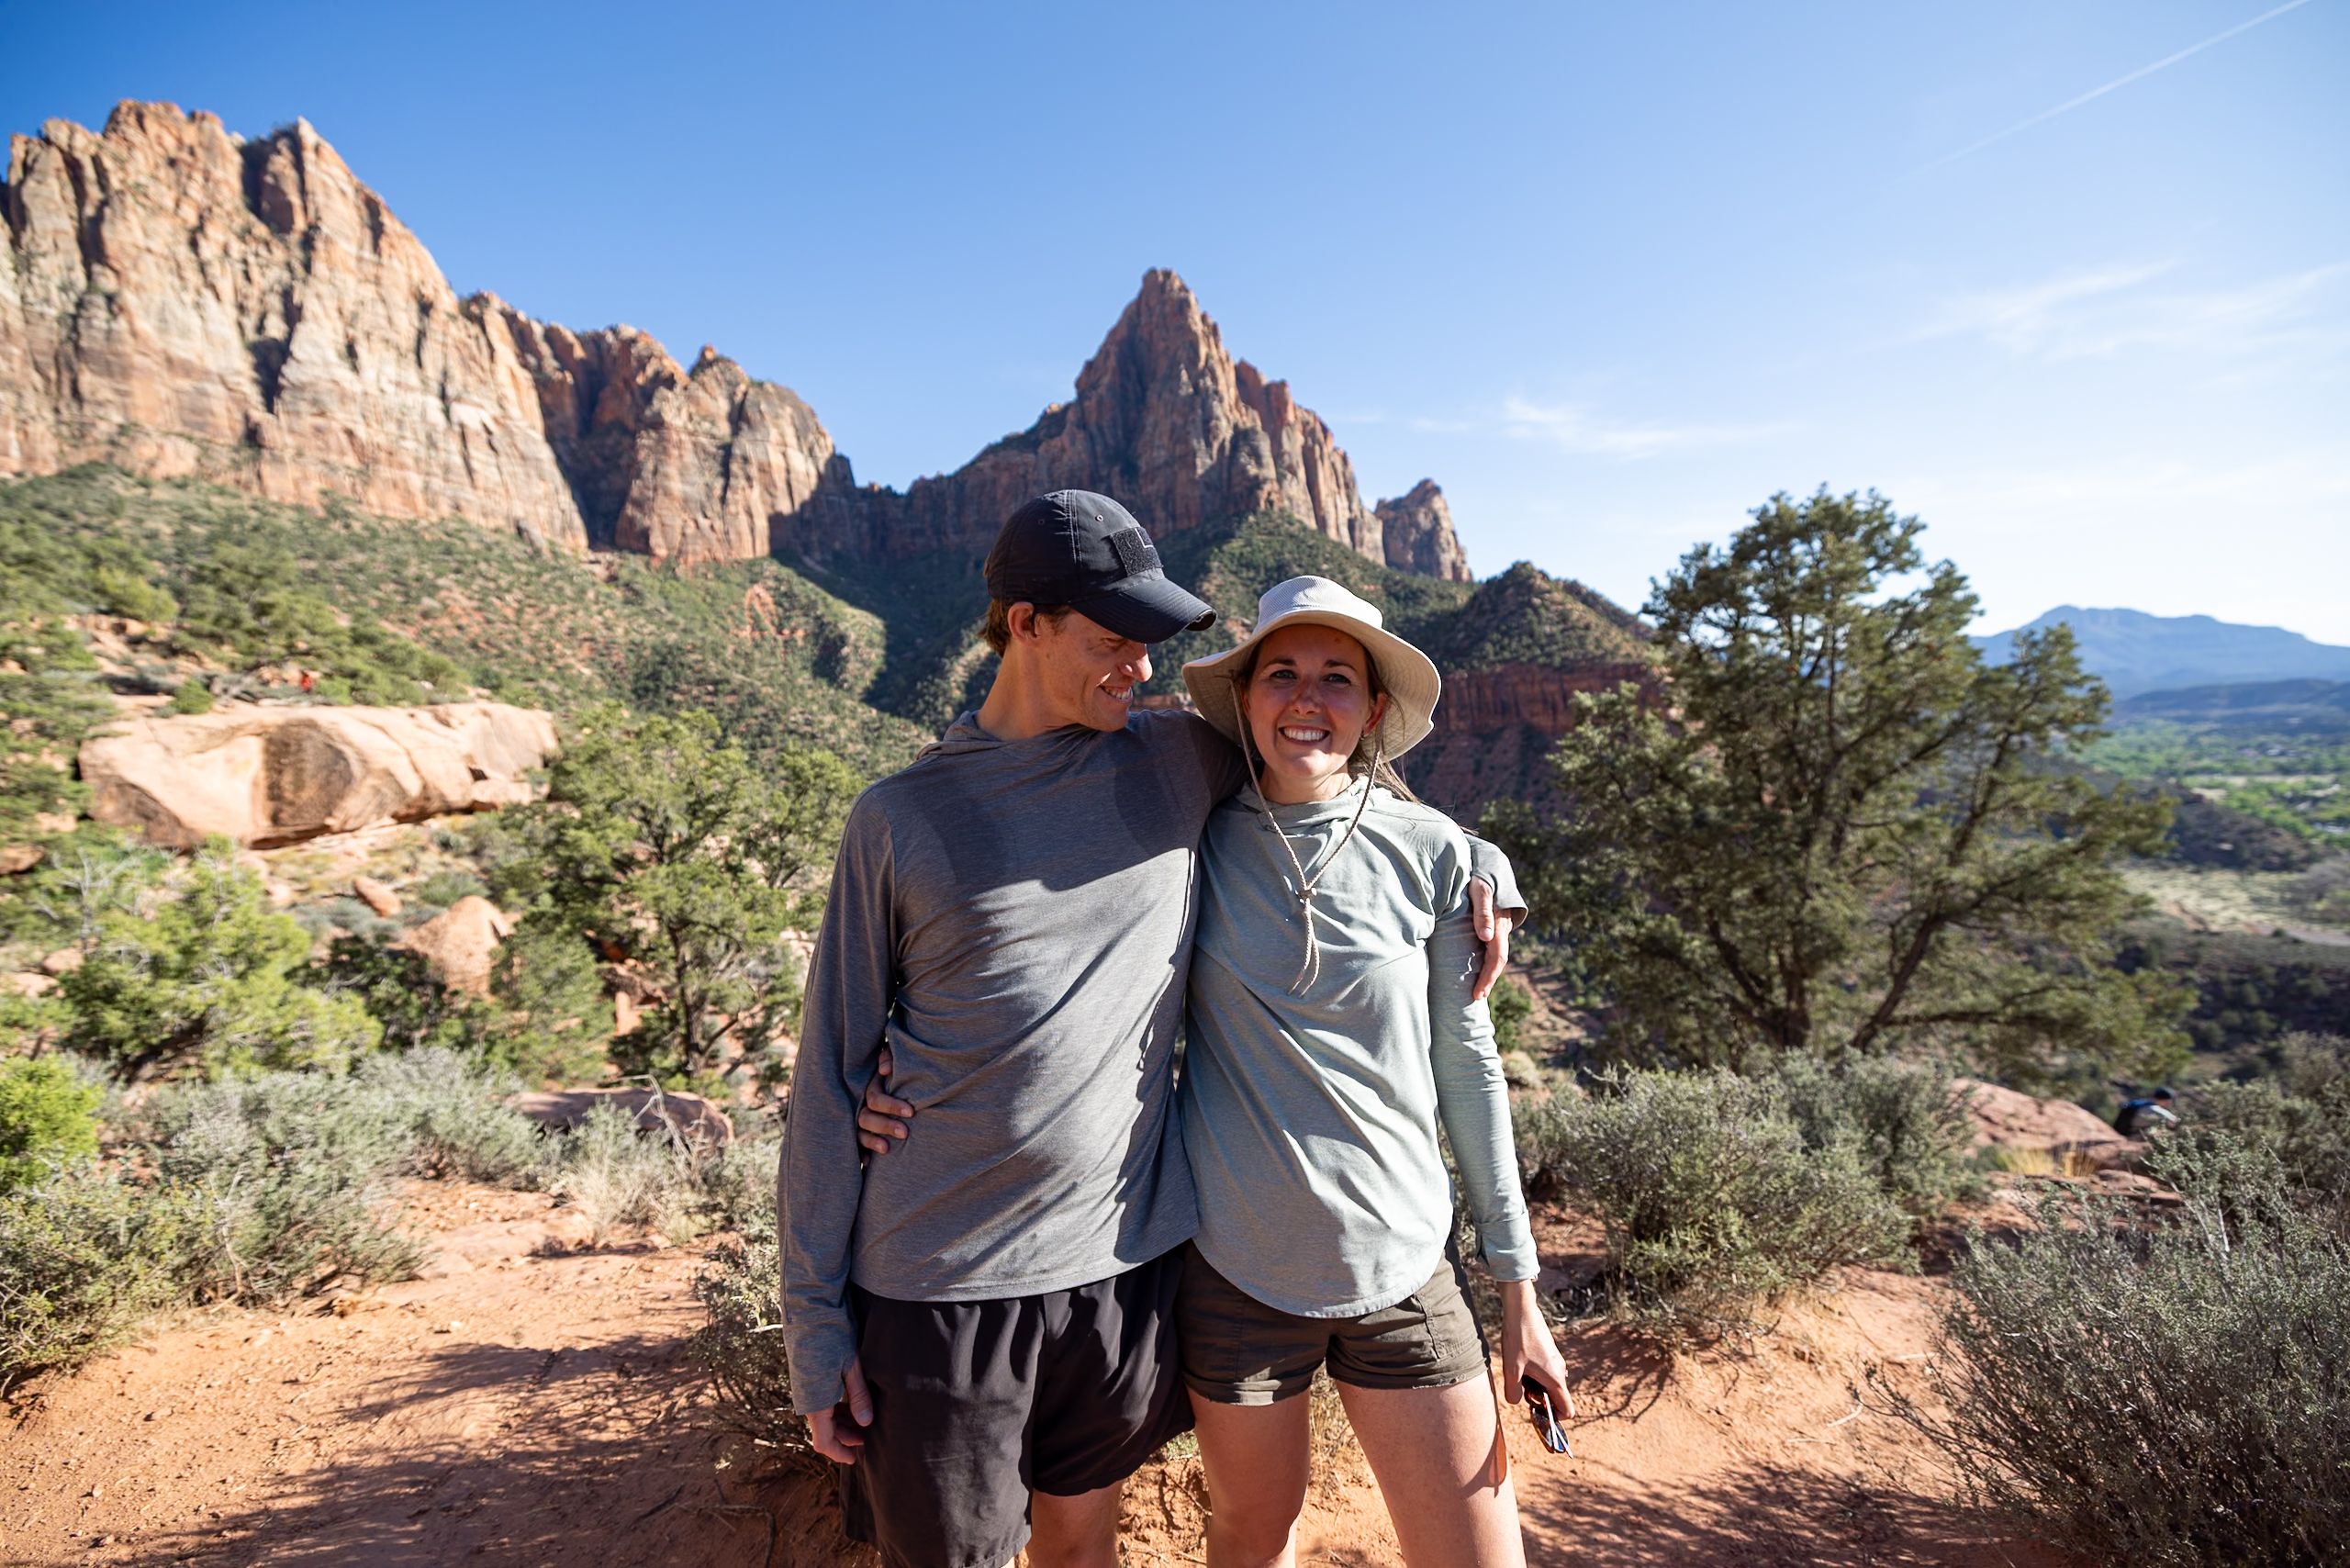
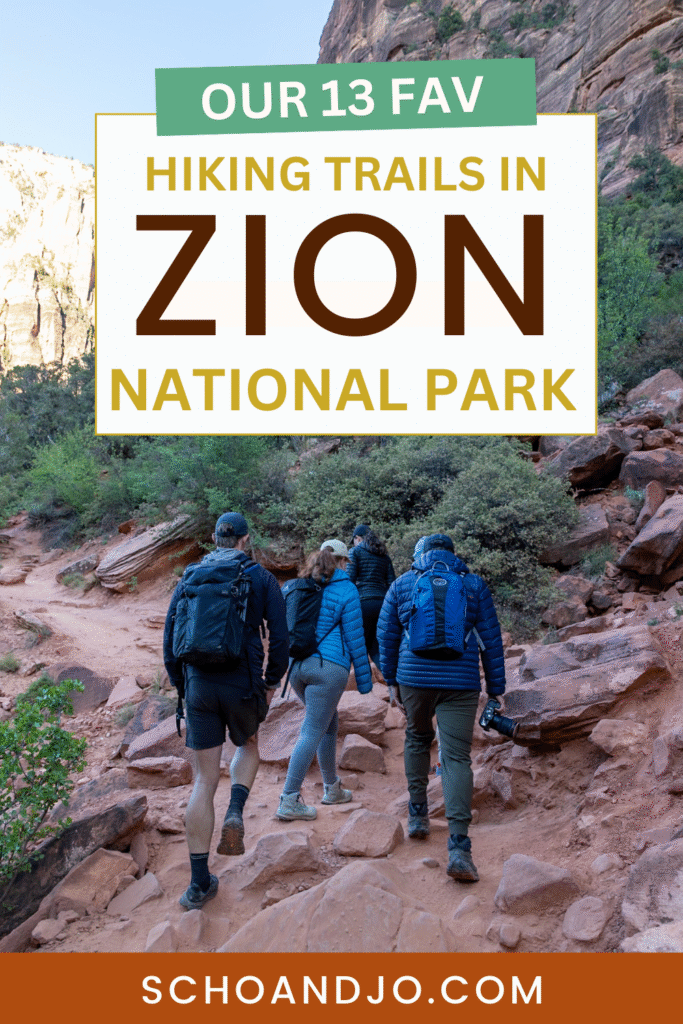
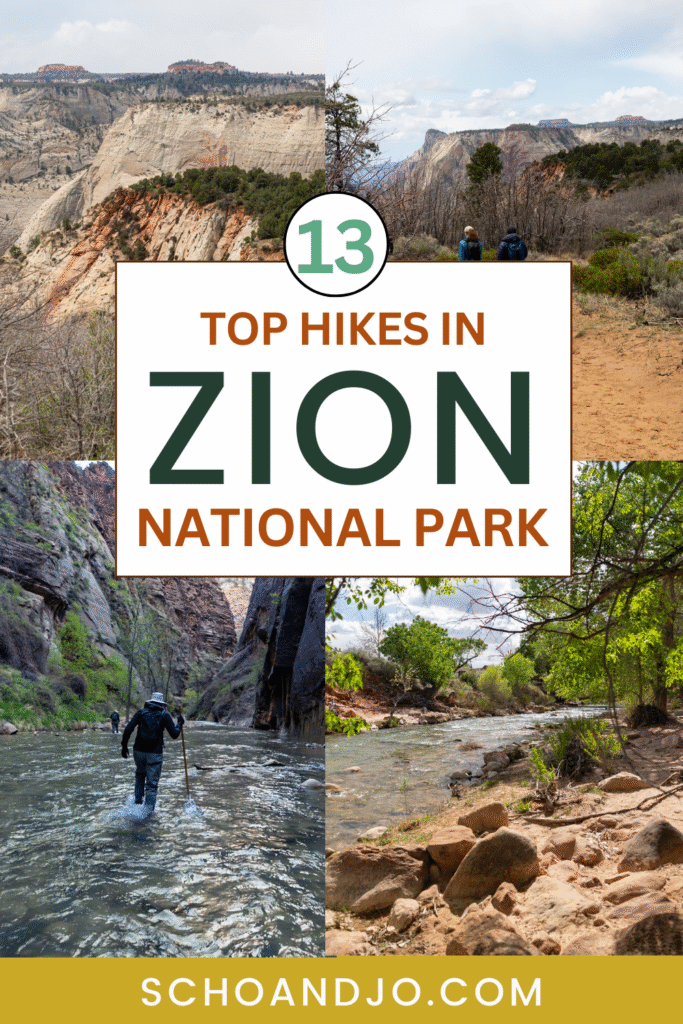
We recently explored Zion National Park for the first time, and we were completely blown away by the variety of hiking trails—each one more stunning than the last. While iconic and more technical hikes like Angels Landing and The Narrows tend to steal the spotlight, we found plenty of lower-intensity trails with just as stunning views. In this guide, we’re sharing the 13 best hikes in Zion National Park, ranked from easiest to hardest, to make choosing which trails to do in this iconic Utah park that much simpler!
Note: We use affiliate links which provide us a little kickback each time you use one of our links and make a purchase, without any additional cost to you. We do not recommend products that we don’t already love or have heard great things about, so you can trust we’re only suggesting great products to you.
Please respect the outdoors and Leave No Trace! Before embarking on your outdoor adventure, review the seven principles of Leave No Trace, which include planning ahead and preparing, traveling and camping on durable surfaces, disposing of waste properly (pack out what you pack in), leaving what you find, minimizing campfire impacts, respecting wildlife, and being considerate of others. Abiding by these principles helps keep these places beautiful so others can enjoy them for years to come!
1. Pa’rus Trail
Pa’rus Trail is one of the most relaxed and scenic walks in Zion—perfect if you’re craving an easy hike that doesn’t skimp on views. This paved, 3.5-mile round-trip path begins right at the Visitor Center and offers wide-open views of the canyon walls and the Virgin River. Along the trail, there are several shaded benches where you can get out of the sun and rest for a bit.
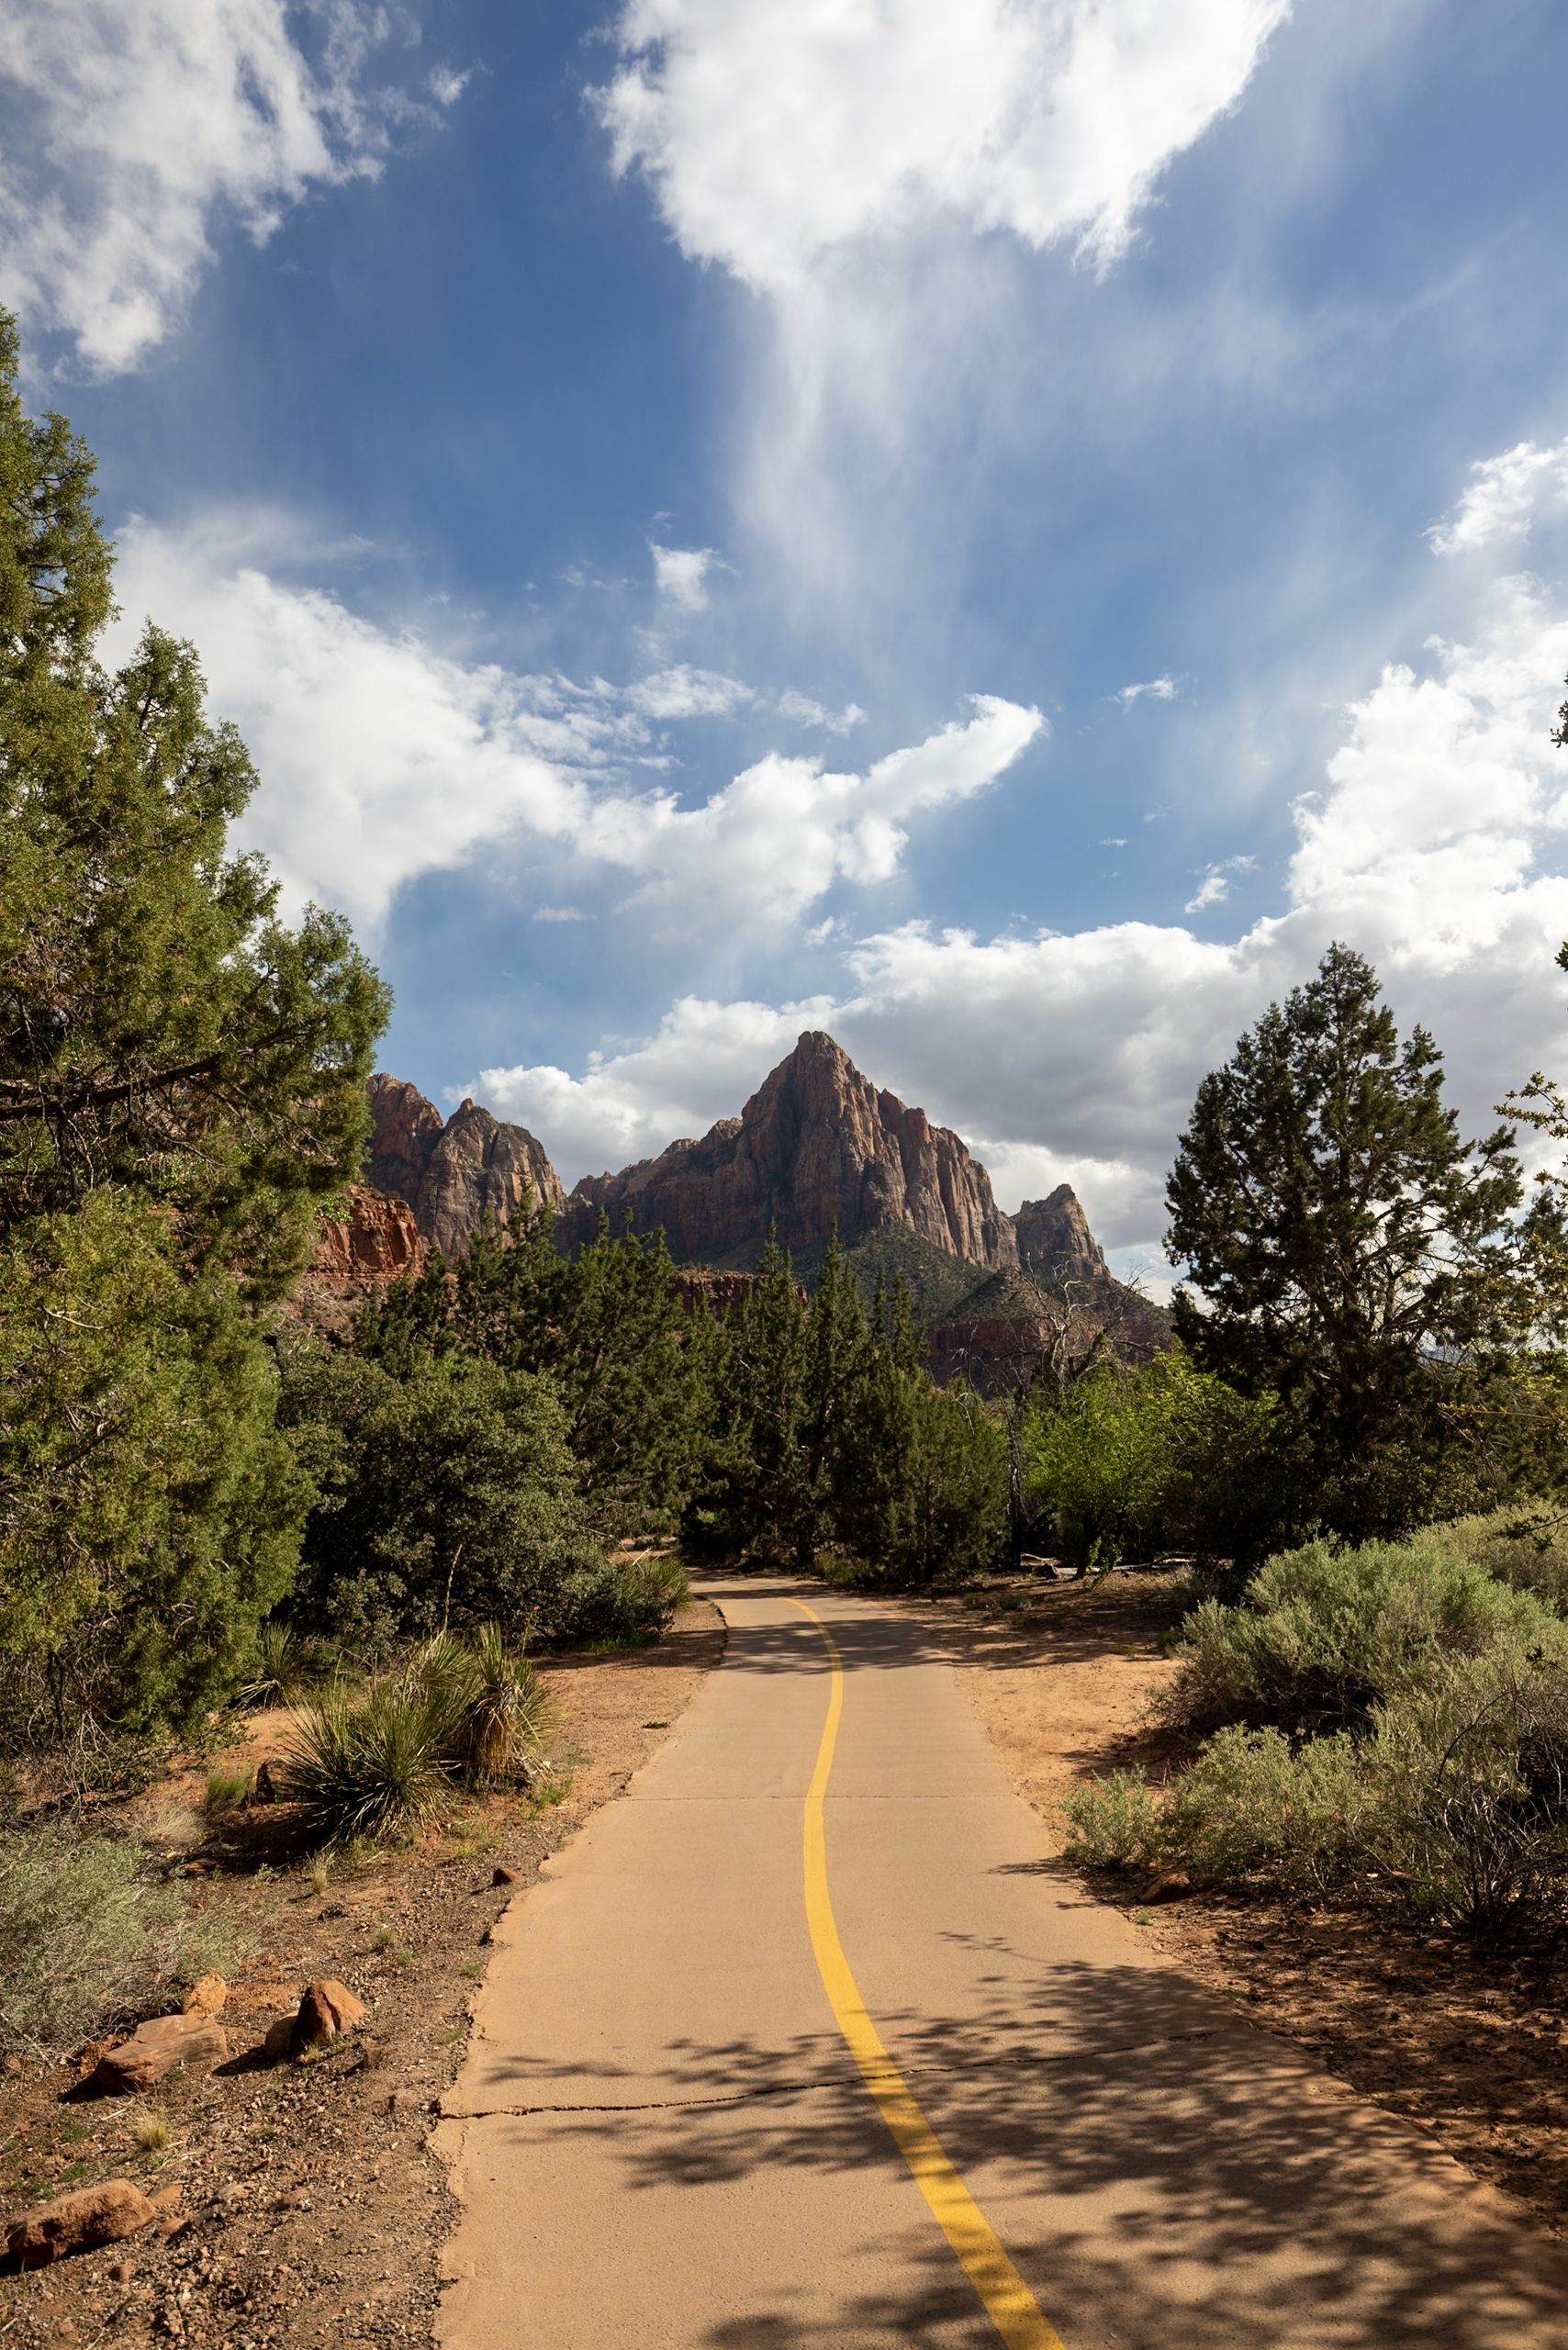
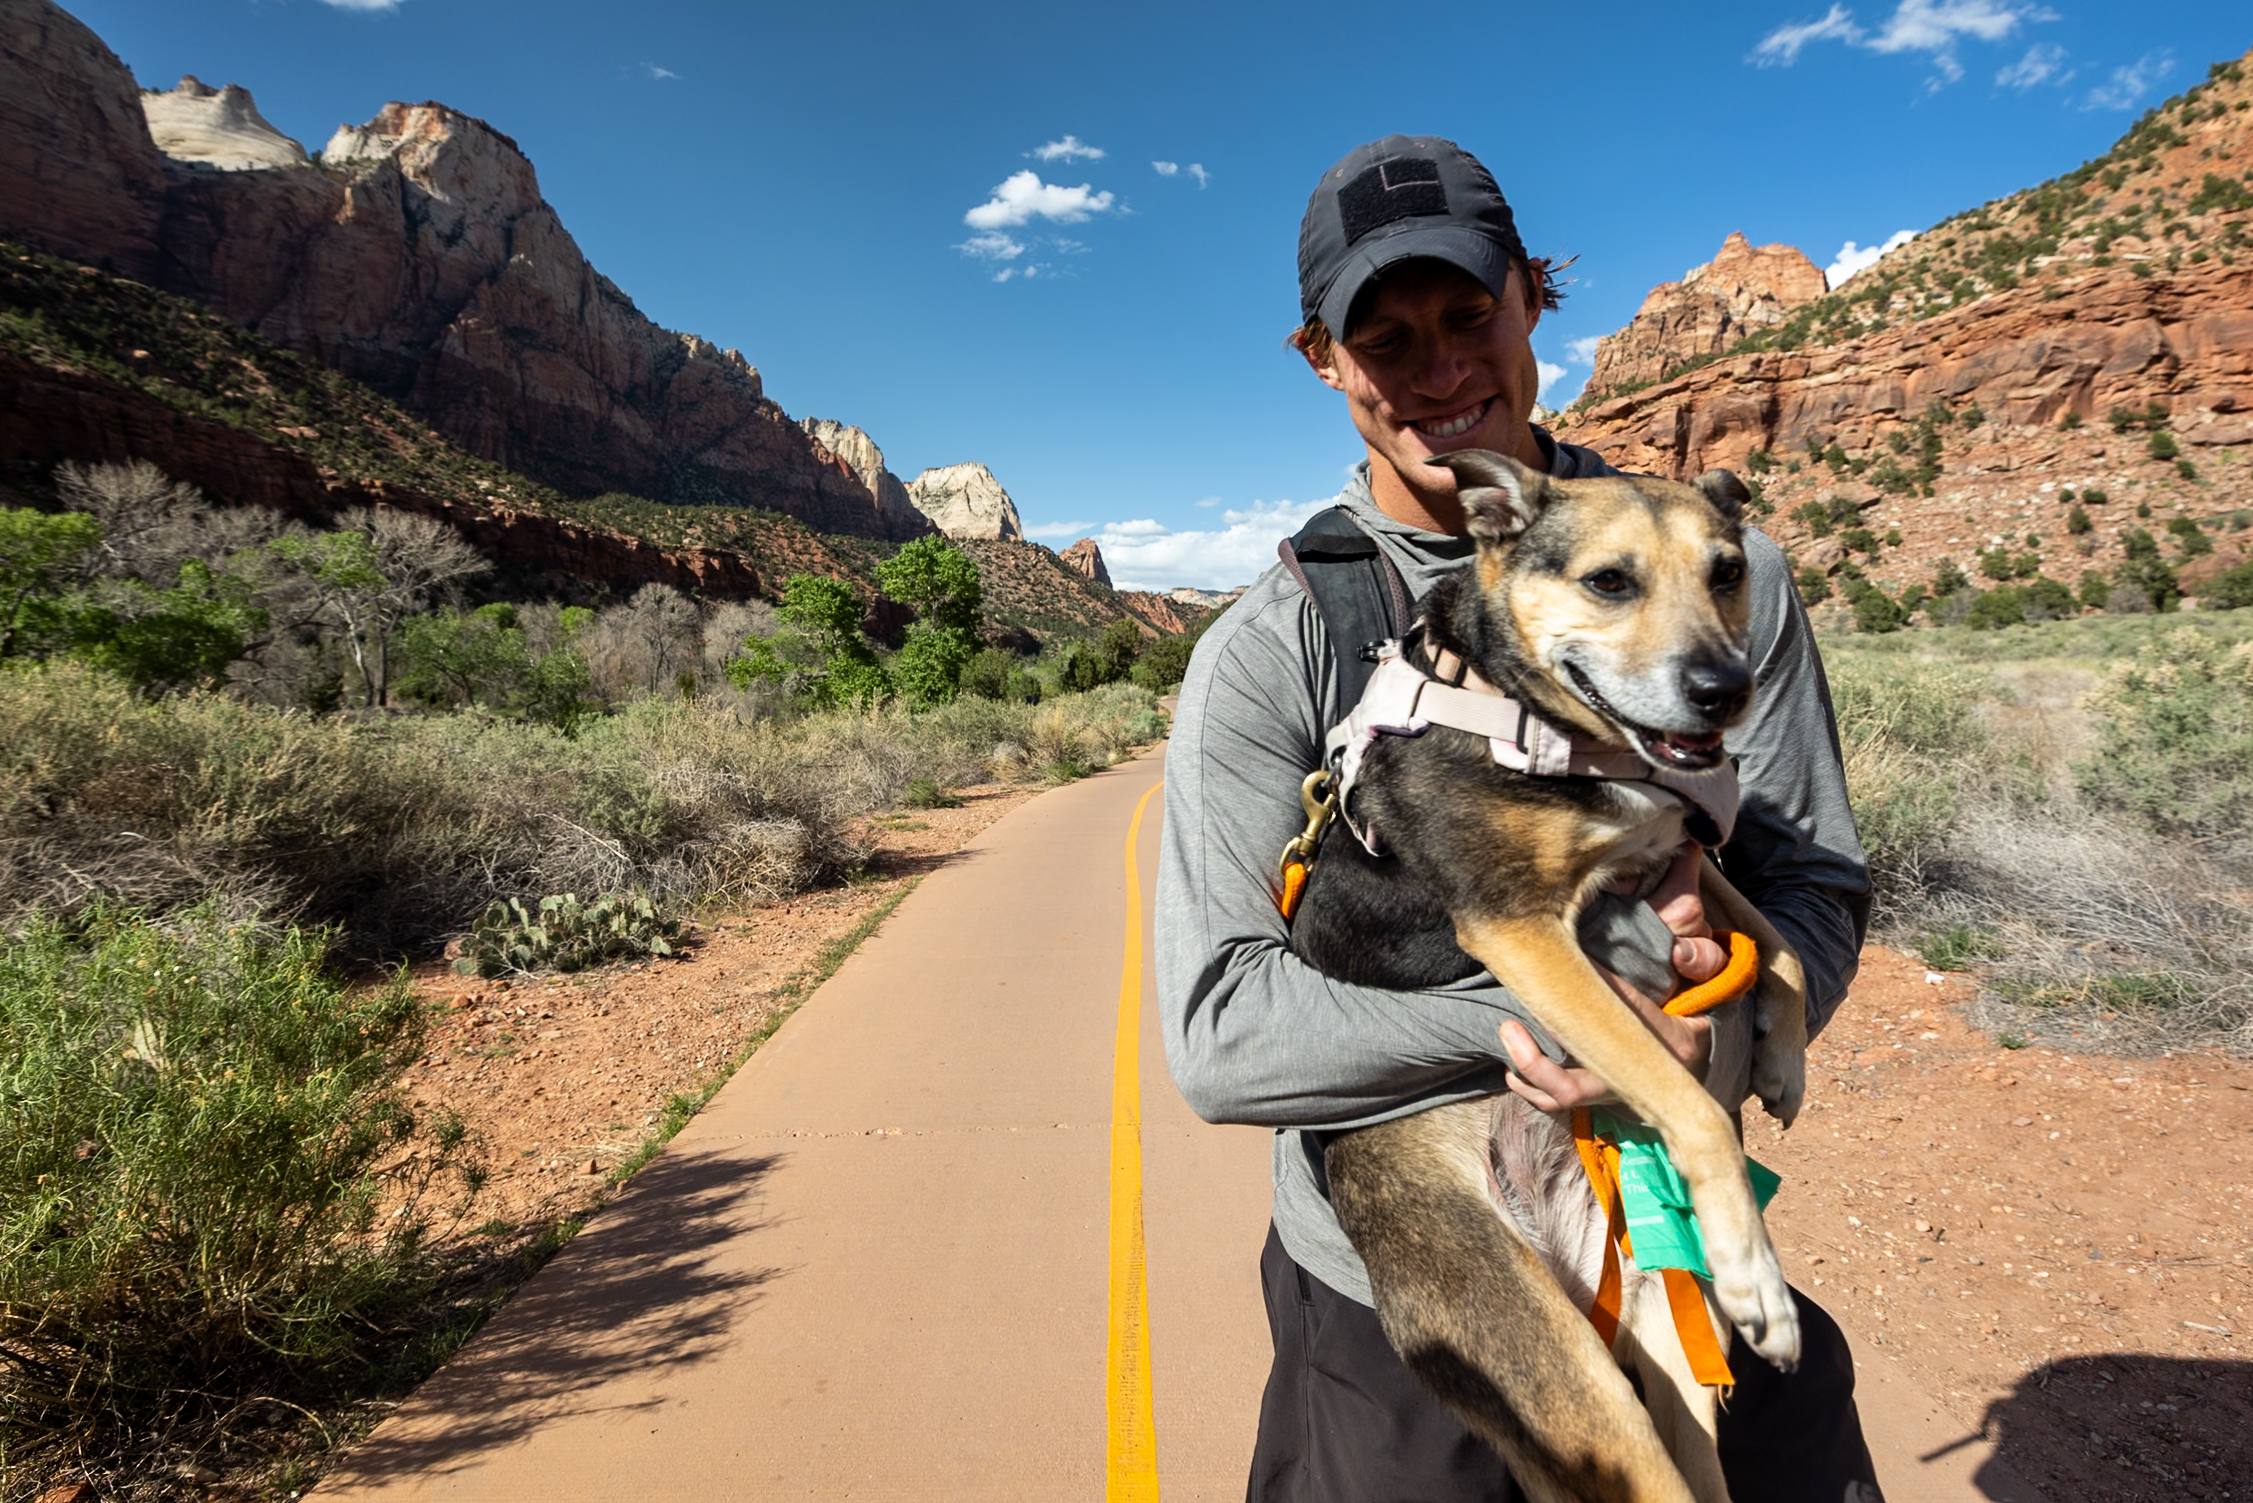
This trail is also a great spot to see the sunset and stargaze once the sun goes down. To top it all off, Pa’rus Trail is bike-friendly, dog-friendly, and wheelchair accessible, making it one of the most inclusive trails in all of Zion! We were very happy to have an in-park trail option to take Ollie out on—and a fairly long trail at that!
Distance: 3.5 miles /5.6 km
Difficulty: Easy
Estimated Time: 2 hours
Permit Required: No
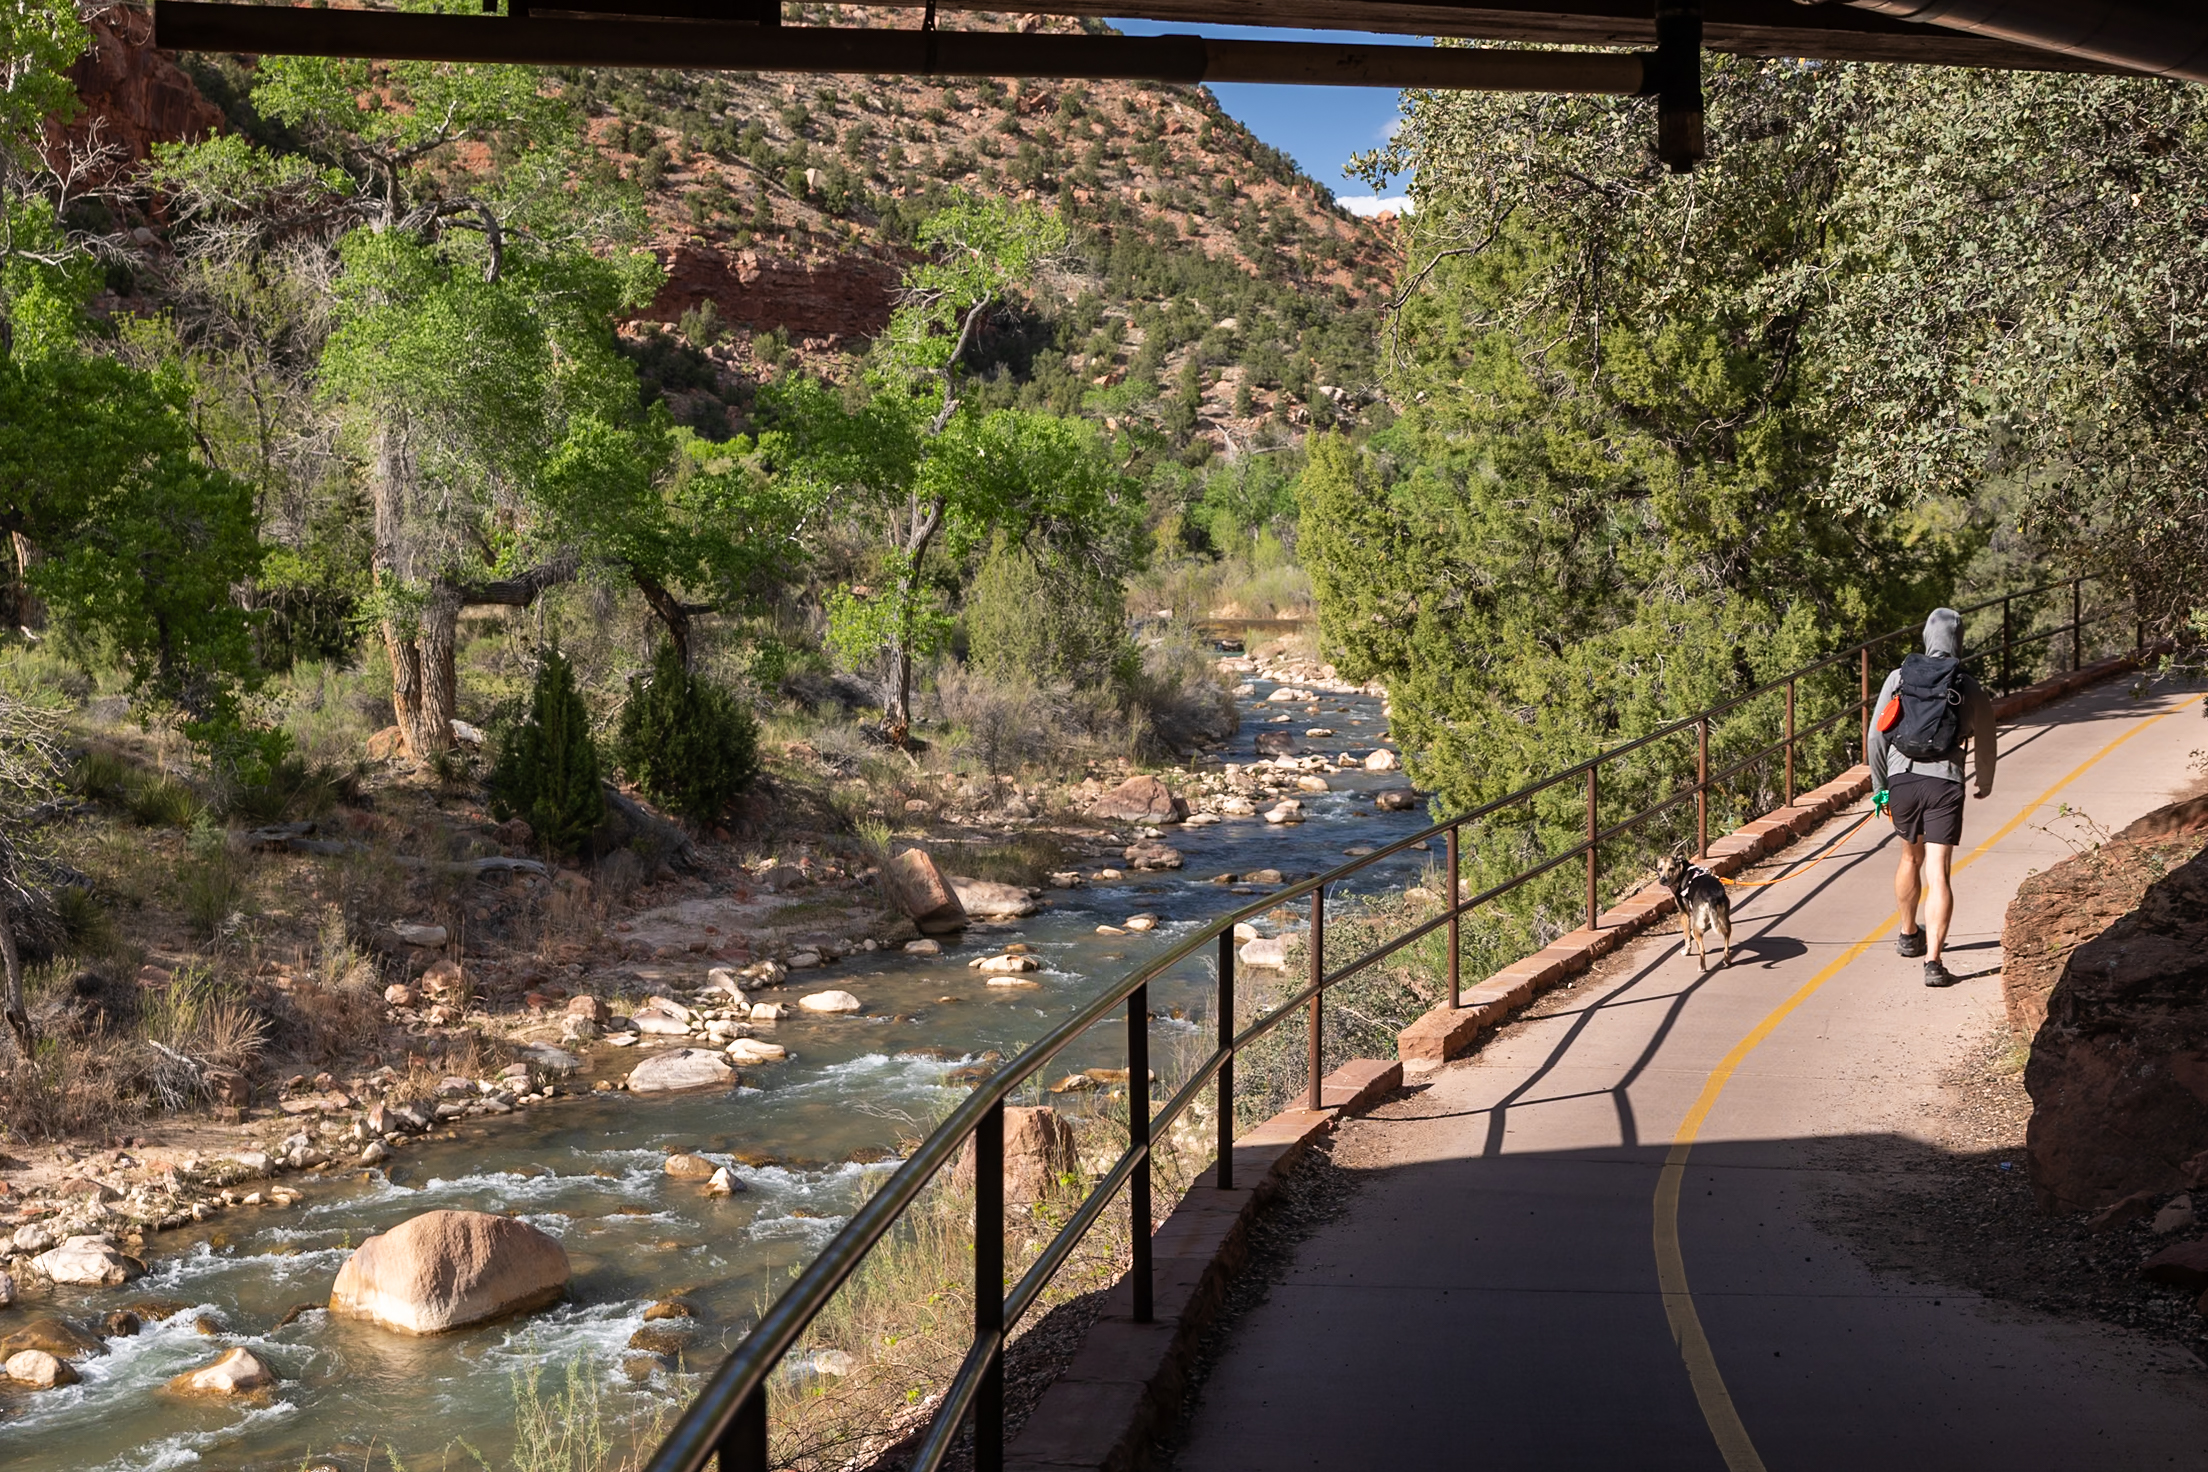
2. Riverside Walk
The Riverside Walk is a peaceful, shaded path starting at Shuttle Stop 9 that follows the Virgin River upstream to the entrance of The Narrows and takes just around 90 minutes to complete. Even if you don’t plan on hiking The Narrows, you can walk this trail!
We hiked this before and after doing The Narrows and noticed it’s especially beautiful in the morning light, plus much less crowded before 10 a.m. A ranger told us it was his favorite short hike in the park, and after experiencing it ourselves, we can totally see why.
Distance: 2.2 miles / 3.5 km
Difficulty: Easy
Estimated Time: 1.5 hours
Permit Required: No
3. Timber Creek Overlook
Located in the quieter northern part of Zion near Kolob Canyon, the Timber Creek Overlook Trail is a short climb that rewards you with sweeping views. The trail starts at the end of Kolob Canyons Road, where there’s a spacious parking lot, and gains some elevation over uneven ground before opening up to panoramic vistas of the canyons.
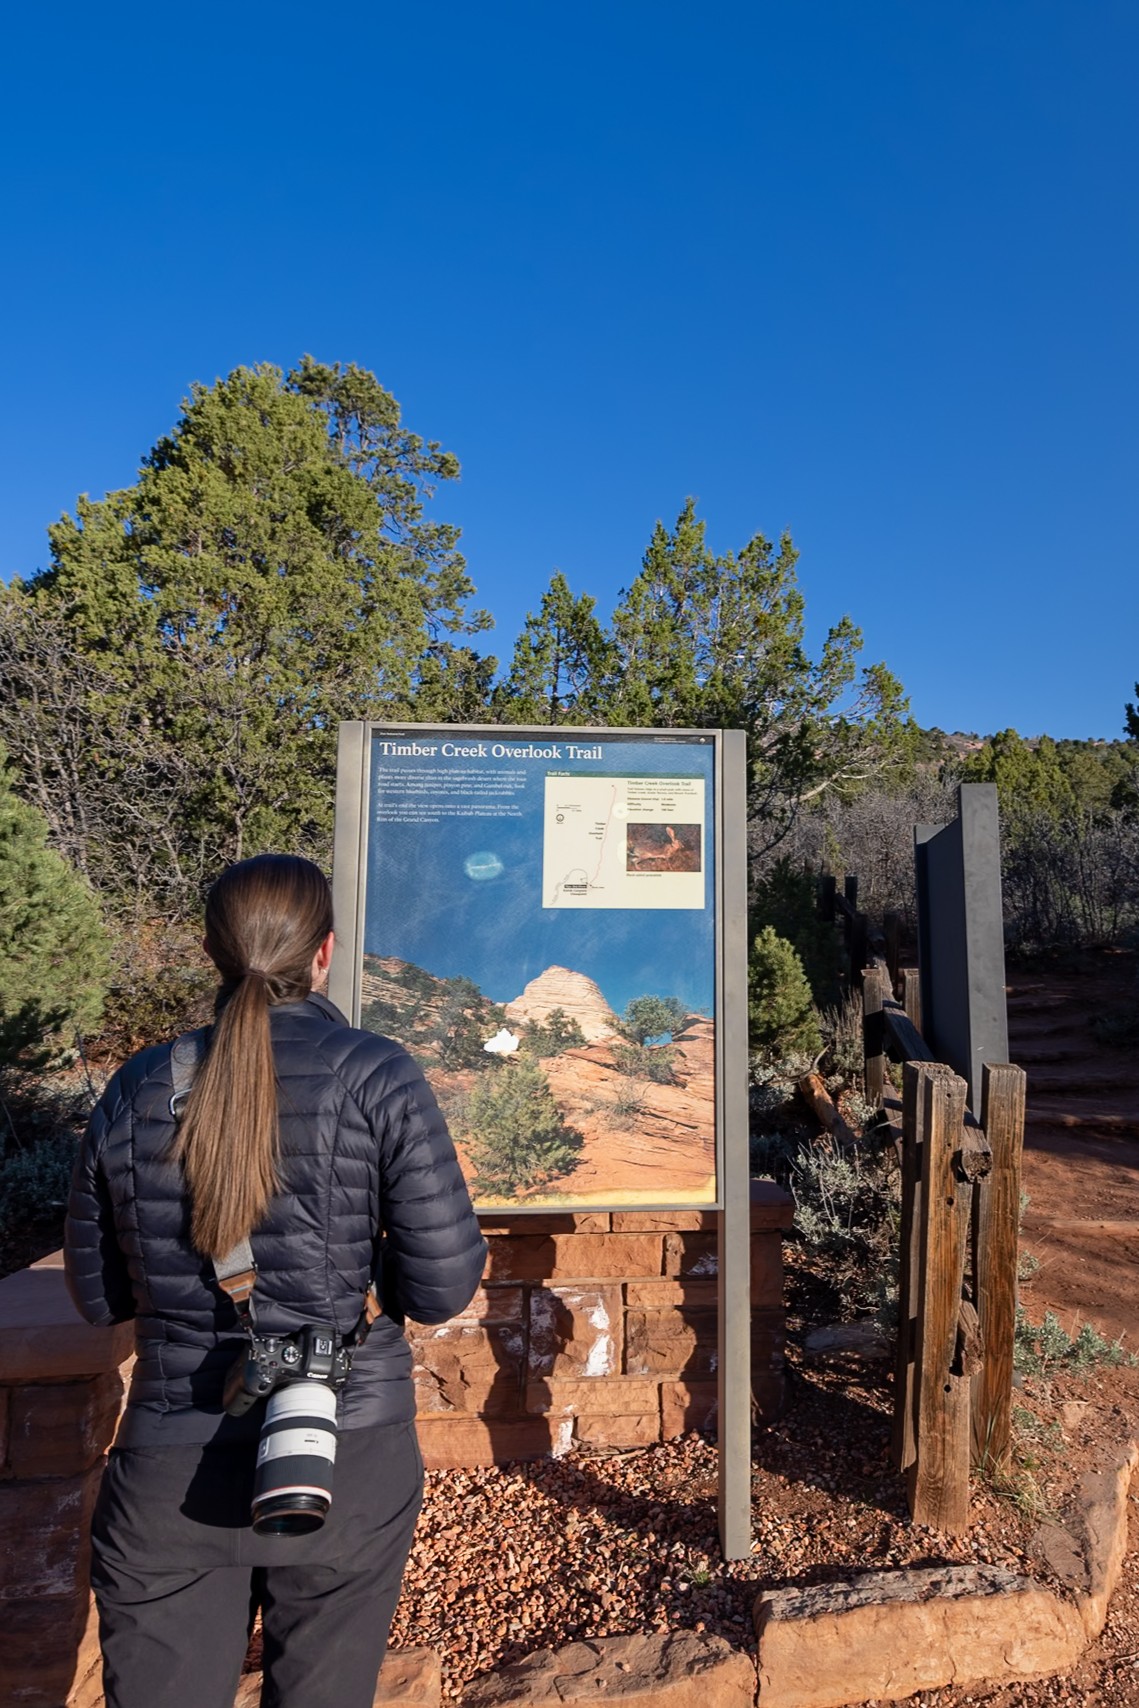
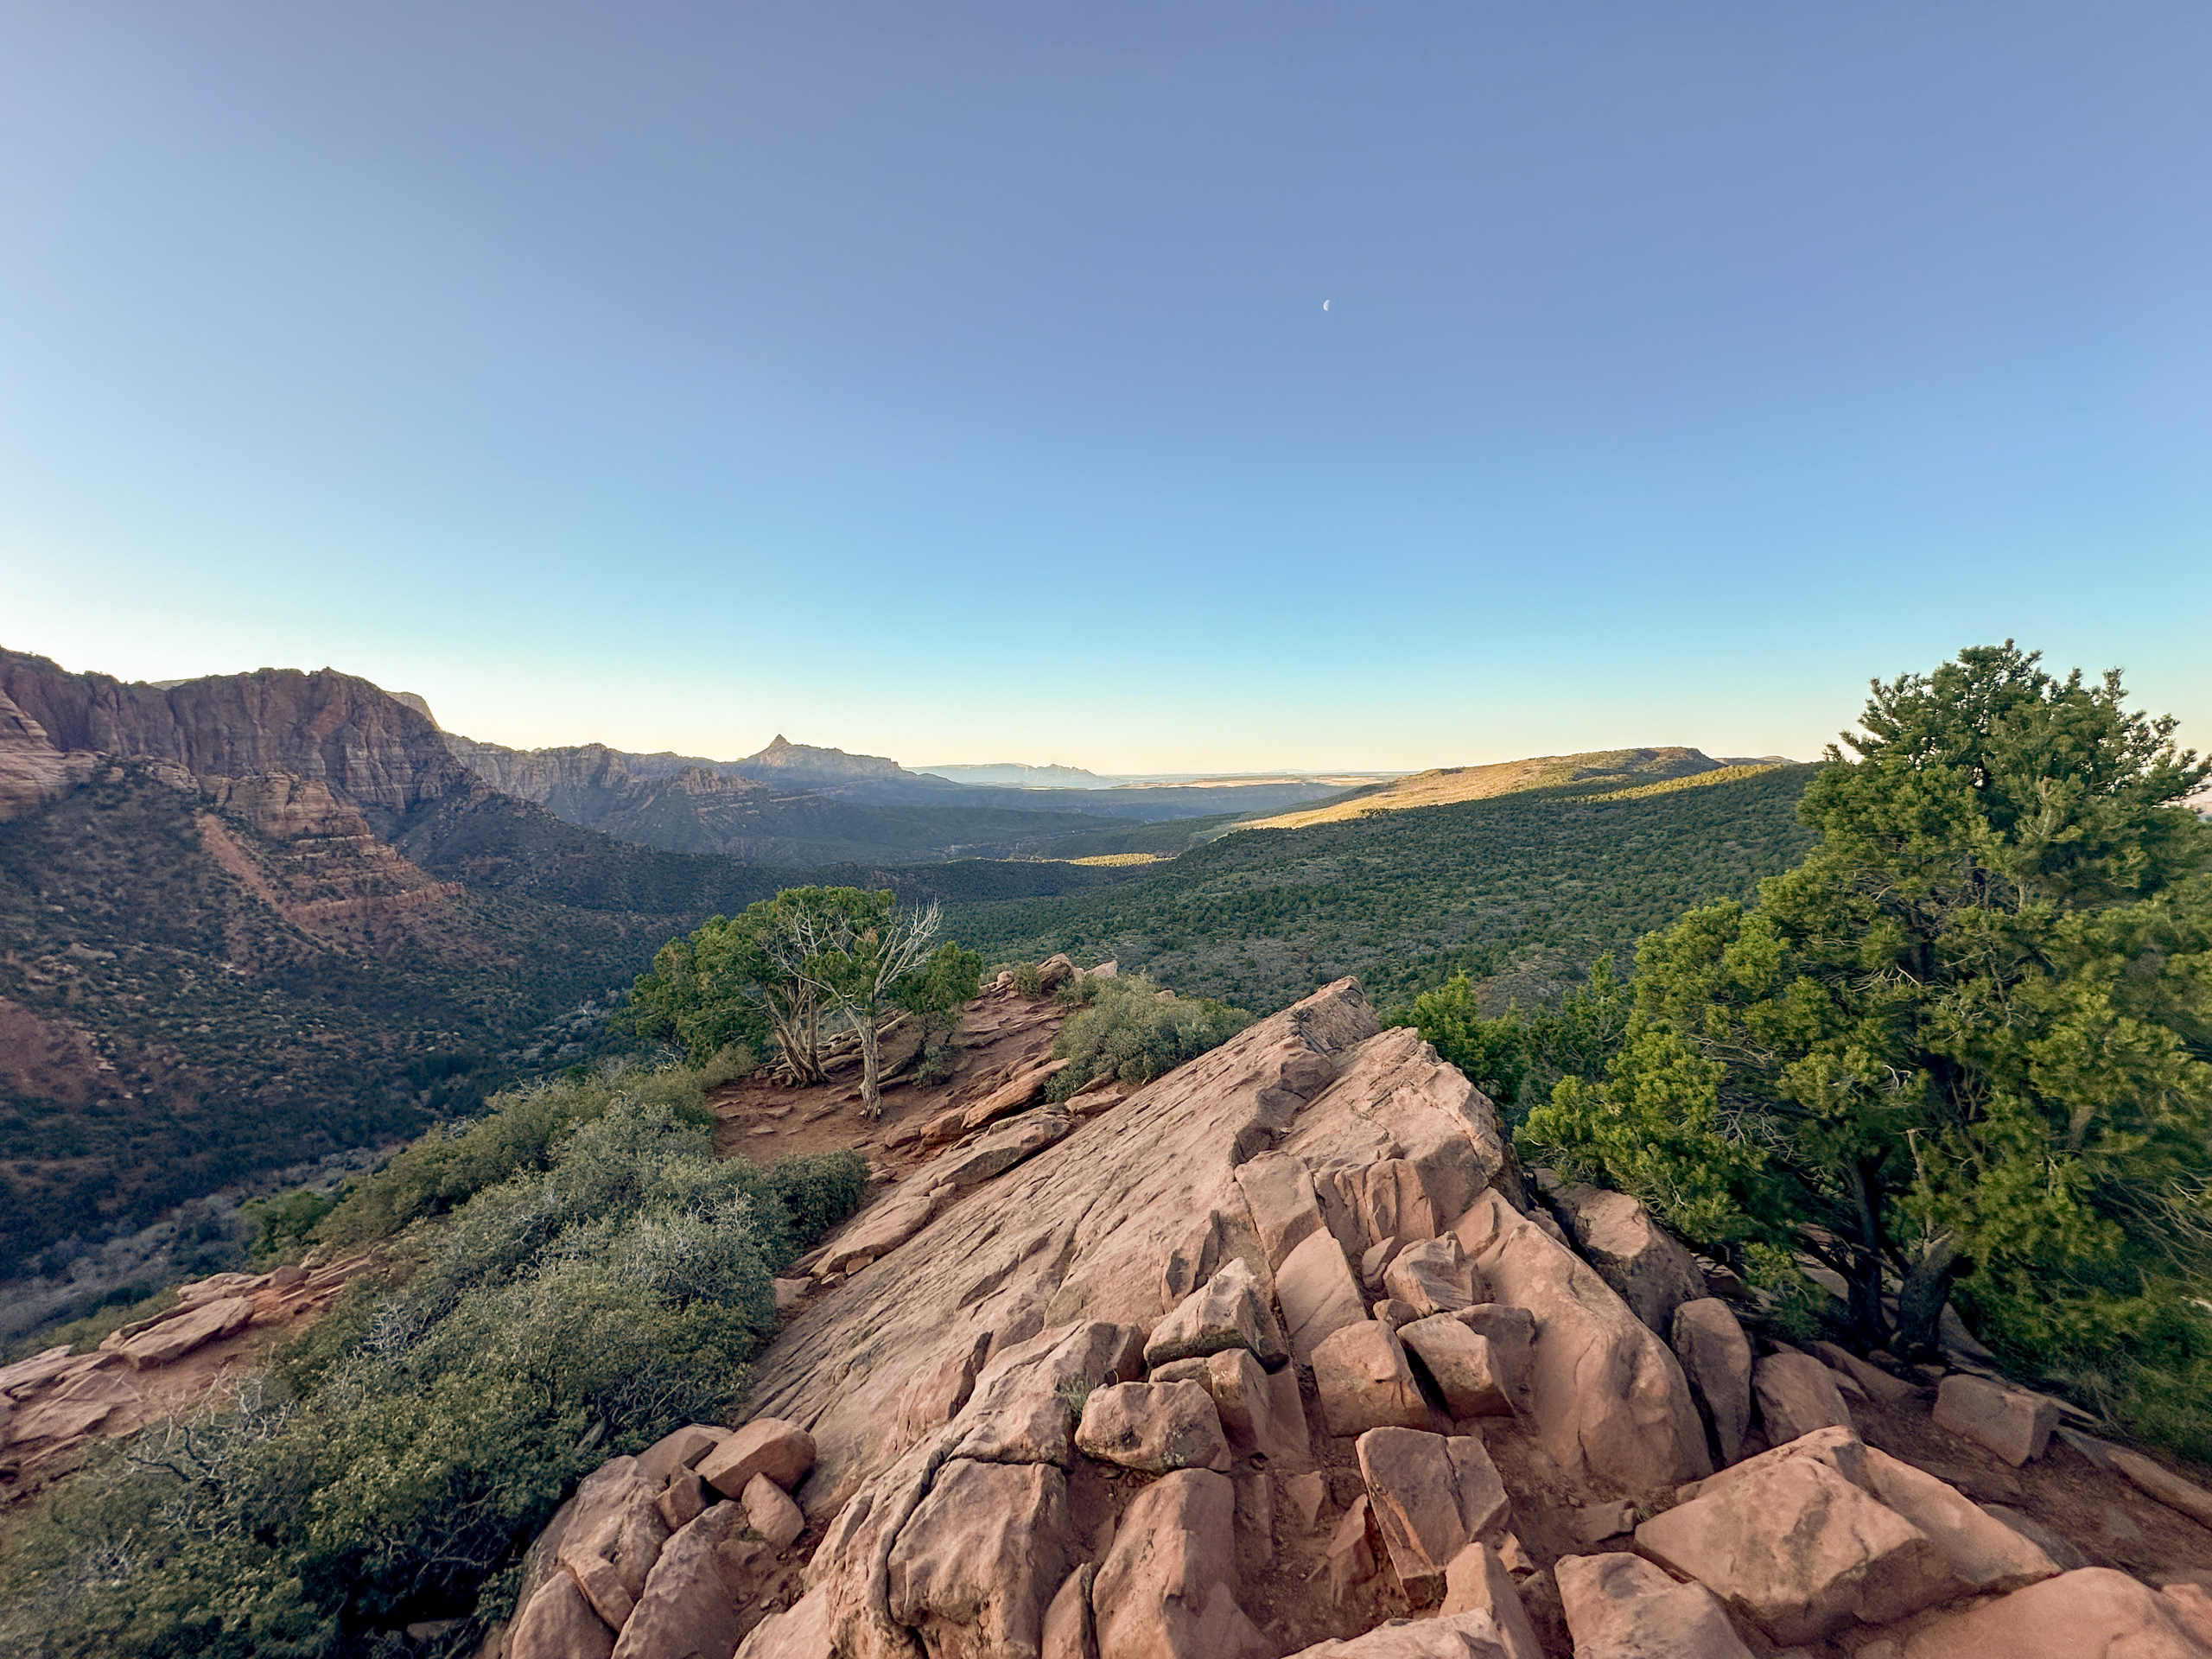
We did this hike at sunrise and loved watching the light shift across the mountains. While the parking lot instantly offers a nice view, we encourage you to take the short trail for even better views away from the road.
Distance: 1.1 miles / 1.77 km
Difficulty: Moderate
Estimated Time: 30 minutes
Permit Required: No
With offline maps, wrong-turn alerts, and extra planning features, make the most of every outside adventure with AllTrails Plus. Get 7 days of AllTrails Plus for free!
4. Canyon Overlook Trail
The Canyon Overlook Trail, located just east of the Zion-Mount Carmel Tunnel, is a short but rewarding hike under a mile round-trip that offers narrow ledges, a wooden bridge, light scrambling, and a final stunning view of the Towers of the Virgin to top it all off!

This trail was very popular with limited parking, so hike it as soon as you find an open spot (we had to pass by twice). A ranger told us it’s one of their favorites, and we agree—sunrise provides perfect light for photos, but sunset views are also spectacular.
Distance: 0.9 miles / 1.45 km
Difficulty: Moderate
Estimated Time: 25 minutes
Permit Required: No
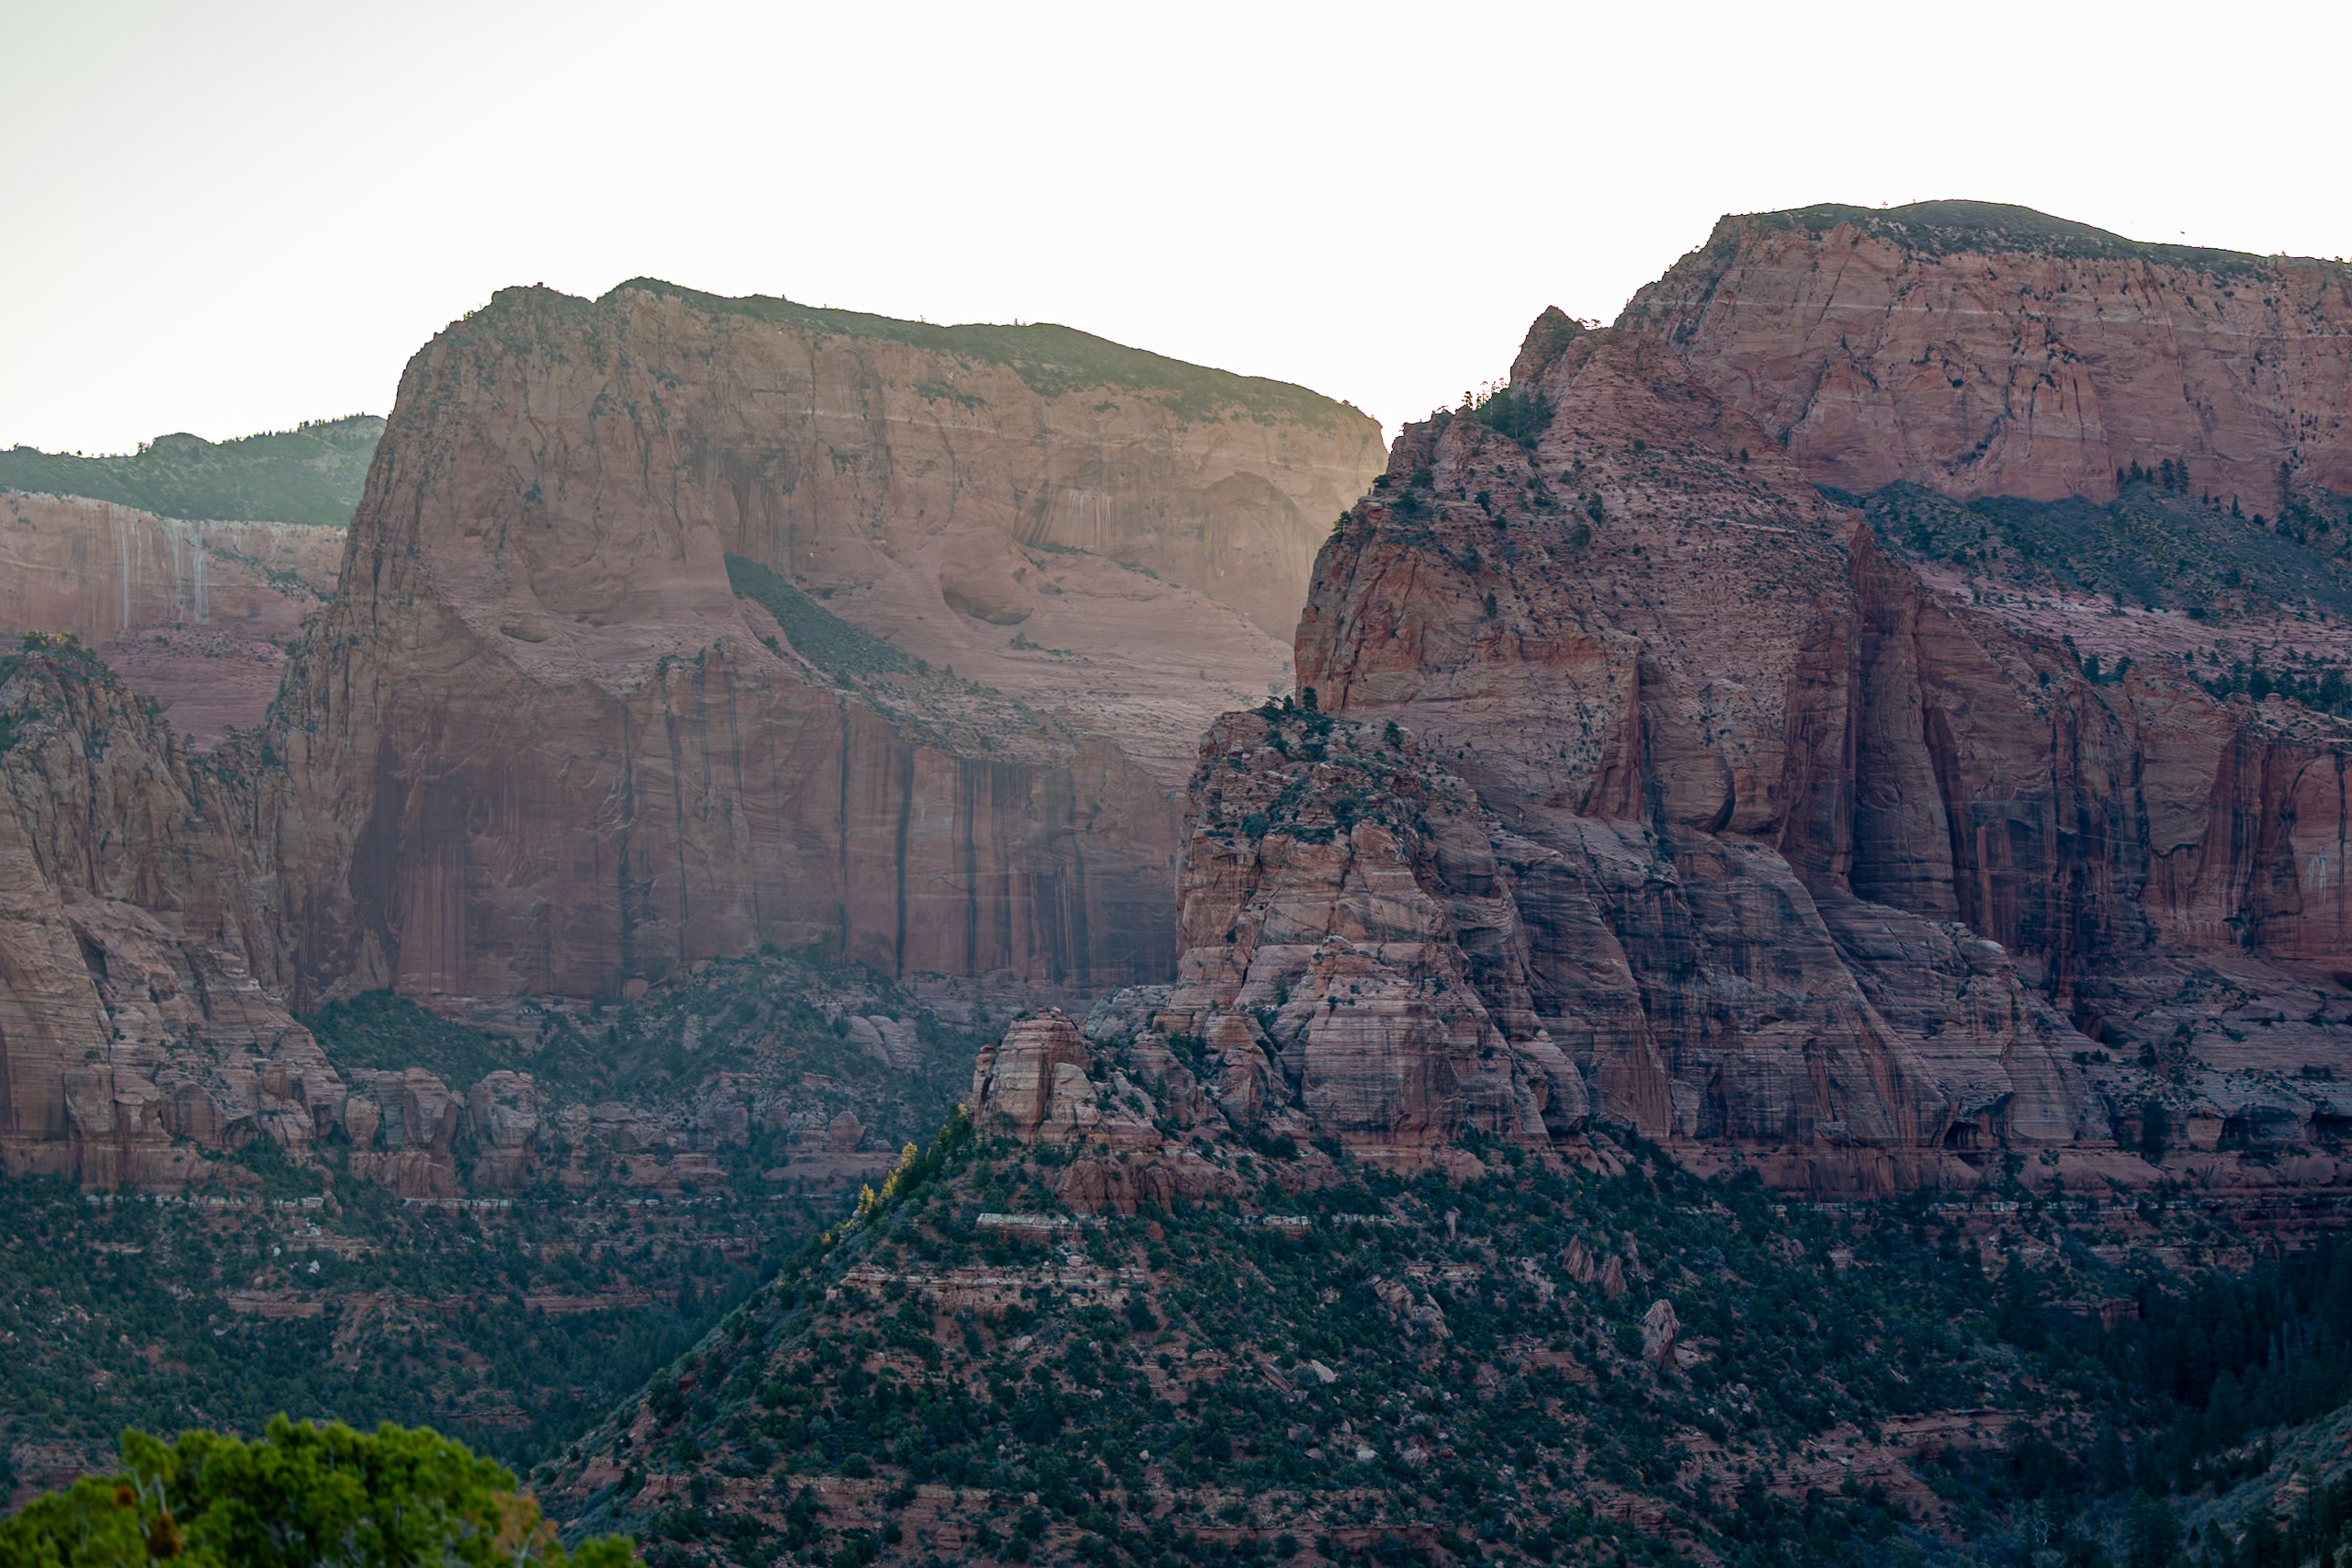
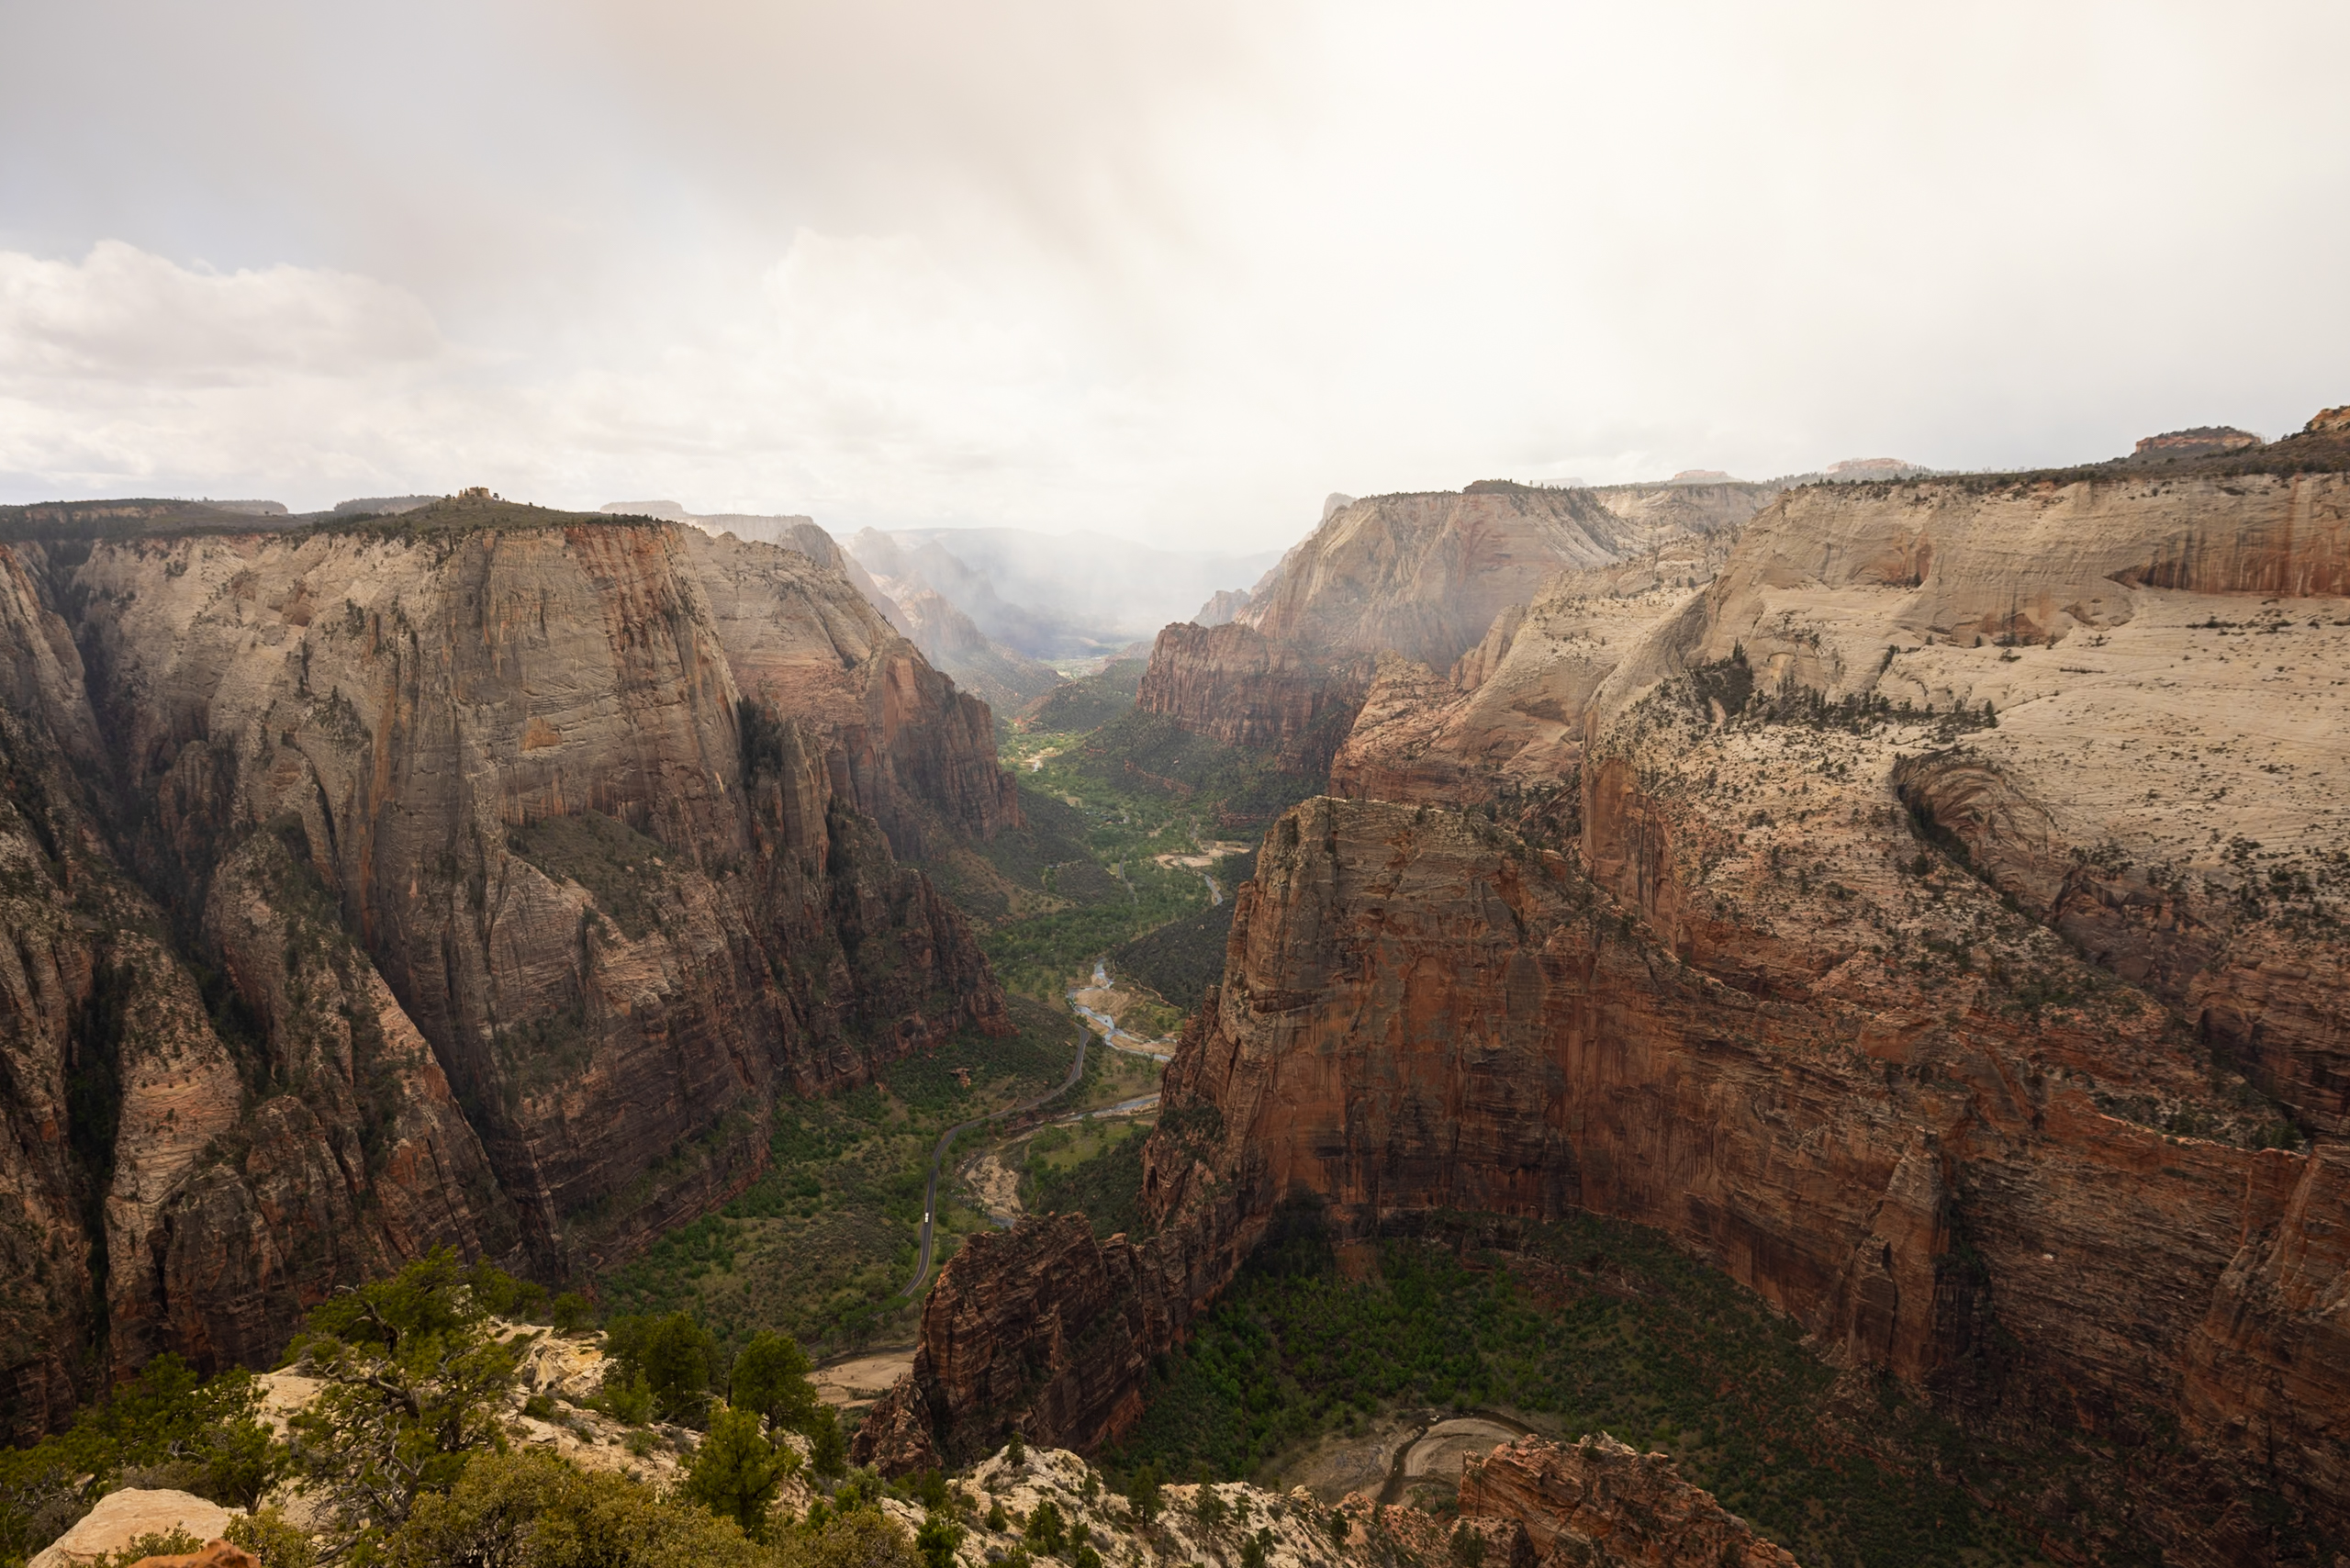
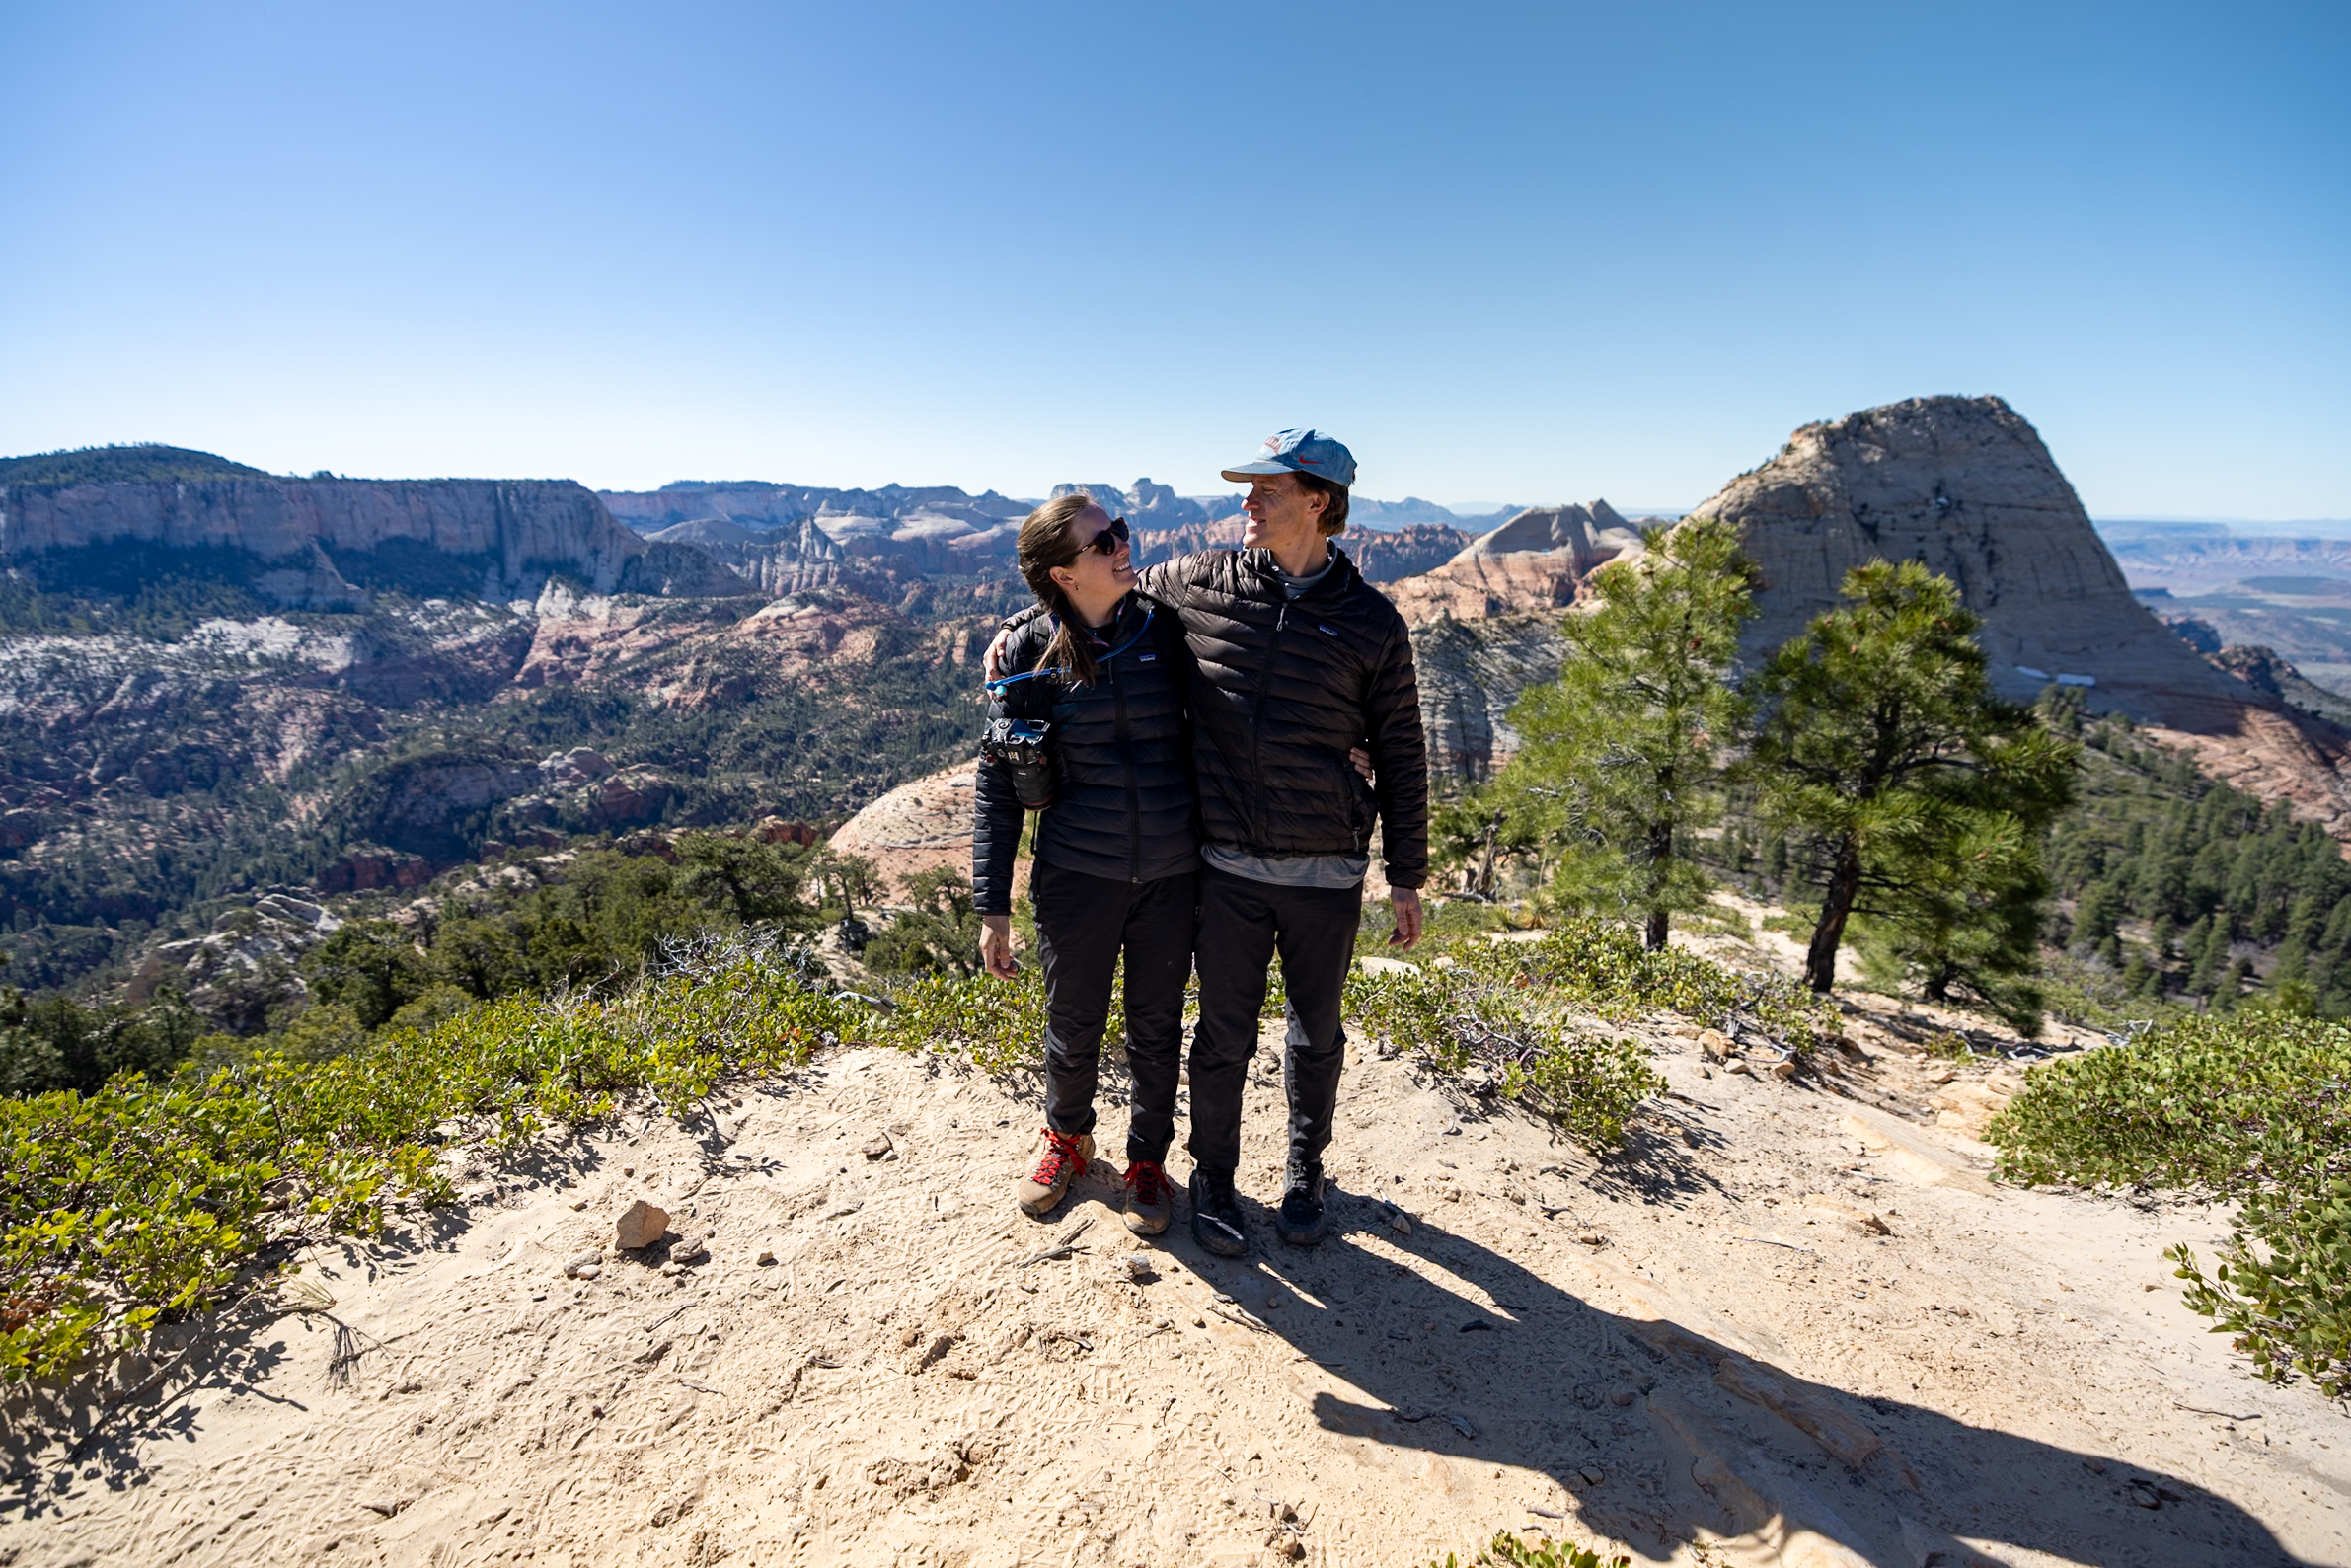
5. Observation Point via East Mesa Trail
The Observation Point via East Mesa Trail was hands-down our favorite hike in Zion for its unmatched views with surprisingly little effort. This route is now accessible by driving to the Zion Ponderosa Ranch Resort (a rockfall closed the original trail). The trail offers sweeping views over Zion Canyon, including a direct view of Angels Landing from above. Overall, it’s relatively flat, shaded in parts, and much less crowded than many others in the park.
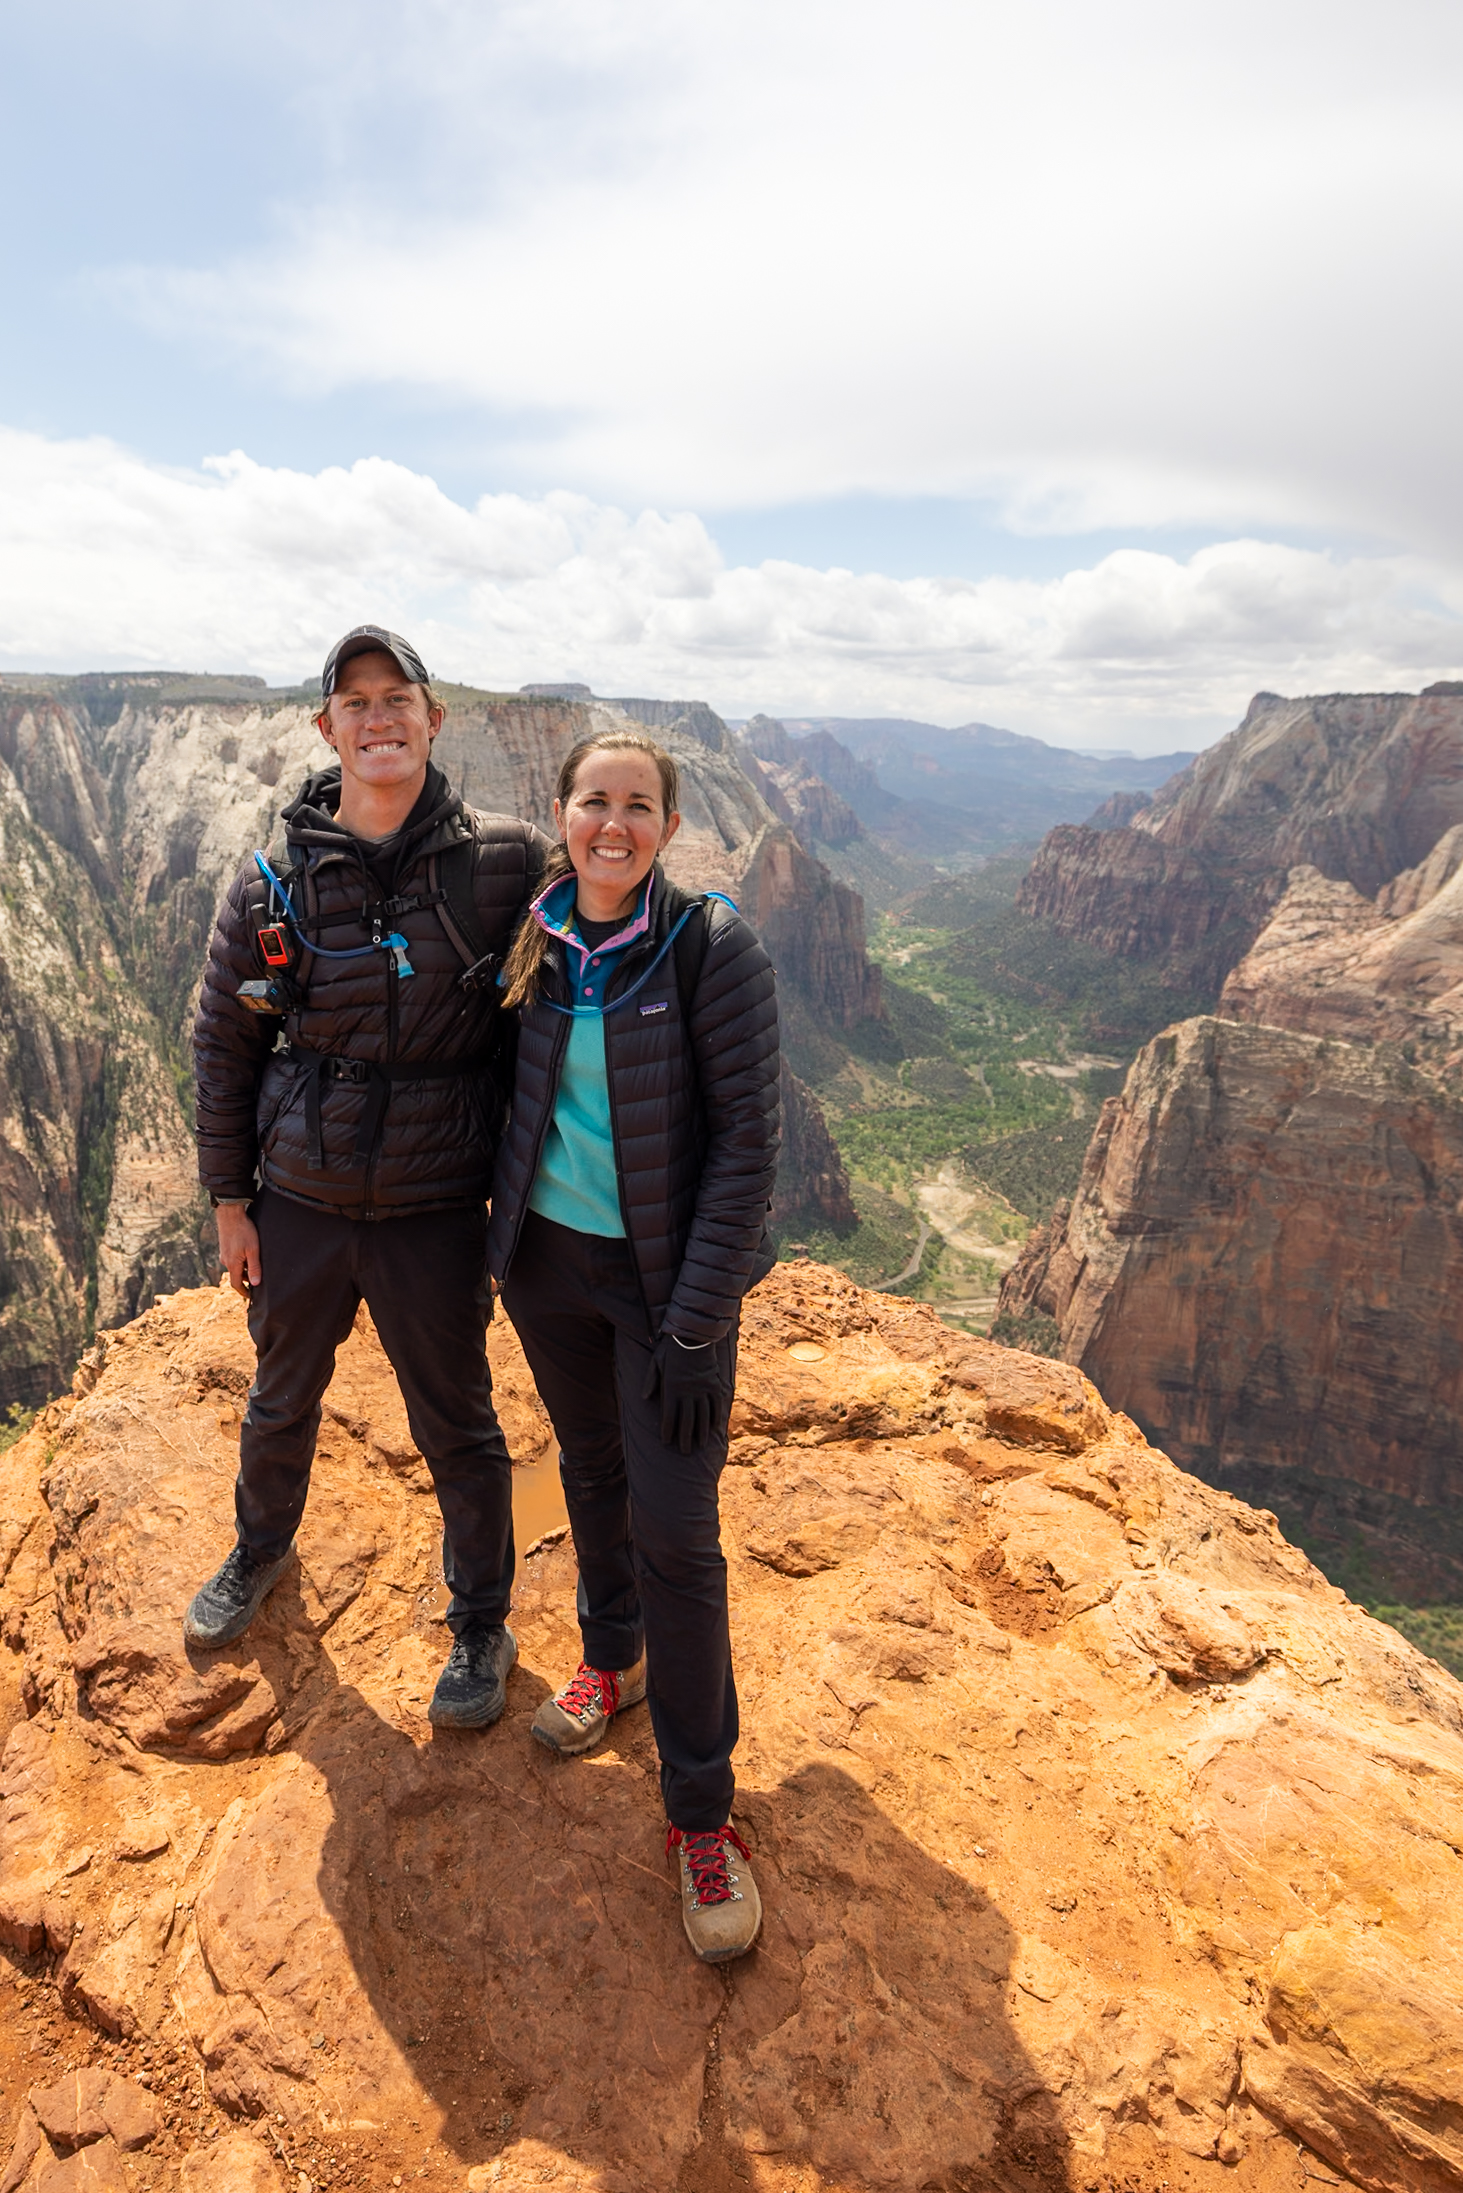
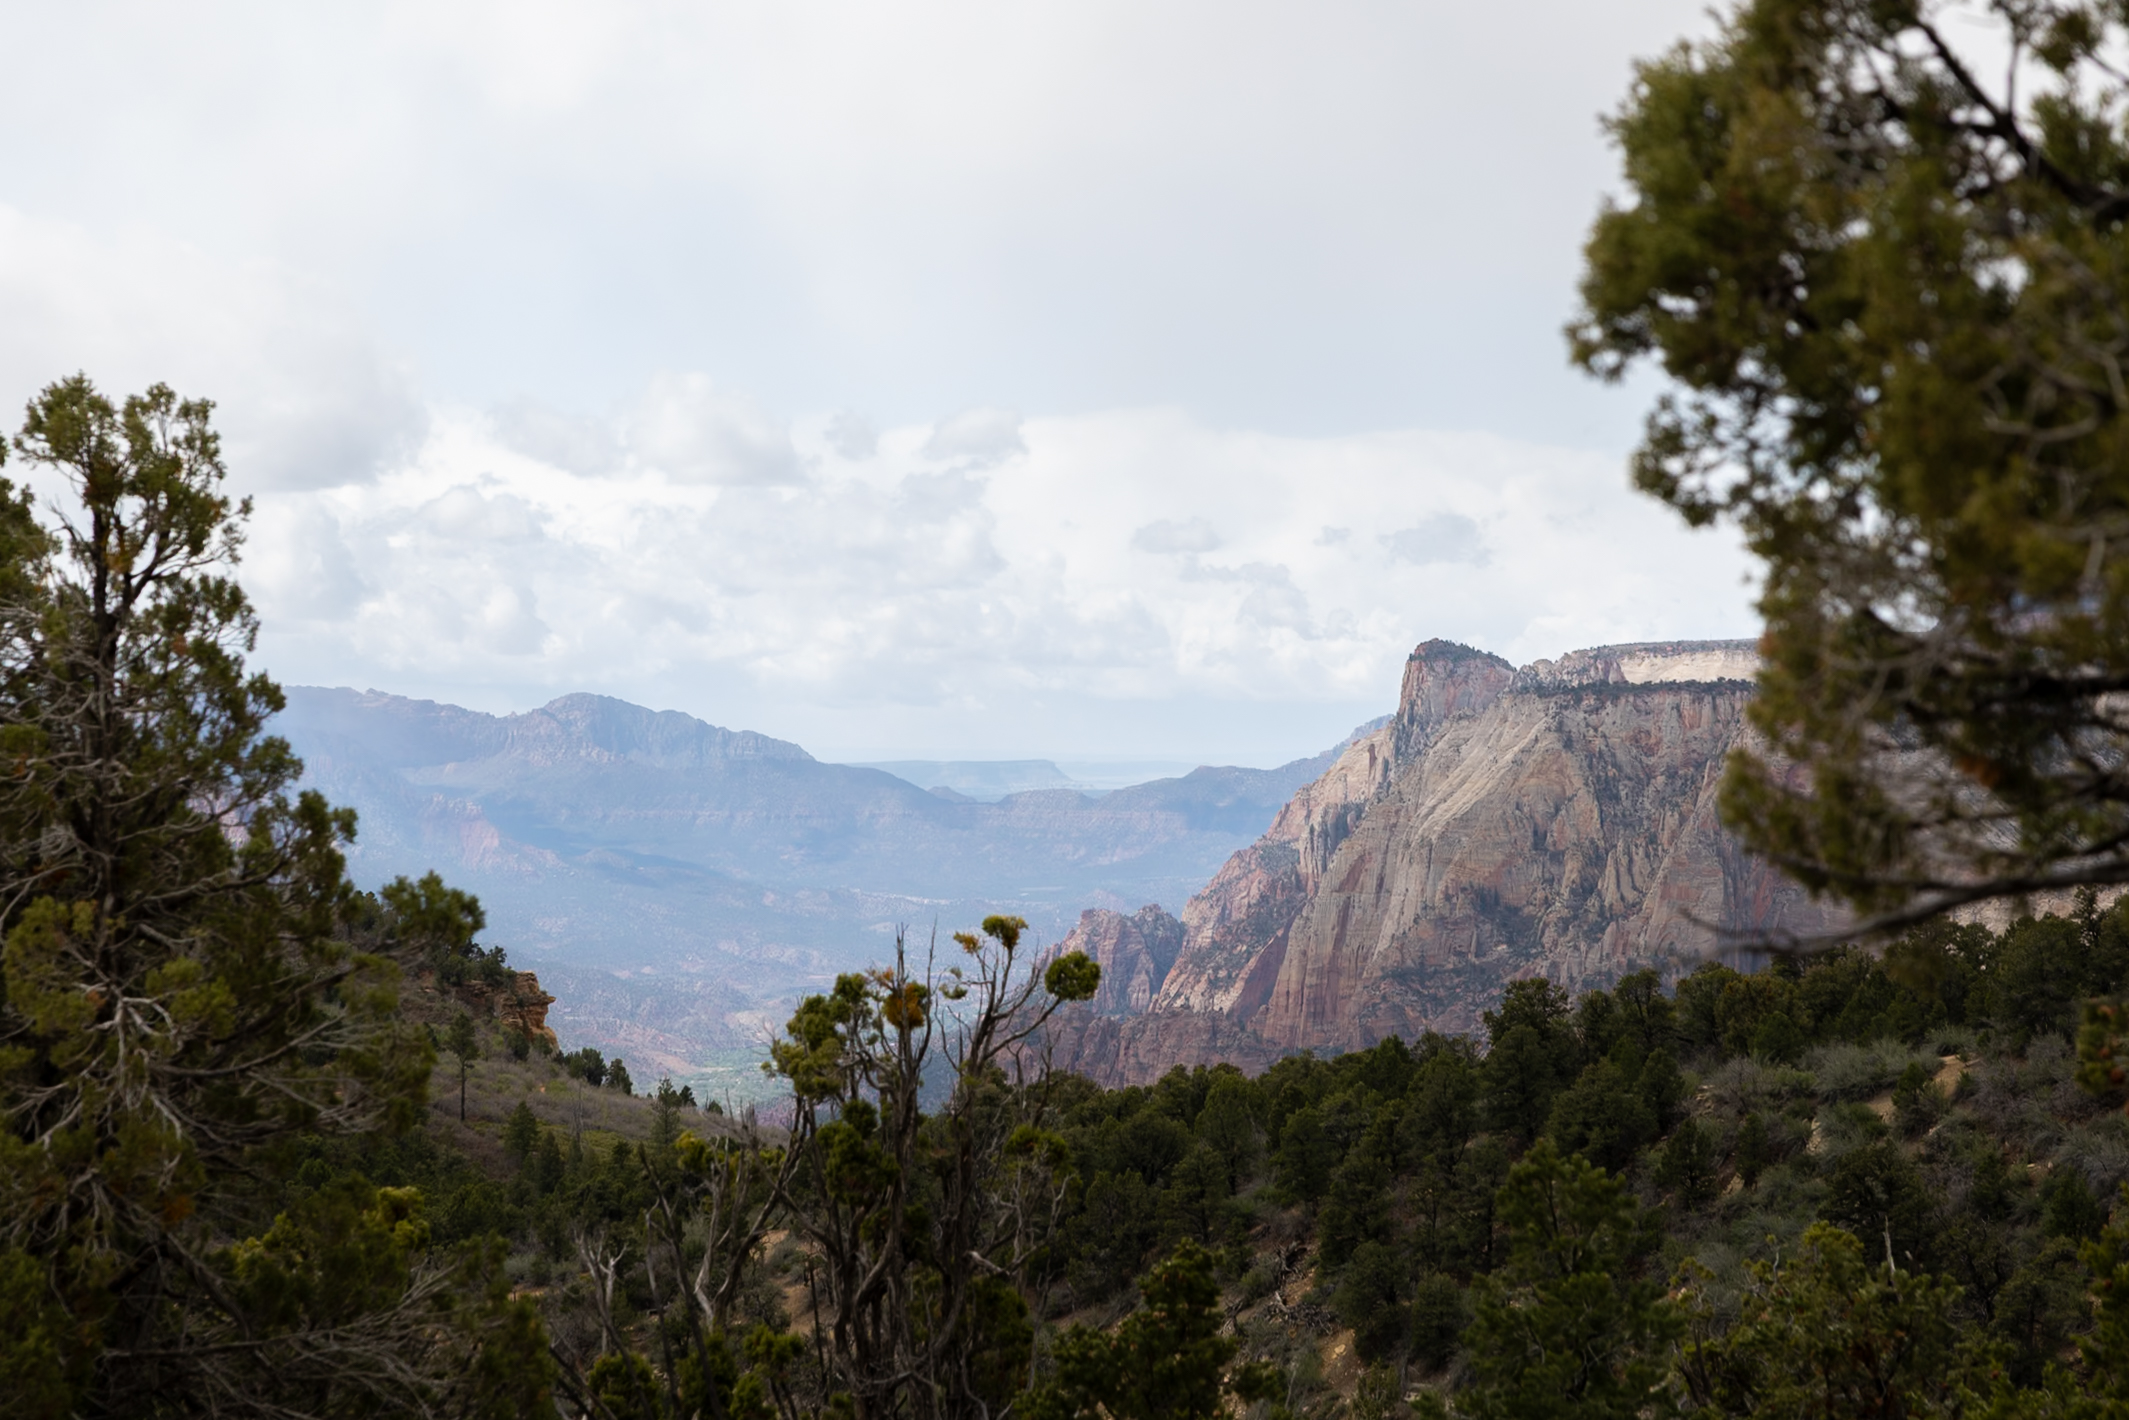
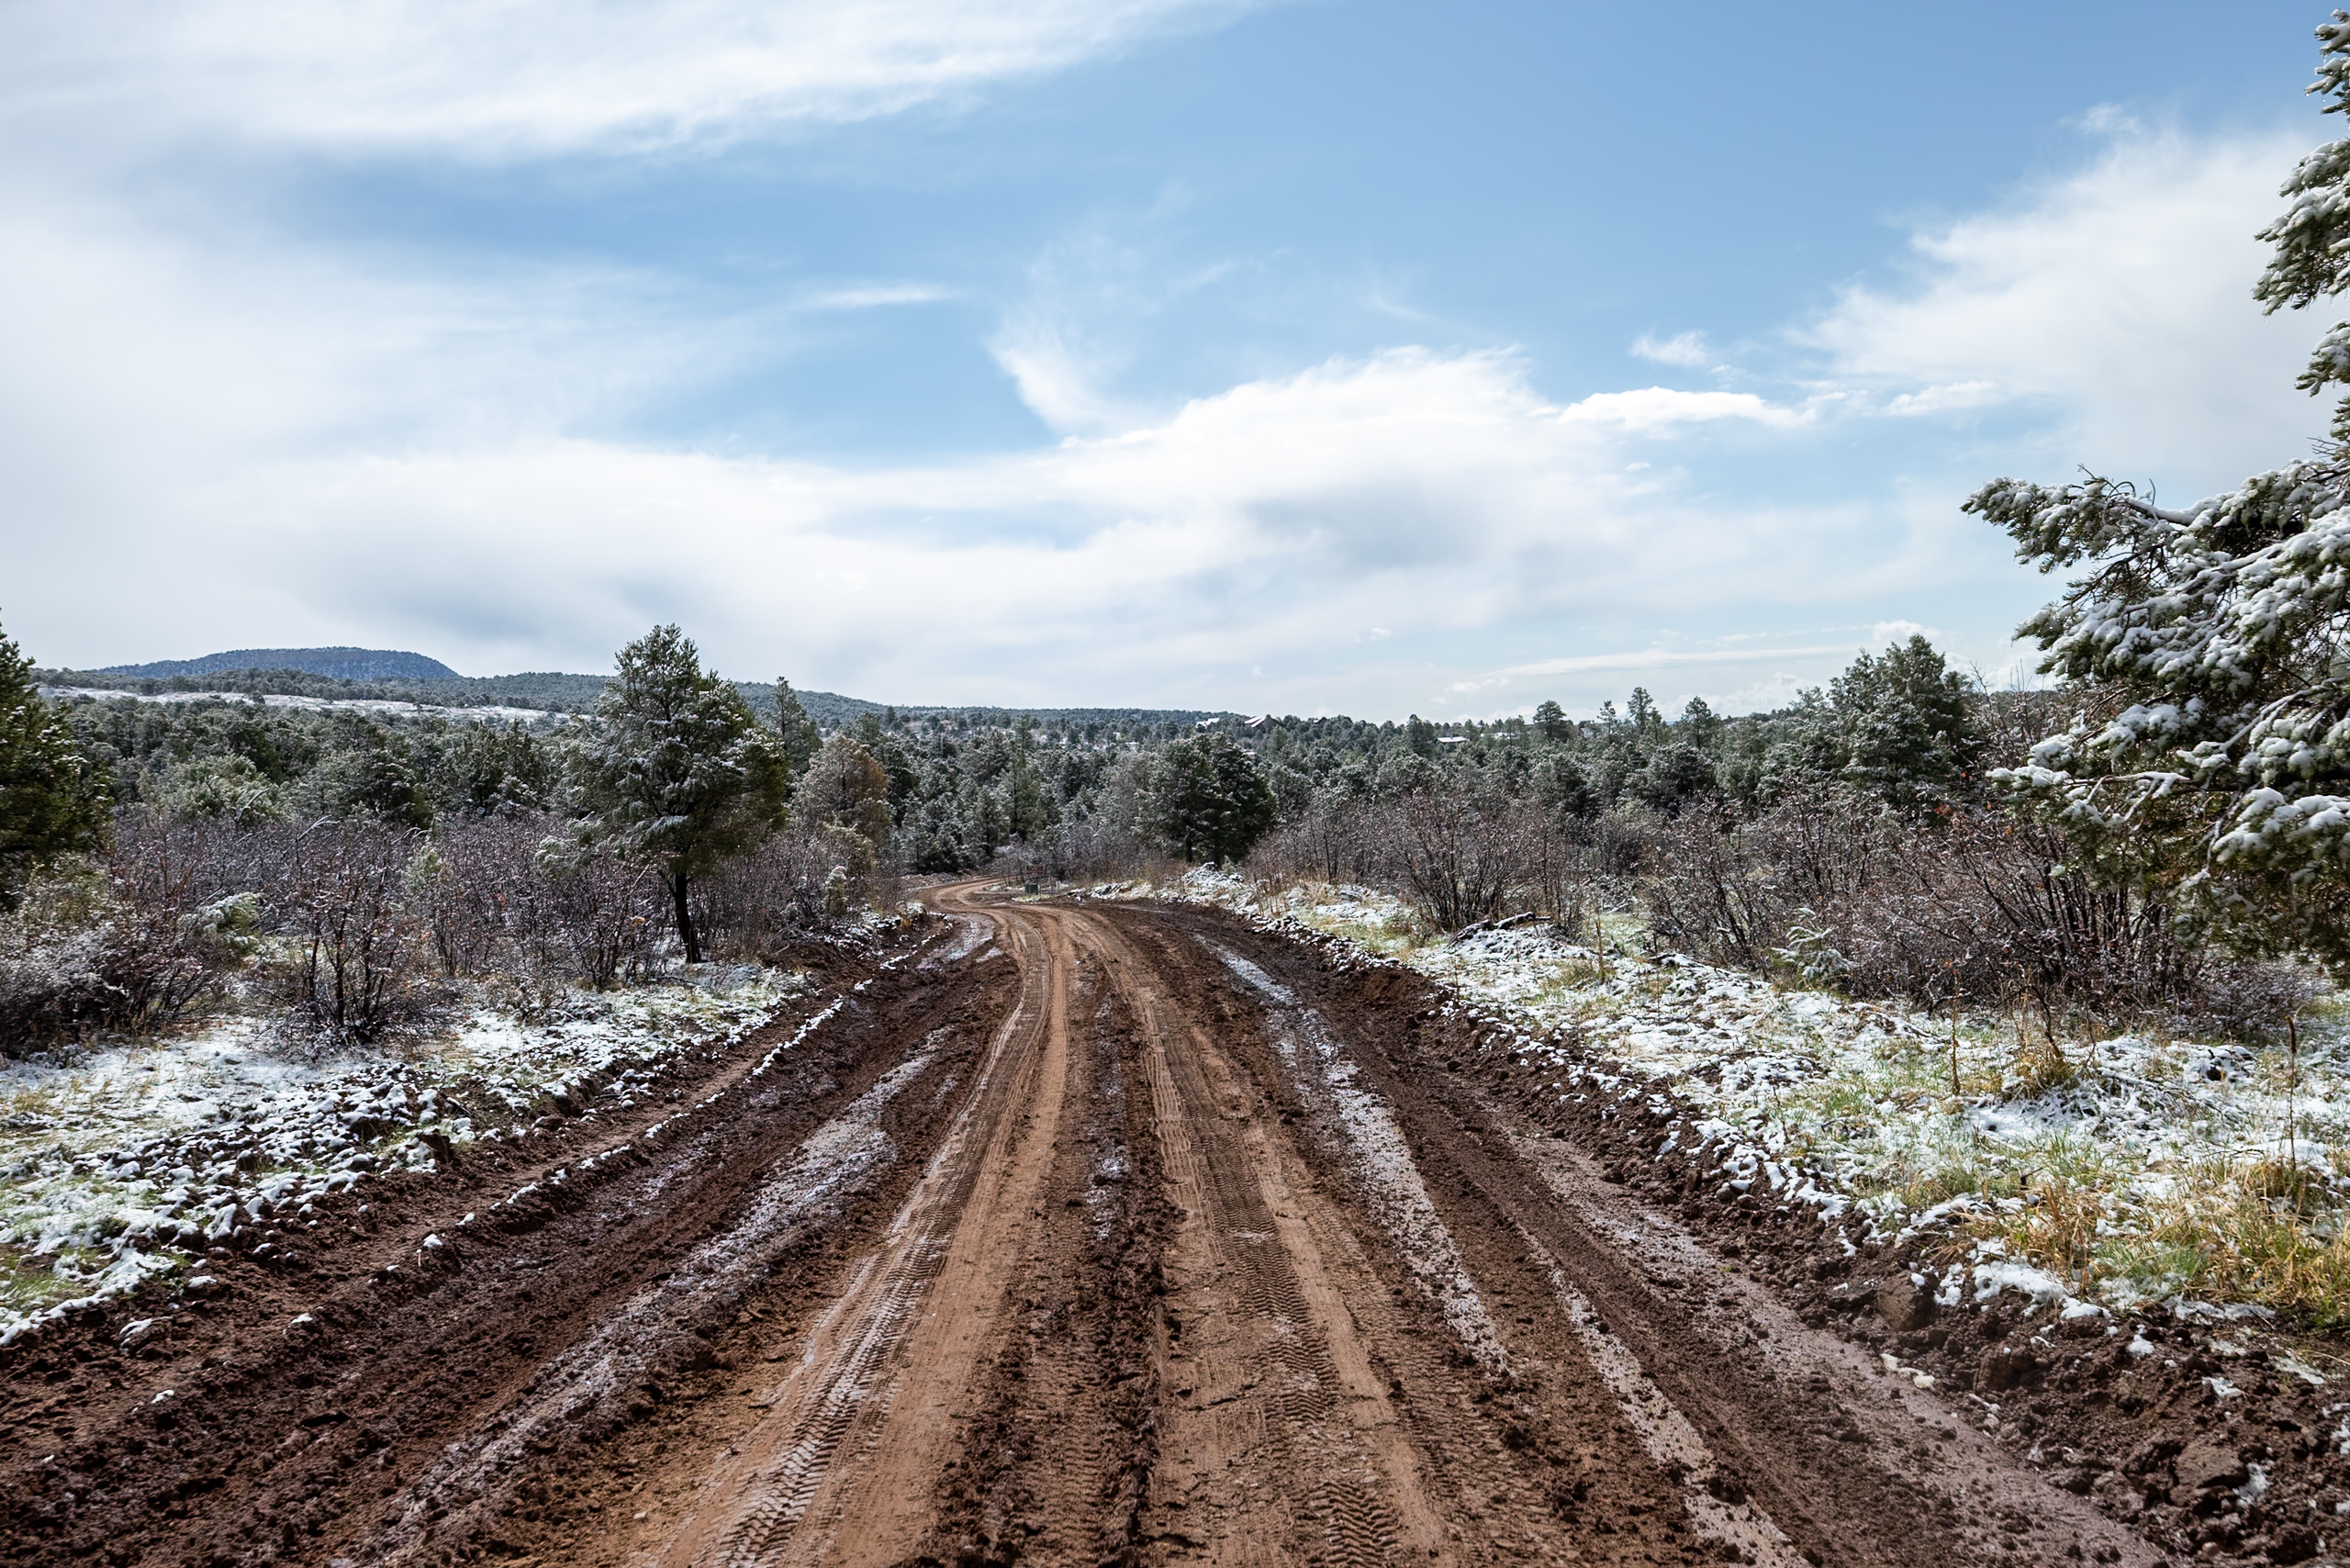
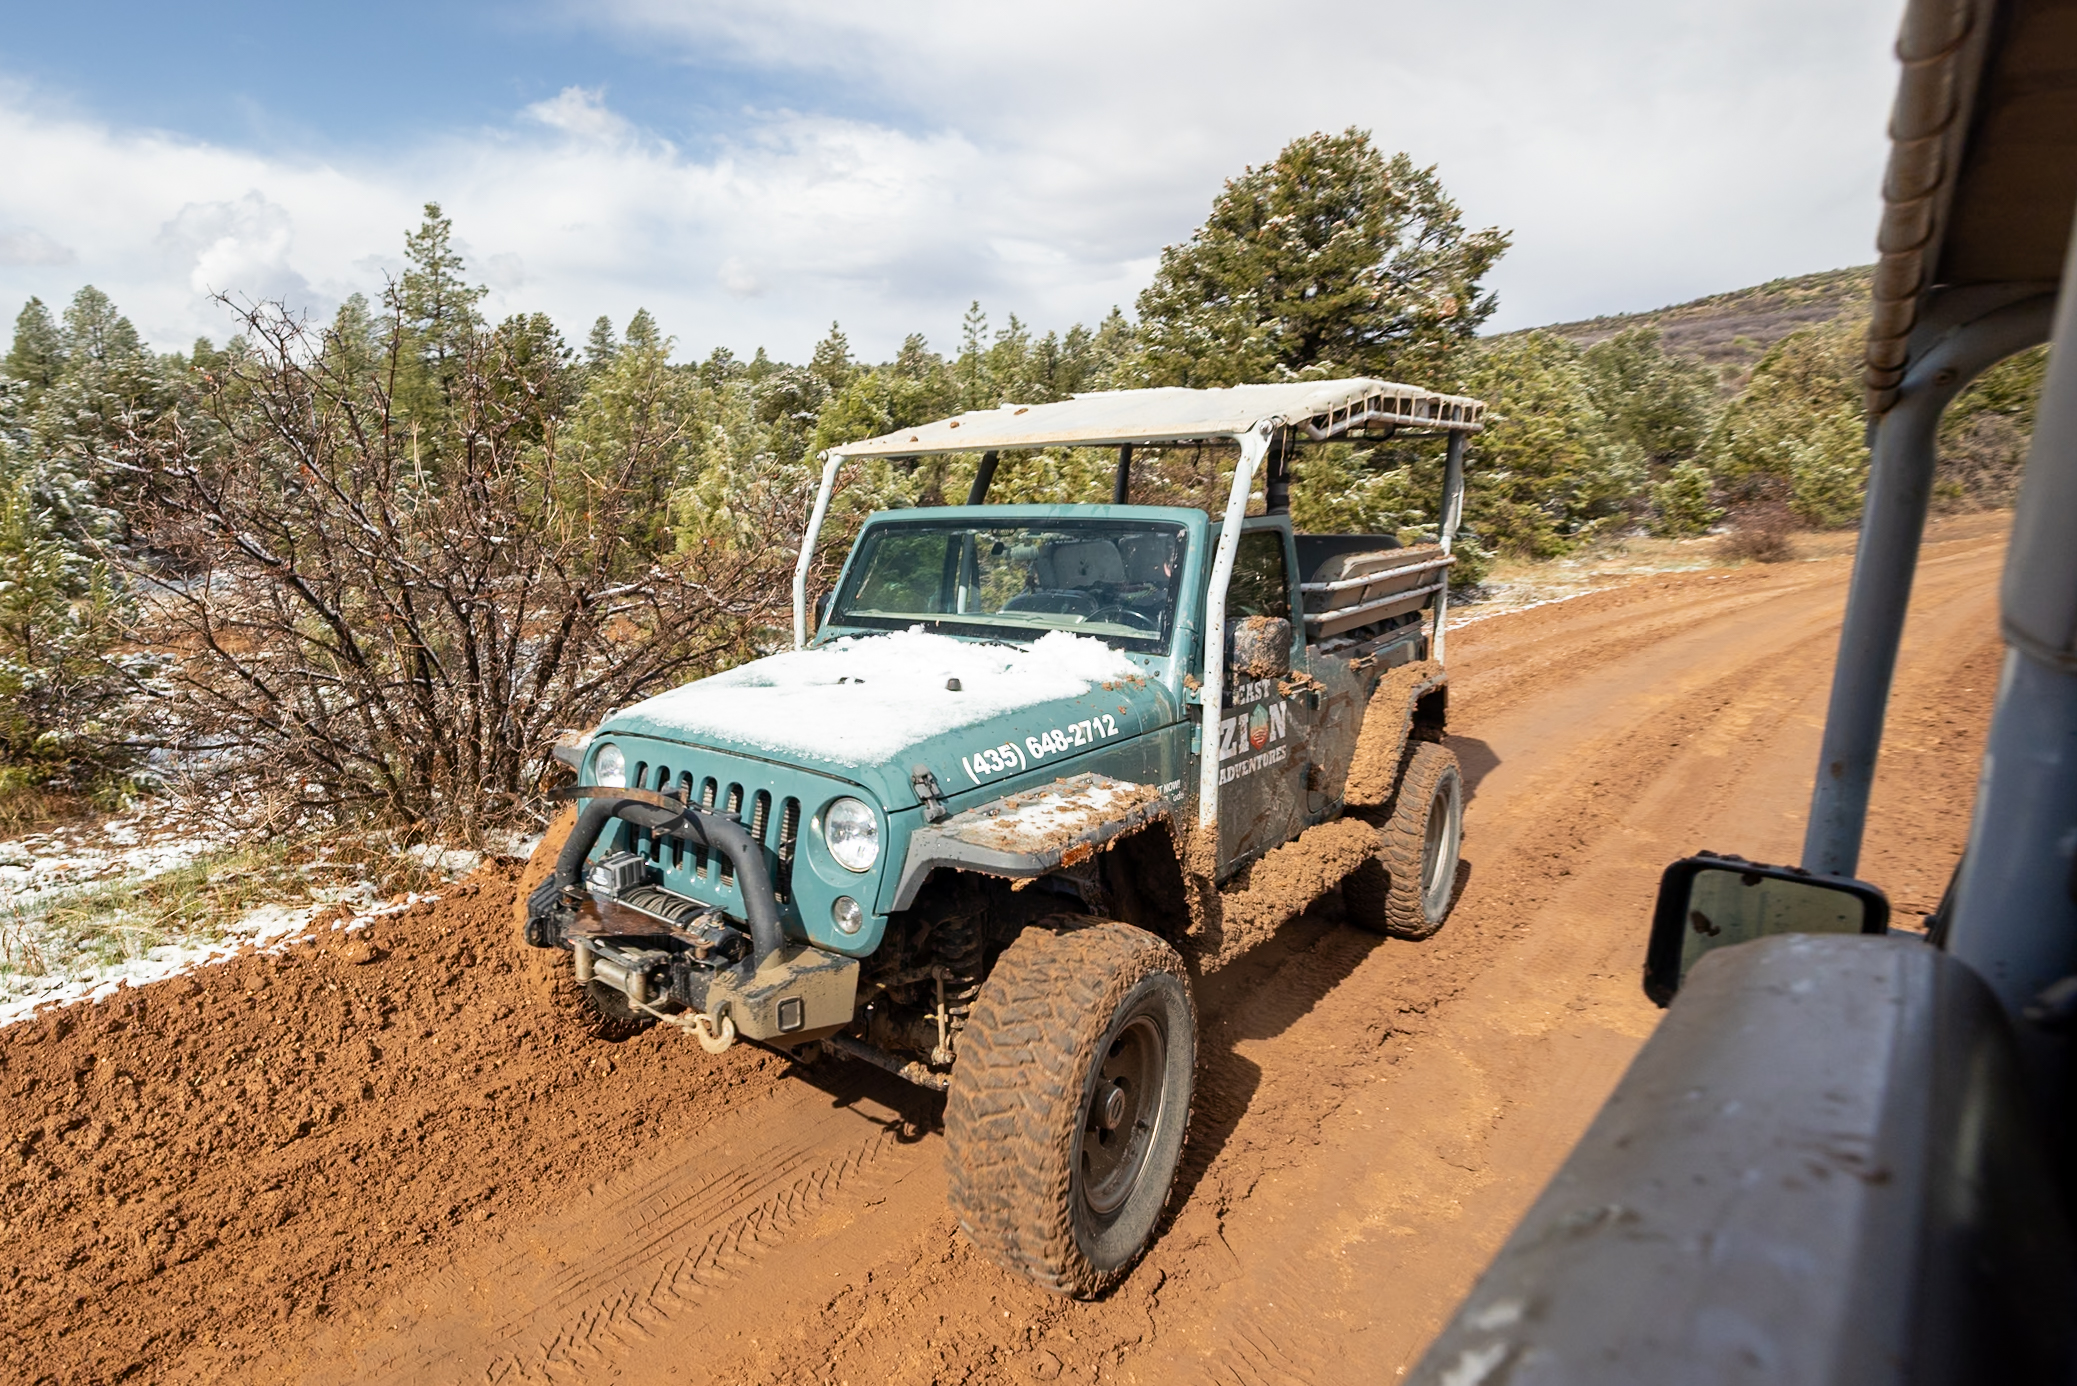
You can walk about a half mile from Zion Ponderosa or take their $7.50 shuttle (which we did, since the dirt road was muddy after recent rain). With its minimal elevation gain and maximum reward, this is one of the best value hikes in the park—just don’t forget UV protective clothing, sunscreen, and a wide-brimmed hat as it’s very exposed!
Distance: 7 miles / 11.3 km
Difficulty: Moderate
Estimated Time: 3-4 hours
Permit Required: No
6. Emerald Pools Trail
The Emerald Pools Trail is a super fun 90-minute hike located by Shuttle Stop 6 that leads you to three scenic spots—Lower, Middle, and Upper Emerald Pools—each with its own unique views. We loved how the route didn’t have one destination, with each pool serving as a natural stopping point.
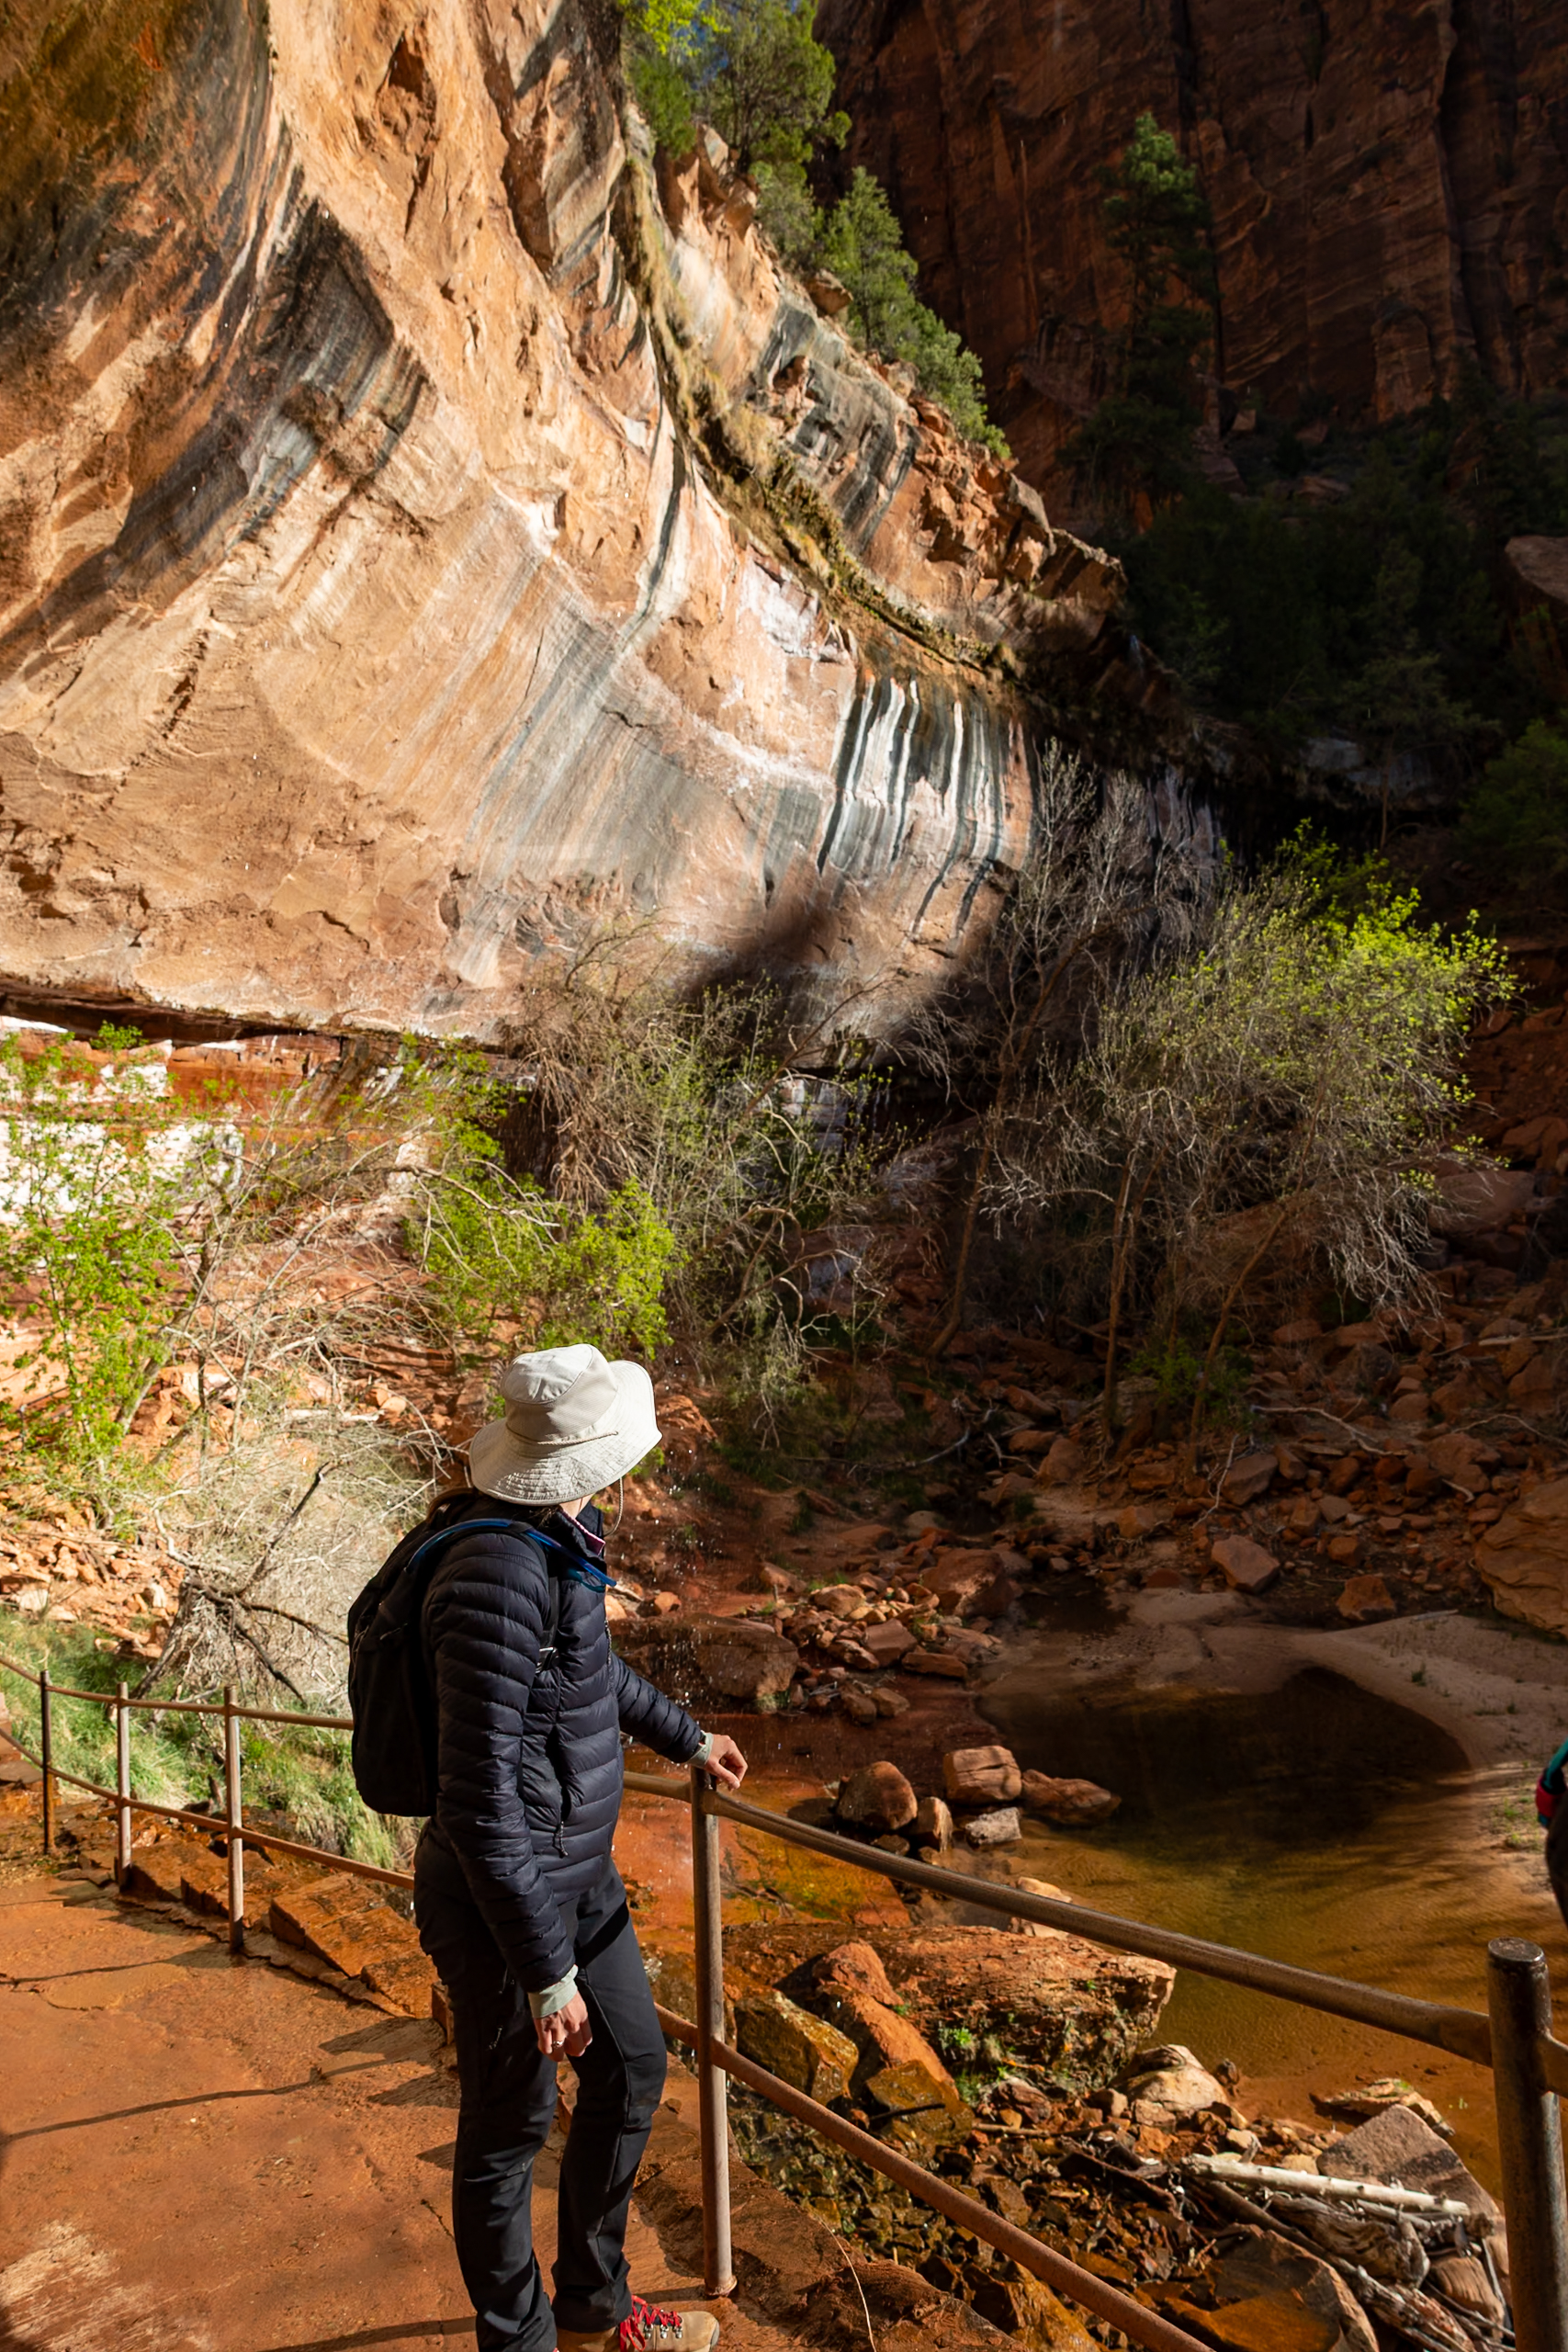
It’s a relatively easy hike, though expect some rocky and uneven terrain as you go higher, bumping it up to a moderate-level hike overall. We started early to beat the crowds, and we’re glad we did—on our way back, the trail was so busy that hikers were waiting in line to pass through narrow sections.
Distance: 2.98 miles / 4.8 km
Difficulty: Moderate
Estimated Time: 1.5 hours
Permit Required: No
7. Watchman Trail
The Watchman Trail starts right at the Visitor Center, so no shuttle is required. The hike involves a steady climb to a panoramic viewpoint overlooking Zion Canyon and the iconic Watchman peak. This hike transports you from the lush green areas surrounding the river to the arid, sandy areas of the desert. It was super cool to notice the flora gradually change from soft flowers to prickly cacti!
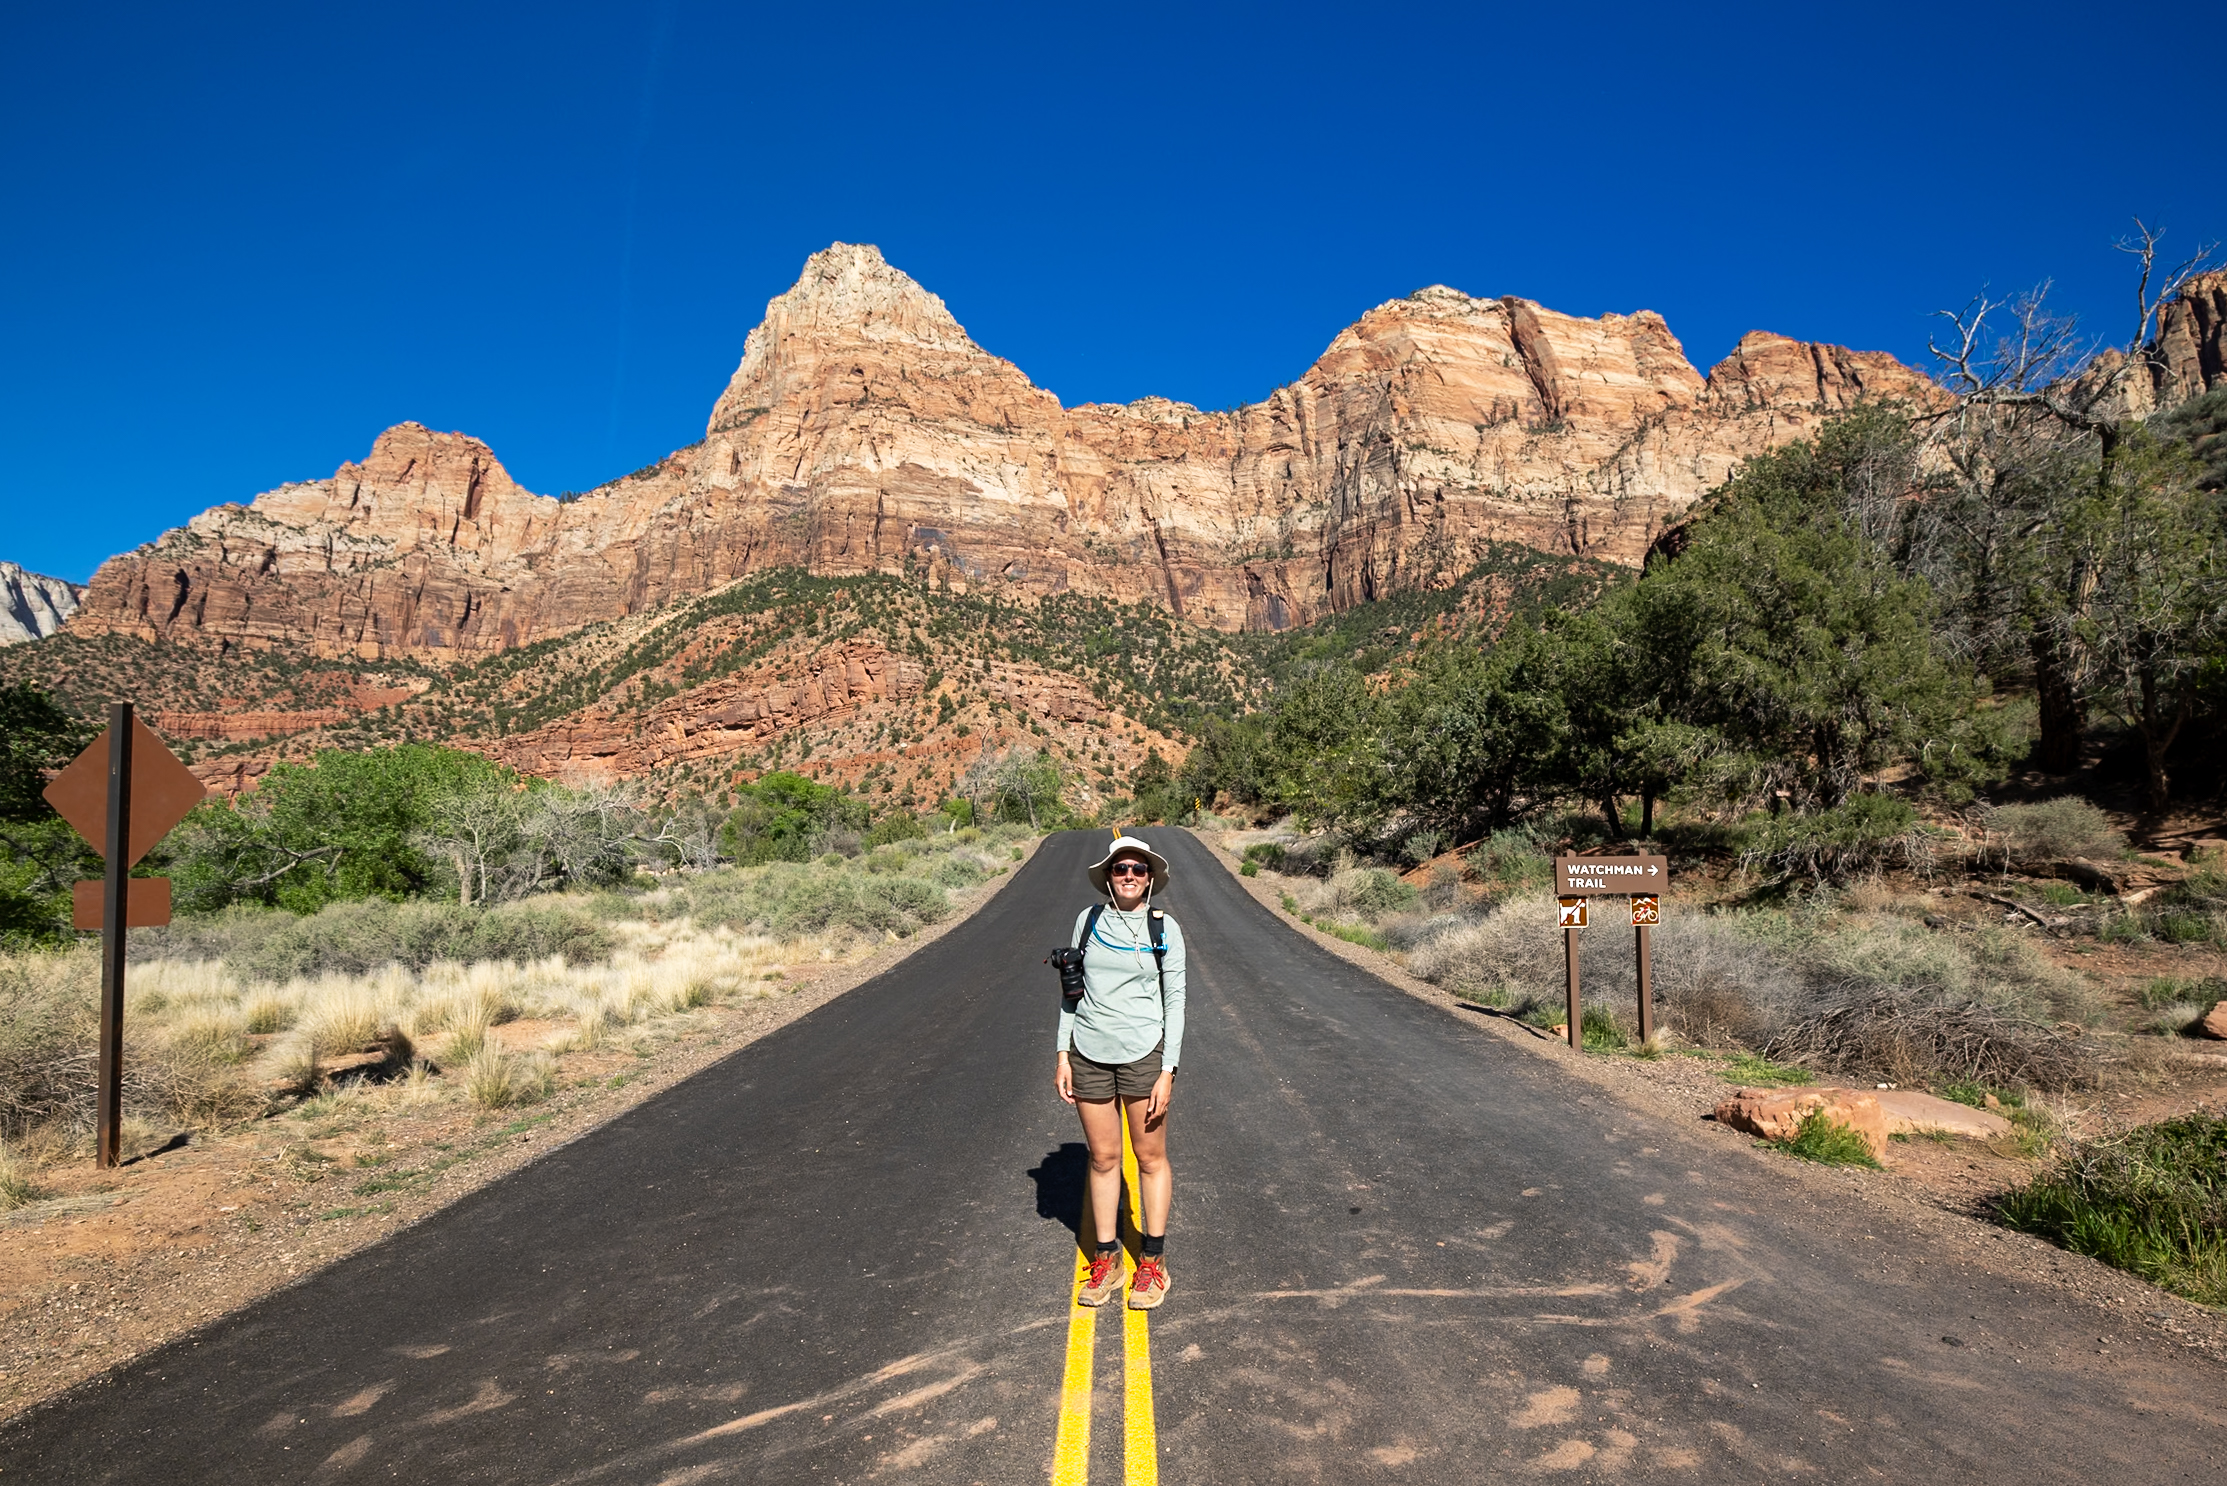
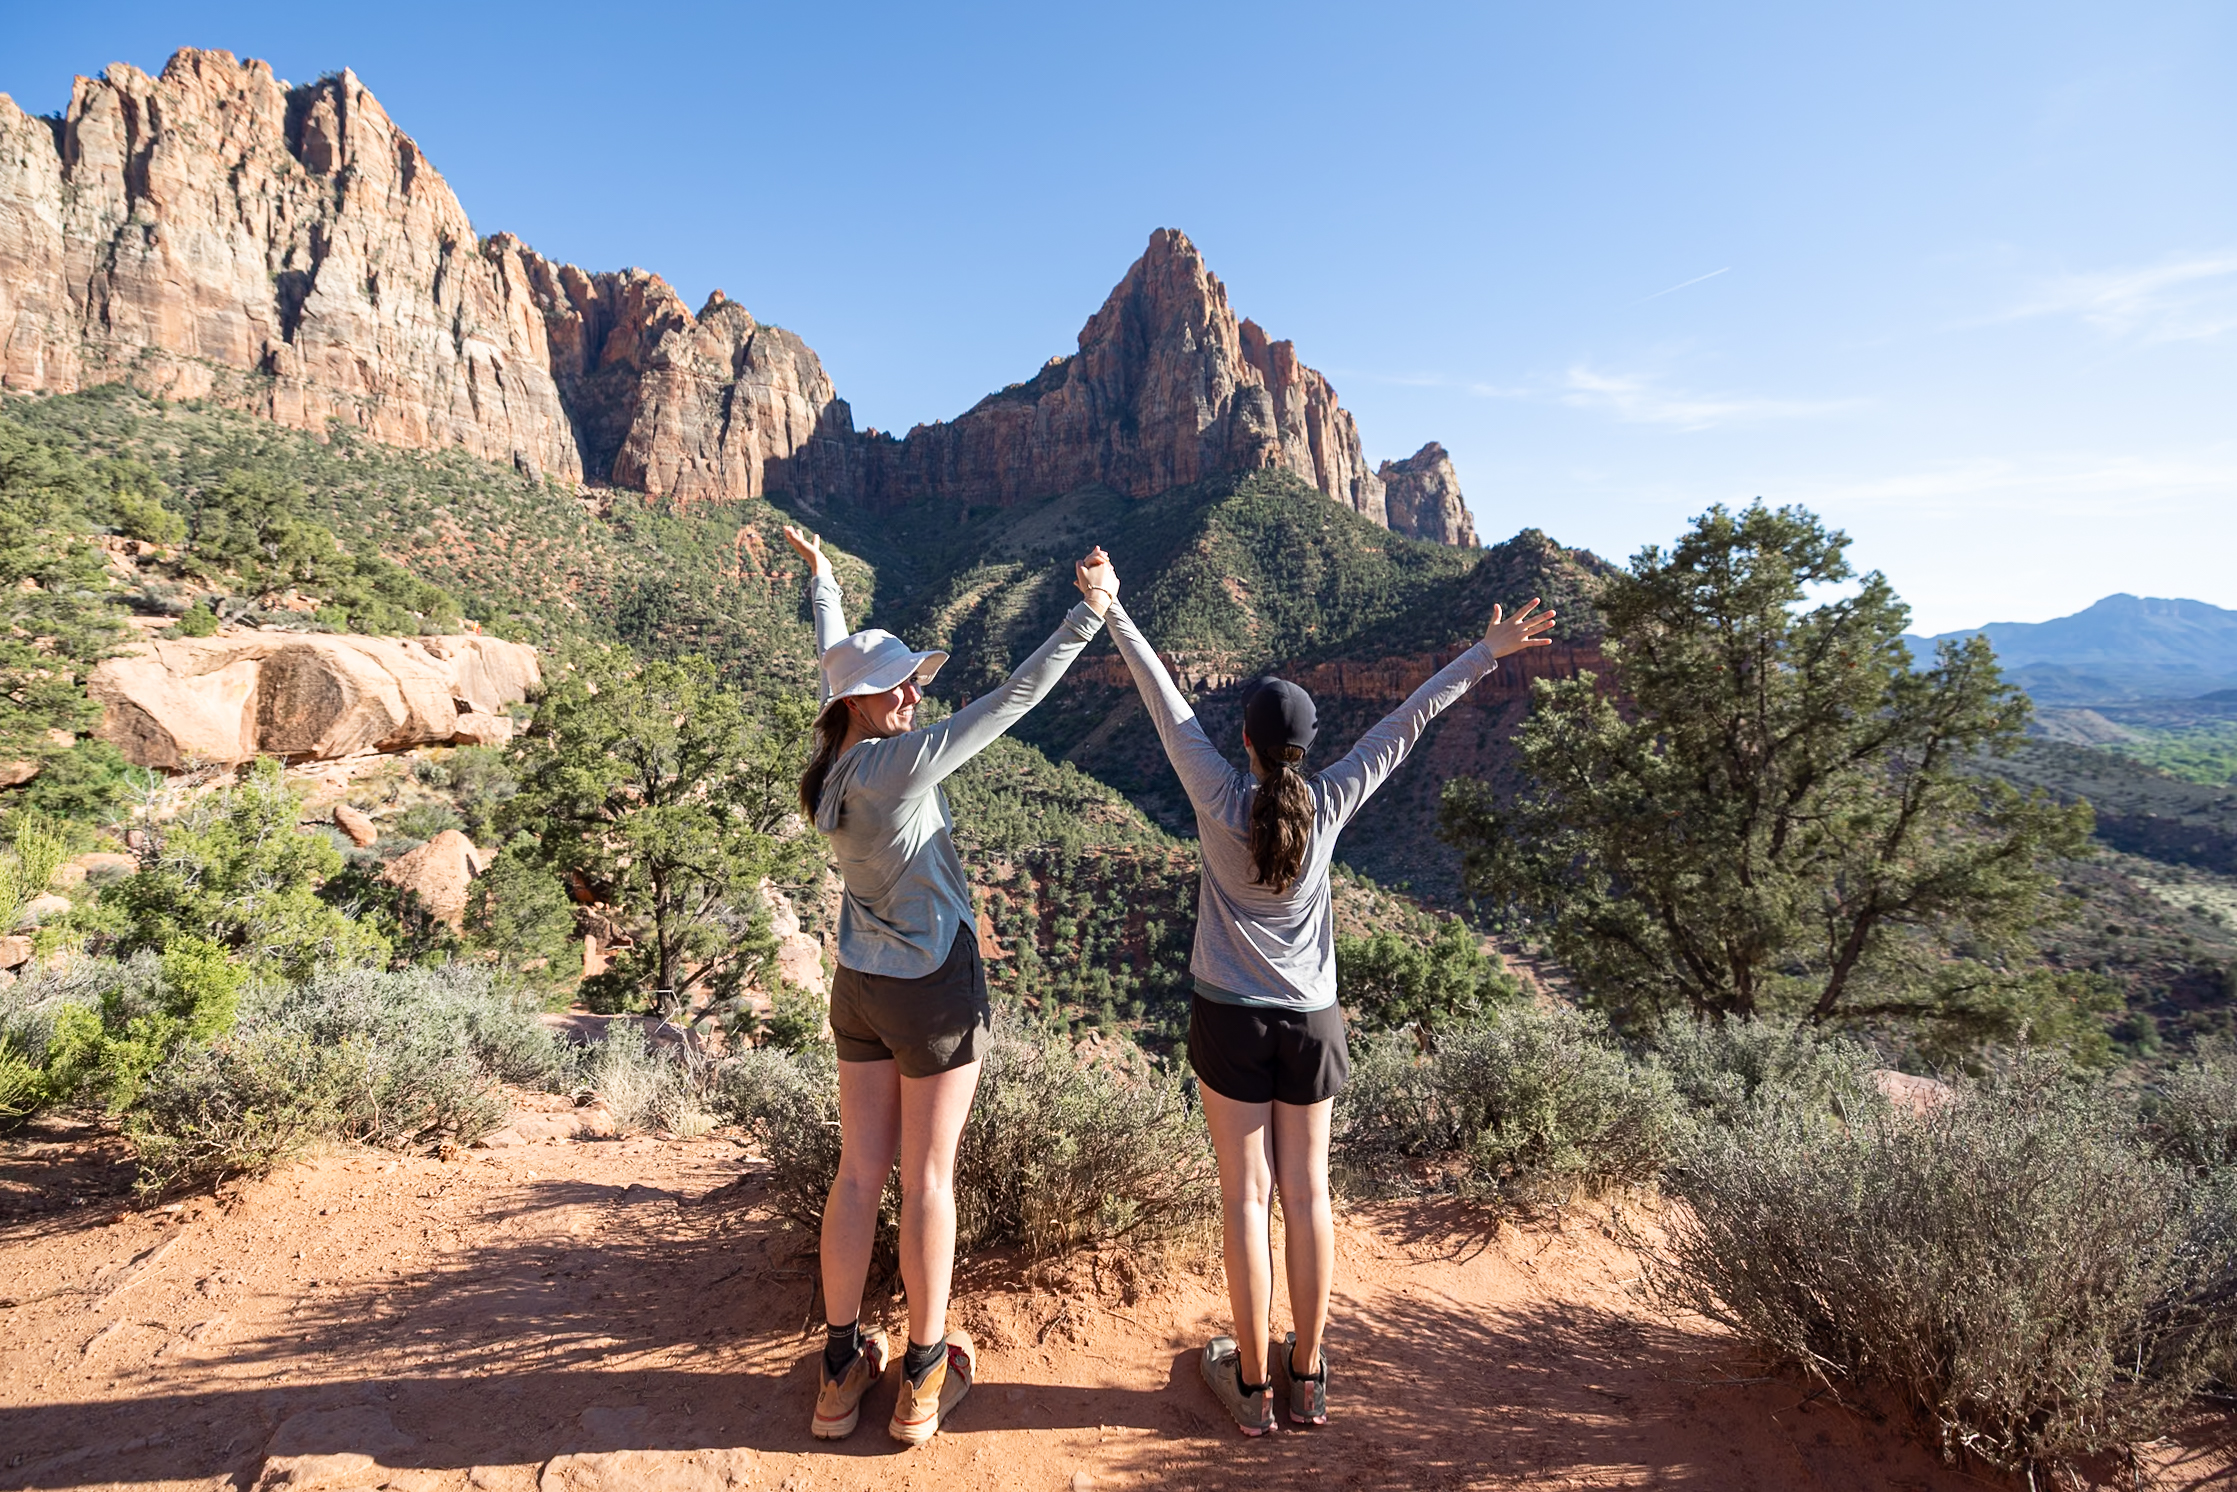
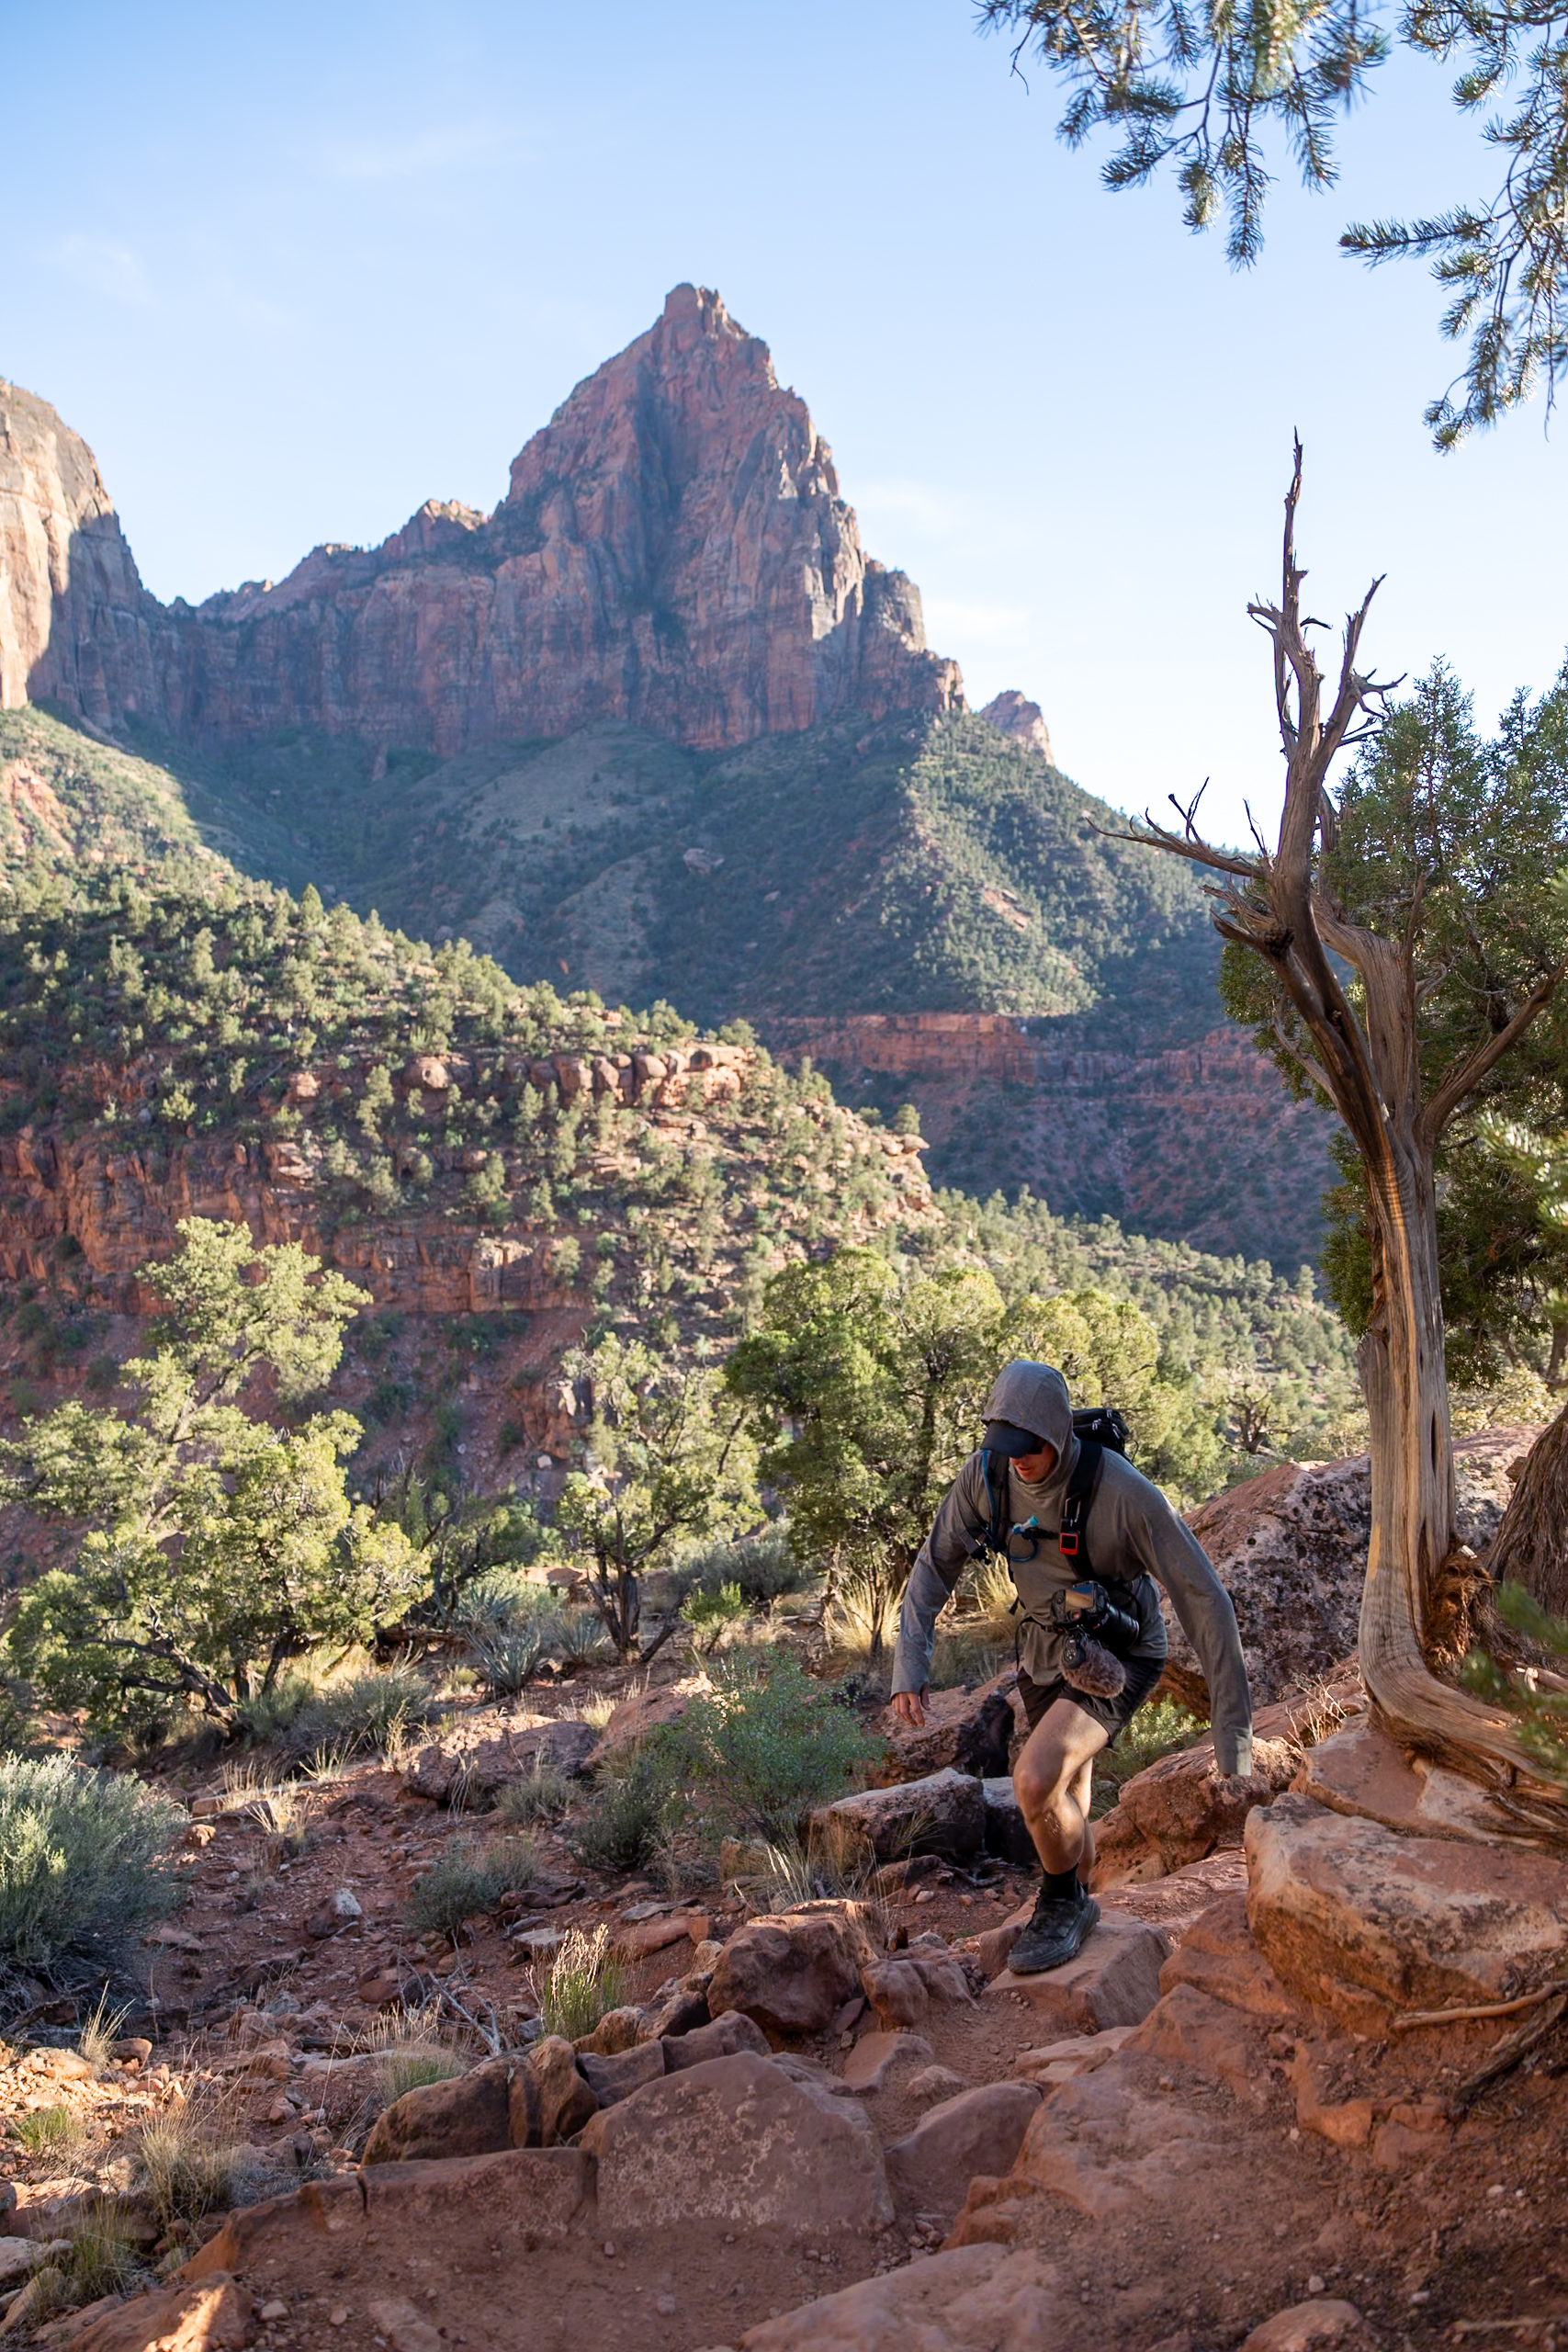
The trail is quite sun-exposed, so bring sunscreen, UV-protective clothing, and a wide-brimmed hat. At the top, you’ll find plenty of spots to sit, enjoy a snack, and soak in the sweeping views. There’s also an optional loop at the summit, but we found the main overlook itself to be the real highlight! Overall, this trail is not too difficult, but does require a bit of effort.
Distance: 3.2 miles / 5.1 km
Difficulty: Moderate
Estimated Time: 1.5 hours
Permit Required: No
With offline maps, wrong-turn alerts, and extra planning features, make the most of every outside adventure with AllTrails Plus. Get 7 days of AllTrails Plus for free!
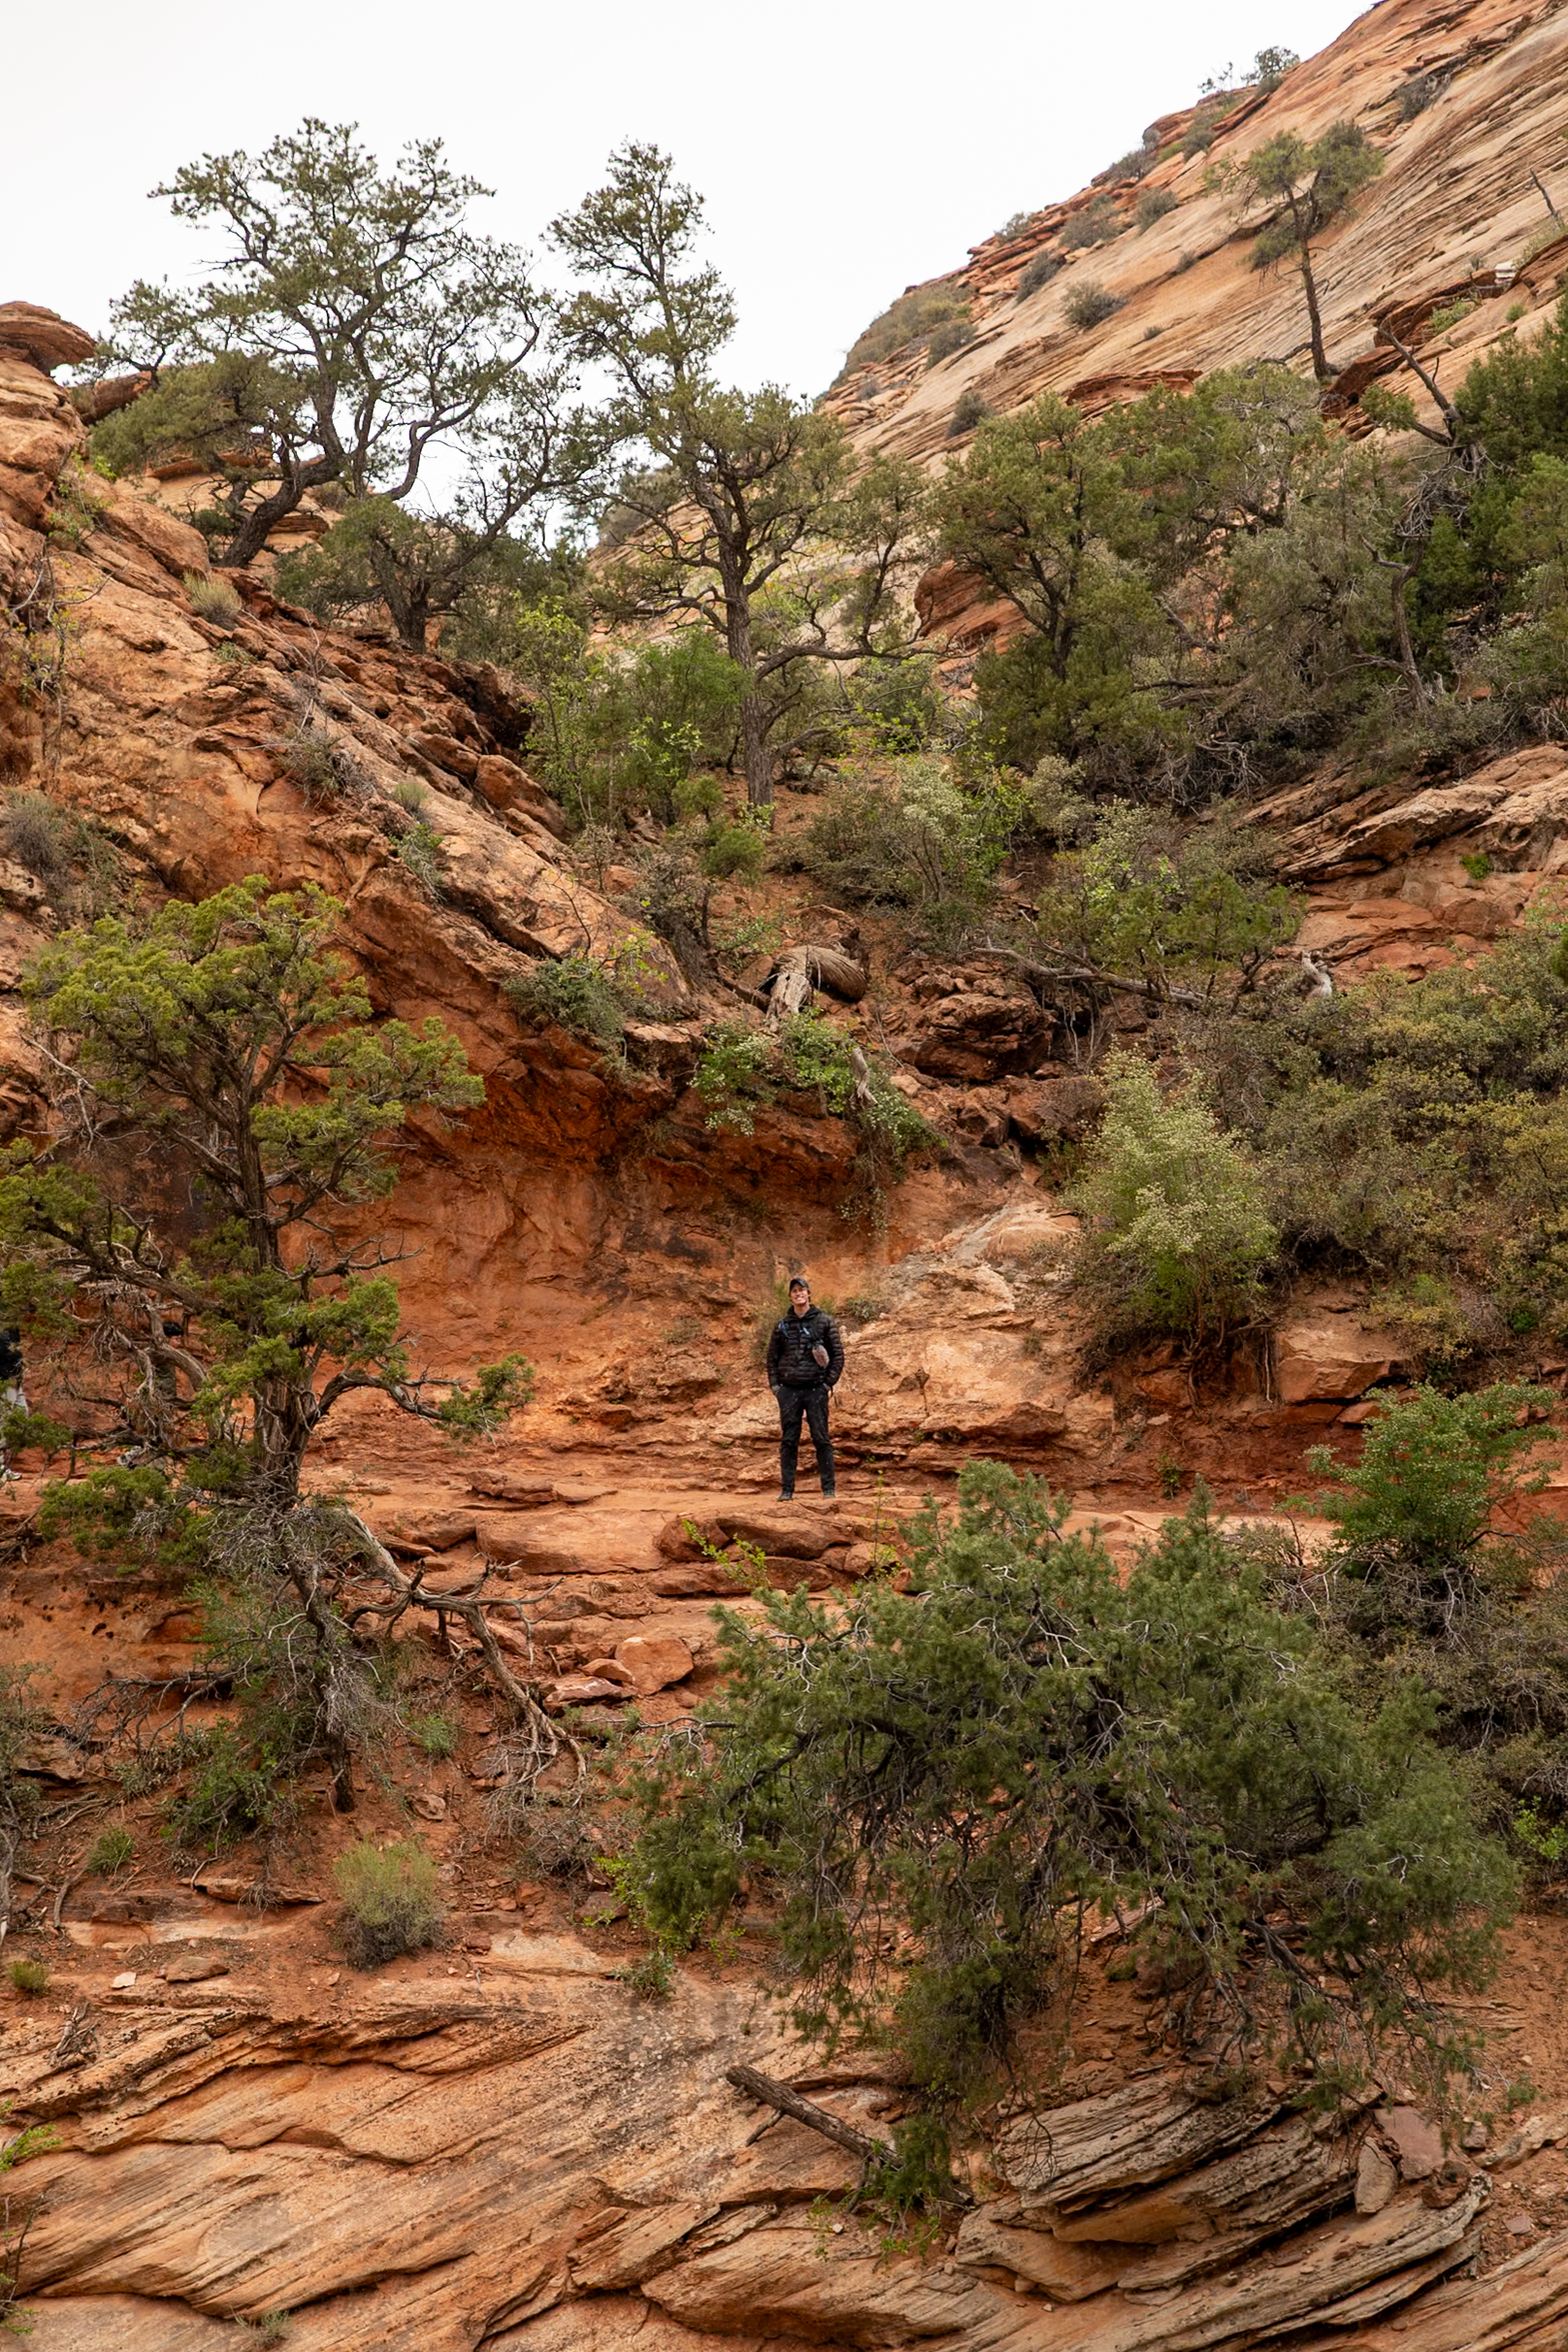
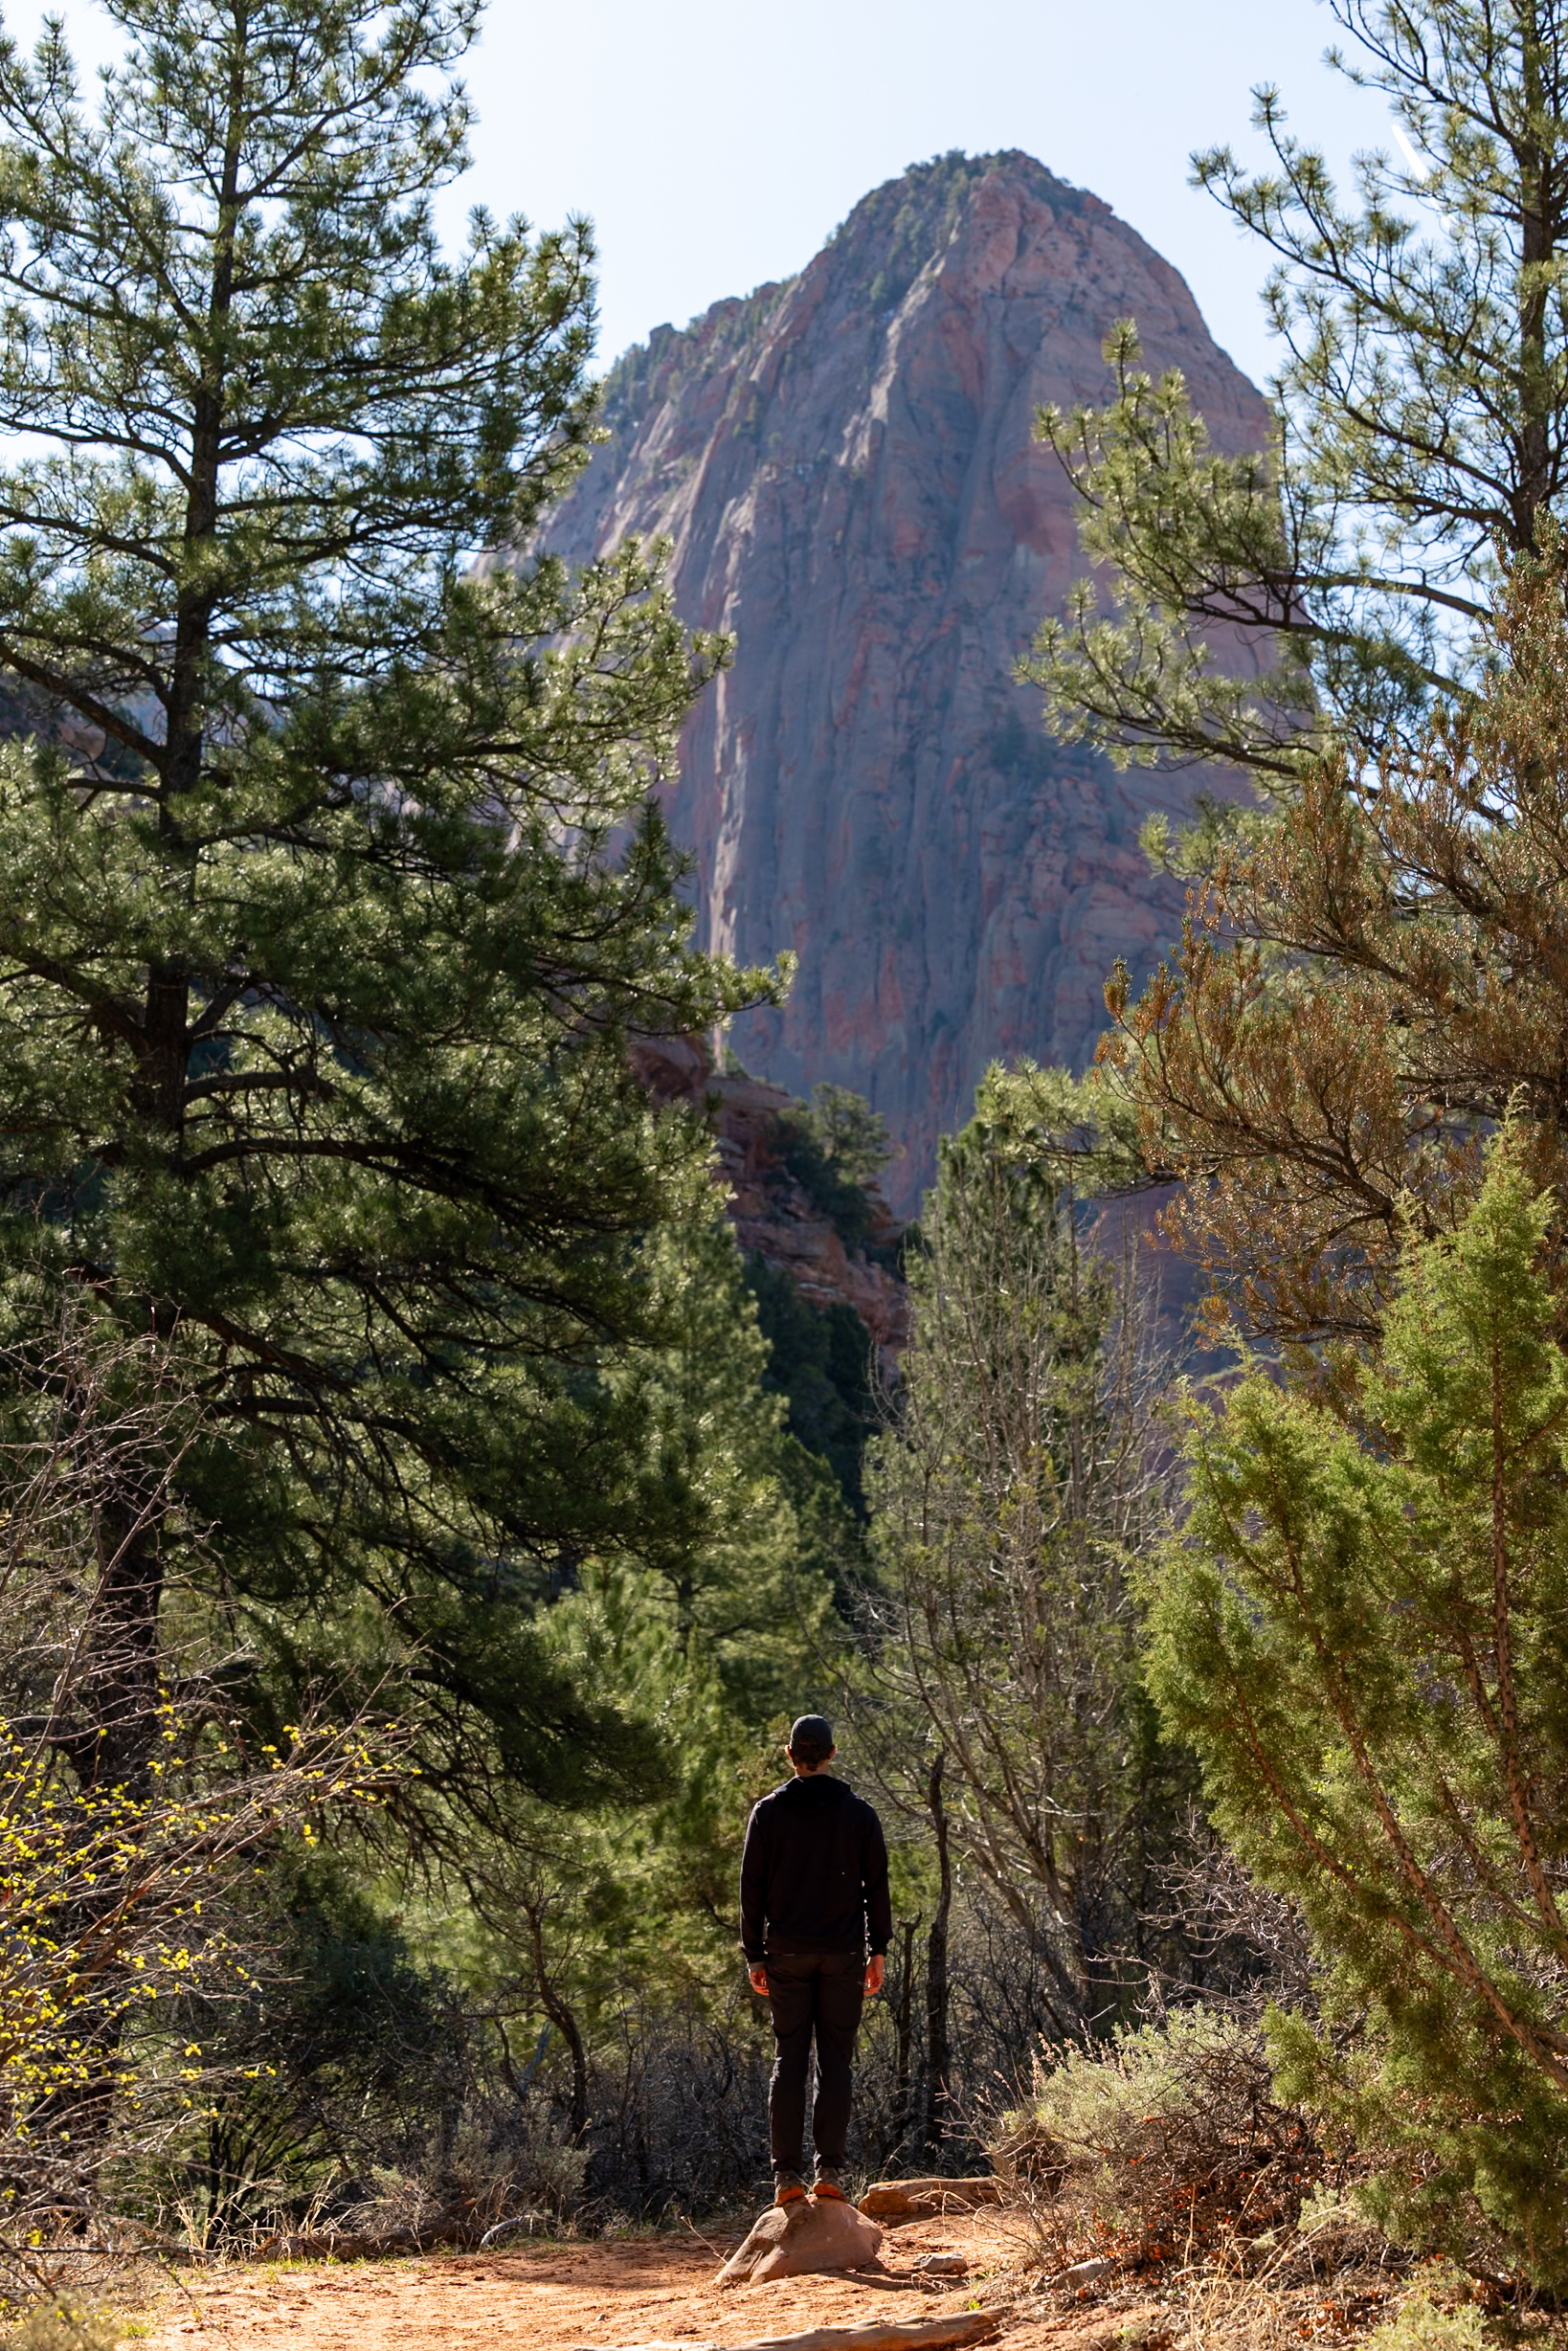
8. Northgate Peaks via Kolob Terrace Trail
The Northgate Peaks Trail, located in the quieter (and least visited) Kolob Terrace section of Zion, offers a peaceful escape with incredible views. The trail is mostly flat and easy for the first two-thirds, then climbs steeply up East Northgate Peak over exposed sandstone. While the rock provides decent grip, sturdy hiking boots or trail runners are quite helpful.

Based on AllTrails reviews, we opted not to continue to West Northgate Peak and just hiked East Northgate Peak. When we got to the top of East Northgate Peak, the views were incredible—we couldn’t imagine them being significantly better from West Northgate Peak.
🗺️ Hiking Tip: As you near the summit, the trail transitions from dirt to open sandstone and can be hard to follow. Use the AllTrails map for guidance and watch for subtle markers or footprints left by previous hikers.
Distance: 5.7 miles / 9.2 km
Difficulty: Moderate
Estimated Time: 2-3 hours
Permit Required: No
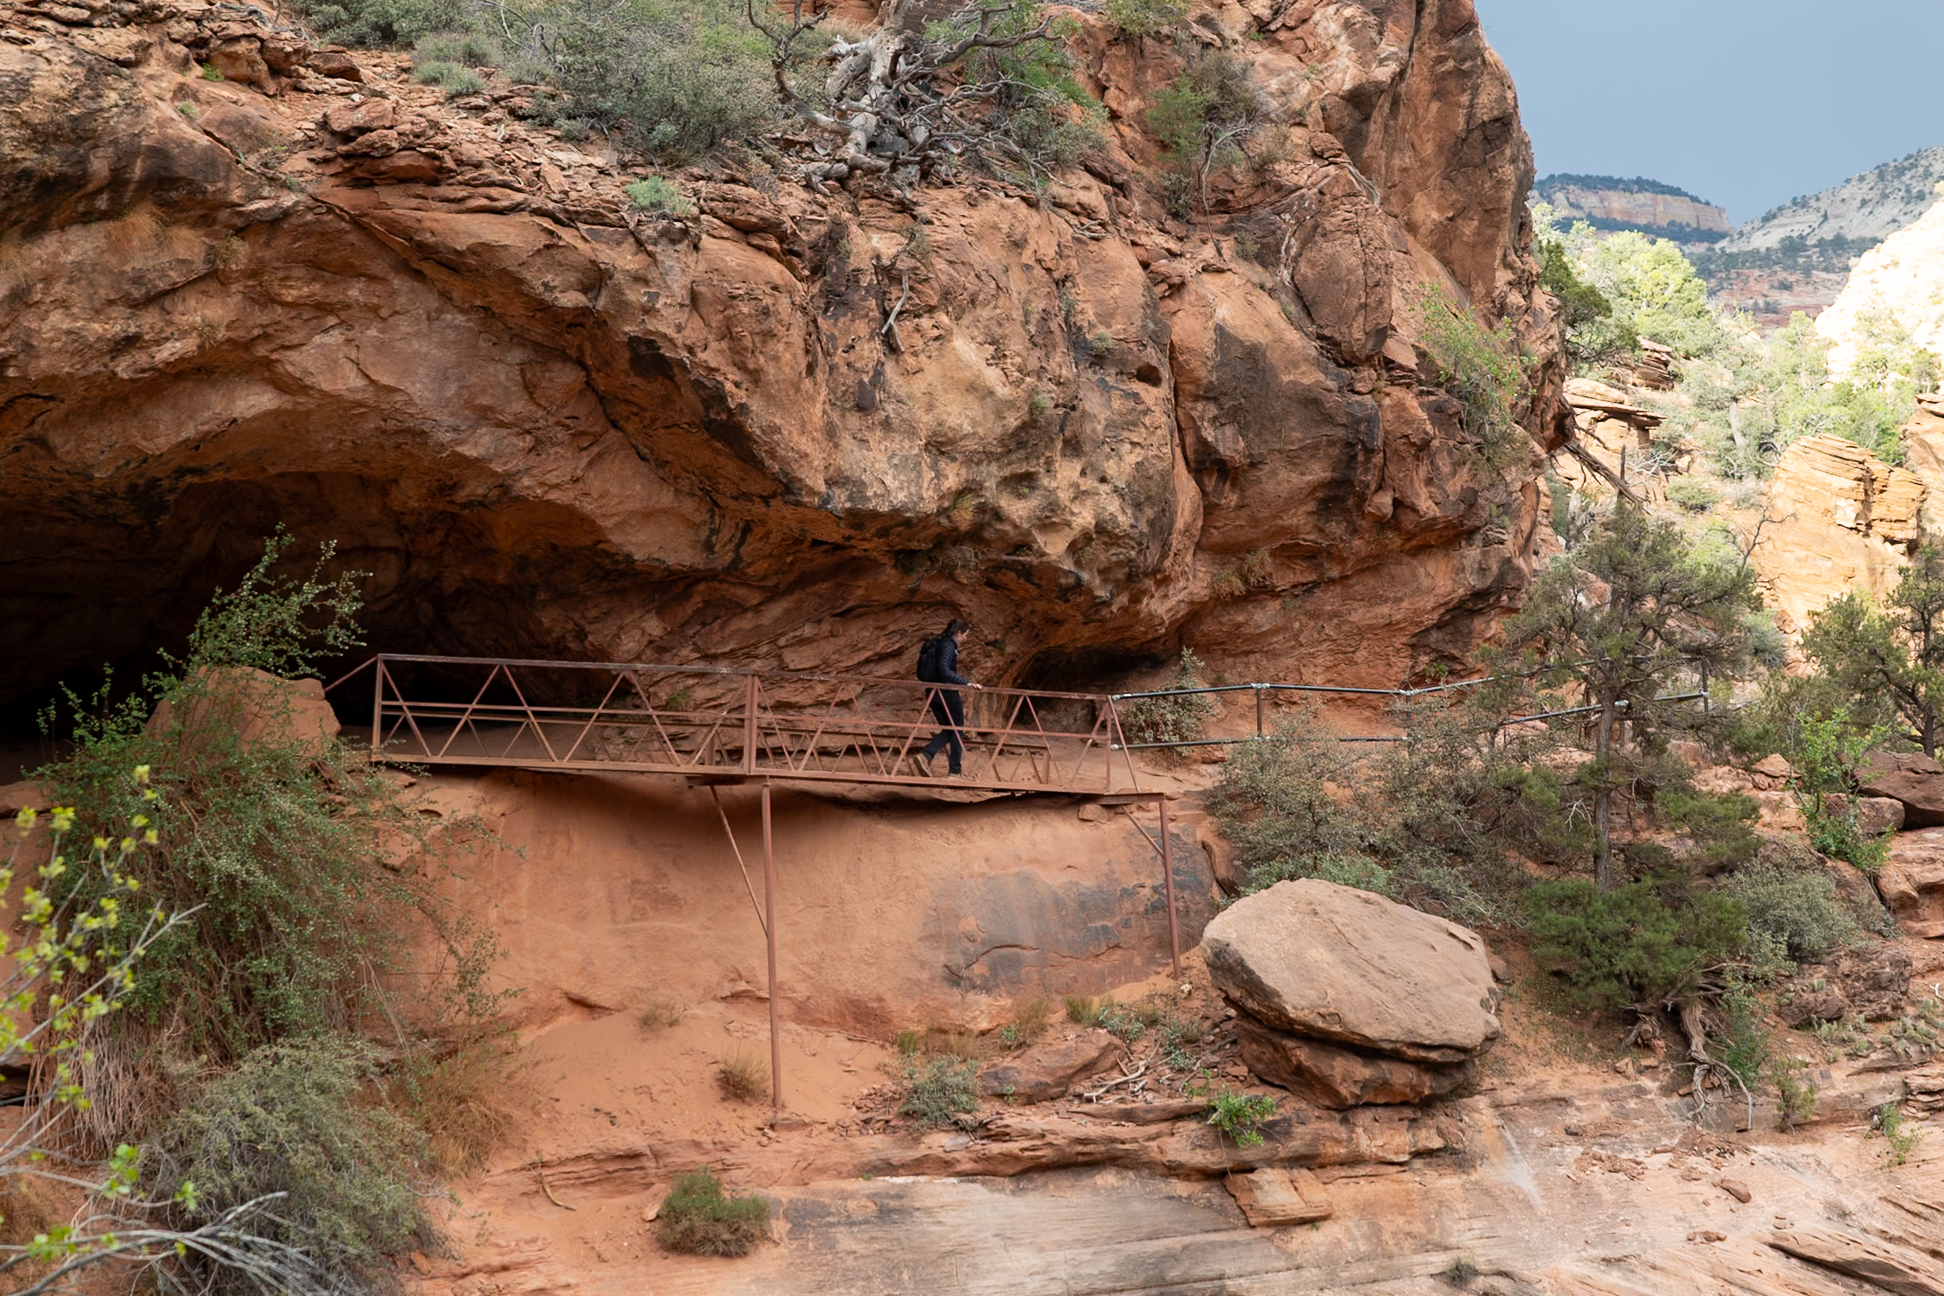
9. Double Arch via Middle Fork Taylor Creek Trail
The Double Arch via Middle Fork Taylor Creek Trail is a scenic and moderately easy hike in the Kolob Canyons section of Zion. The trail gently follows Taylor Creek, with about 20 shallow stream crossings that were pretty easy to navigate if you use the river rocks as stepping stones, at least during spring when we visited.
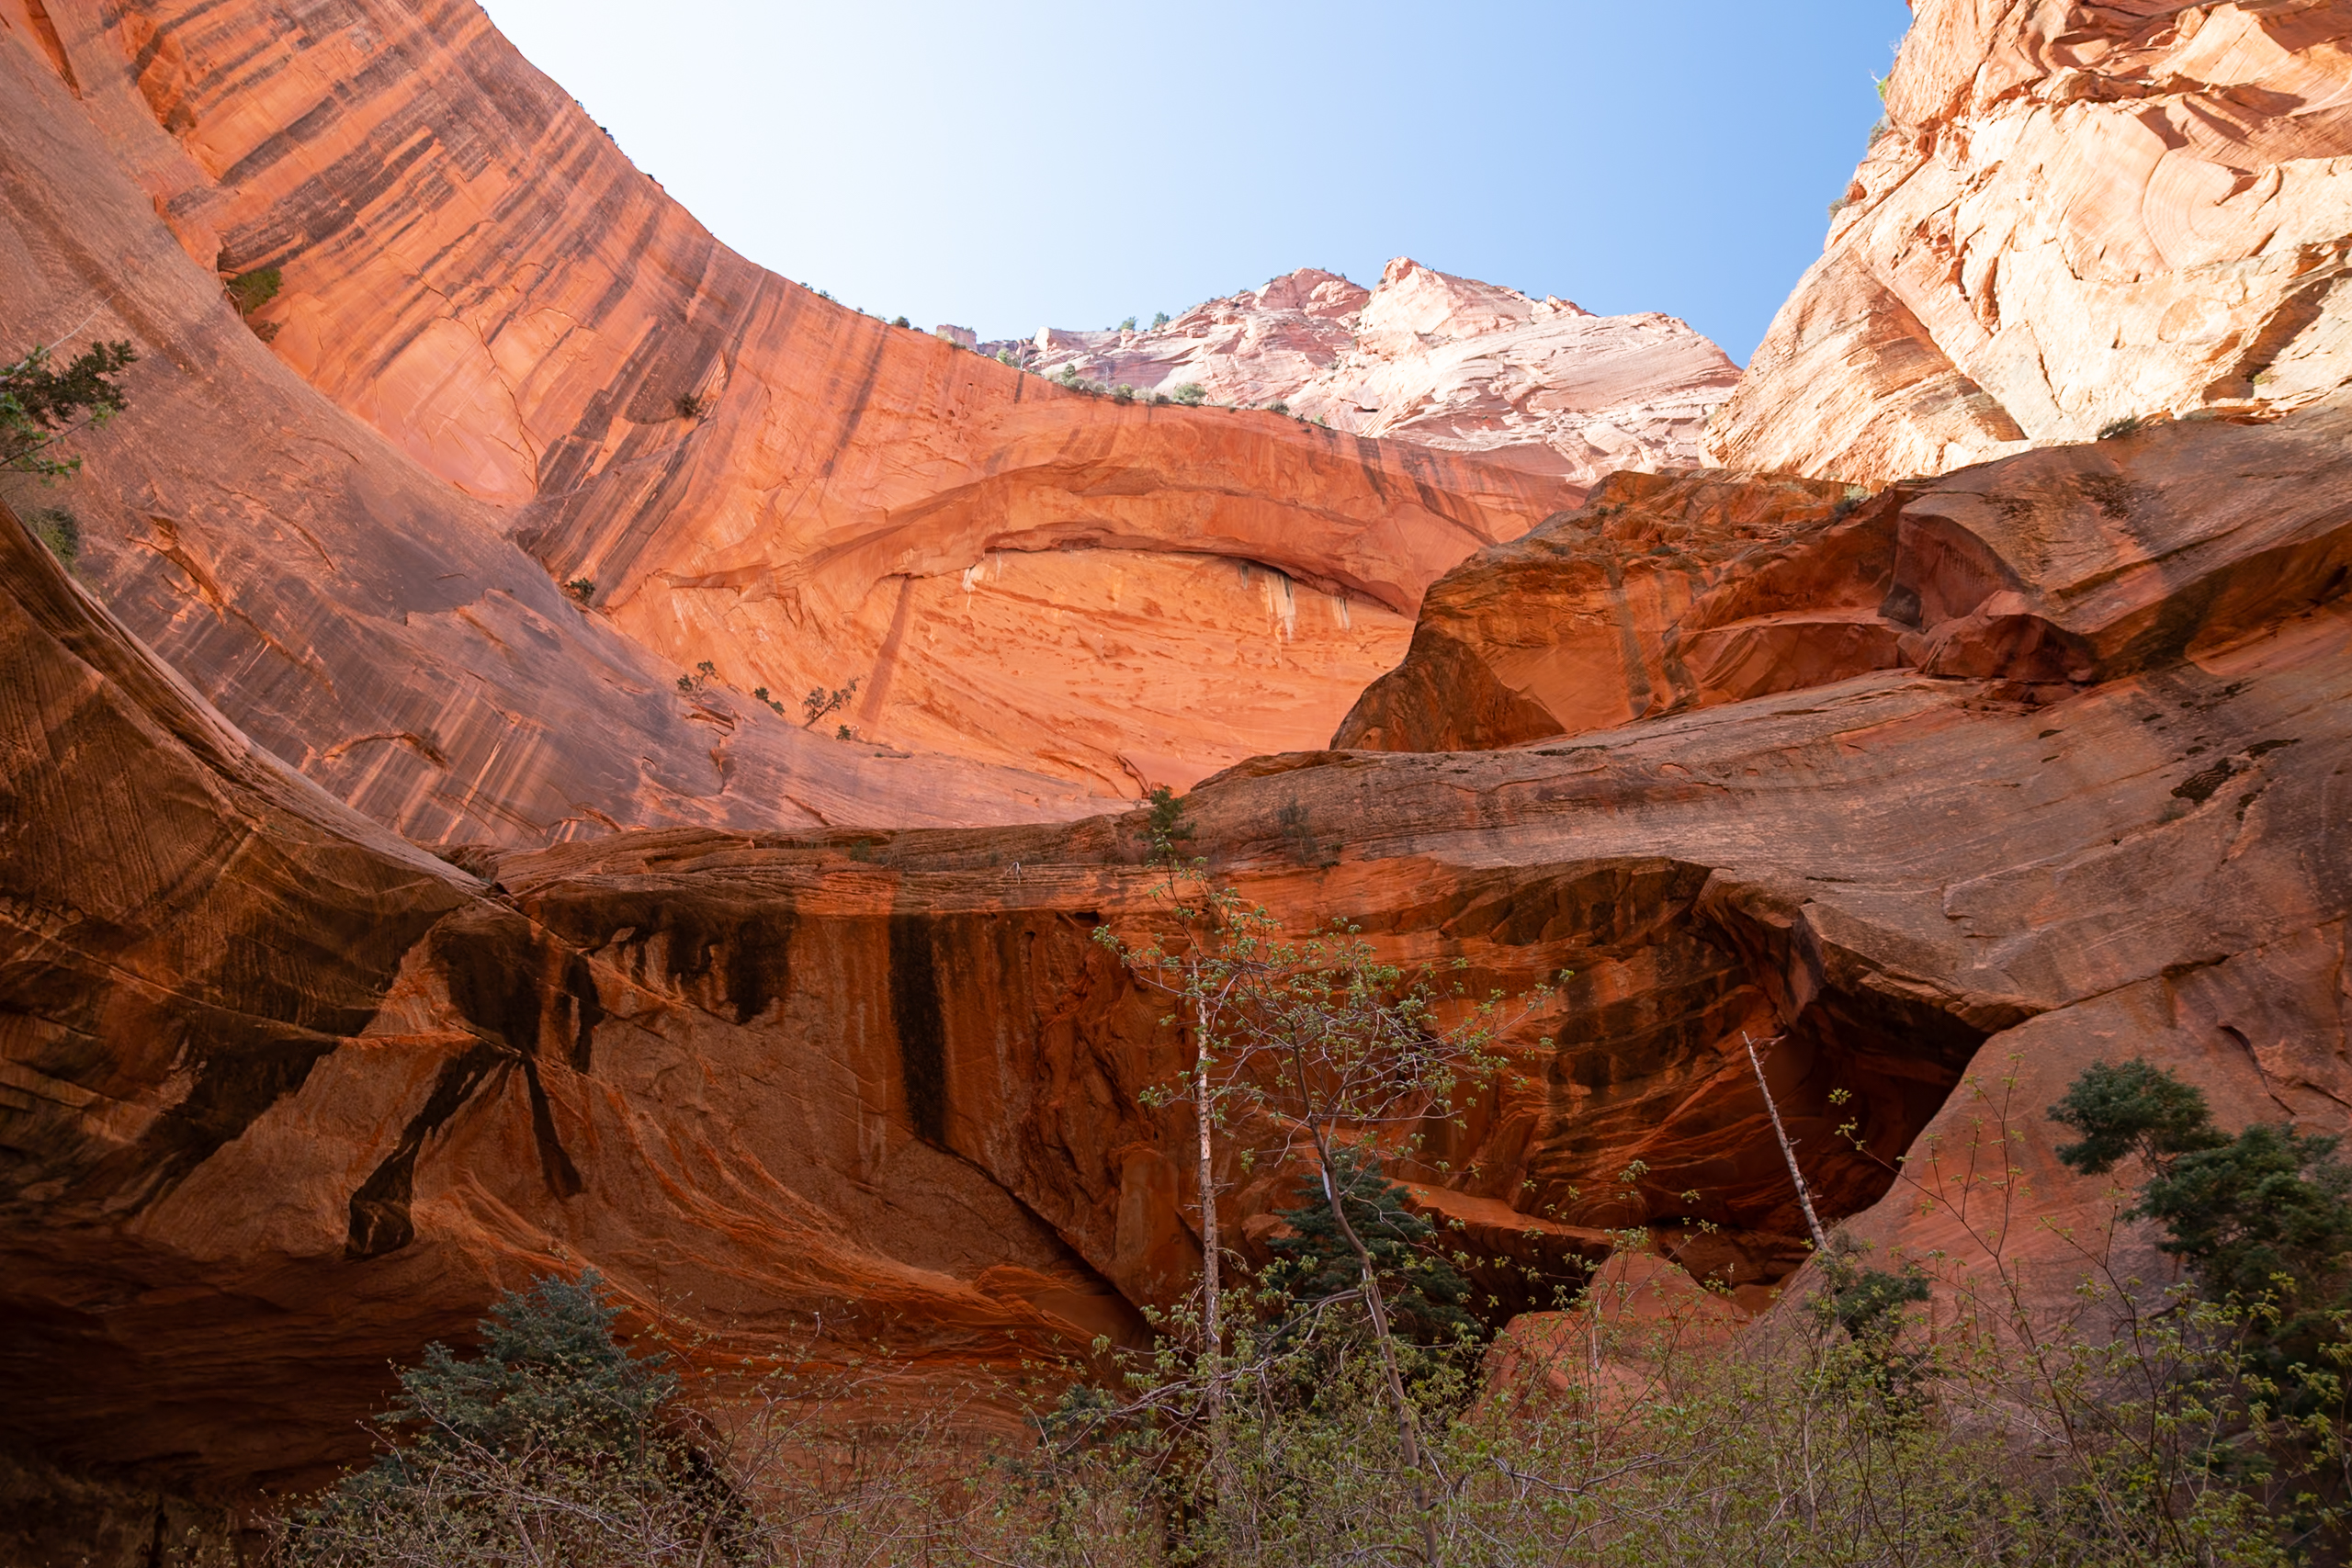
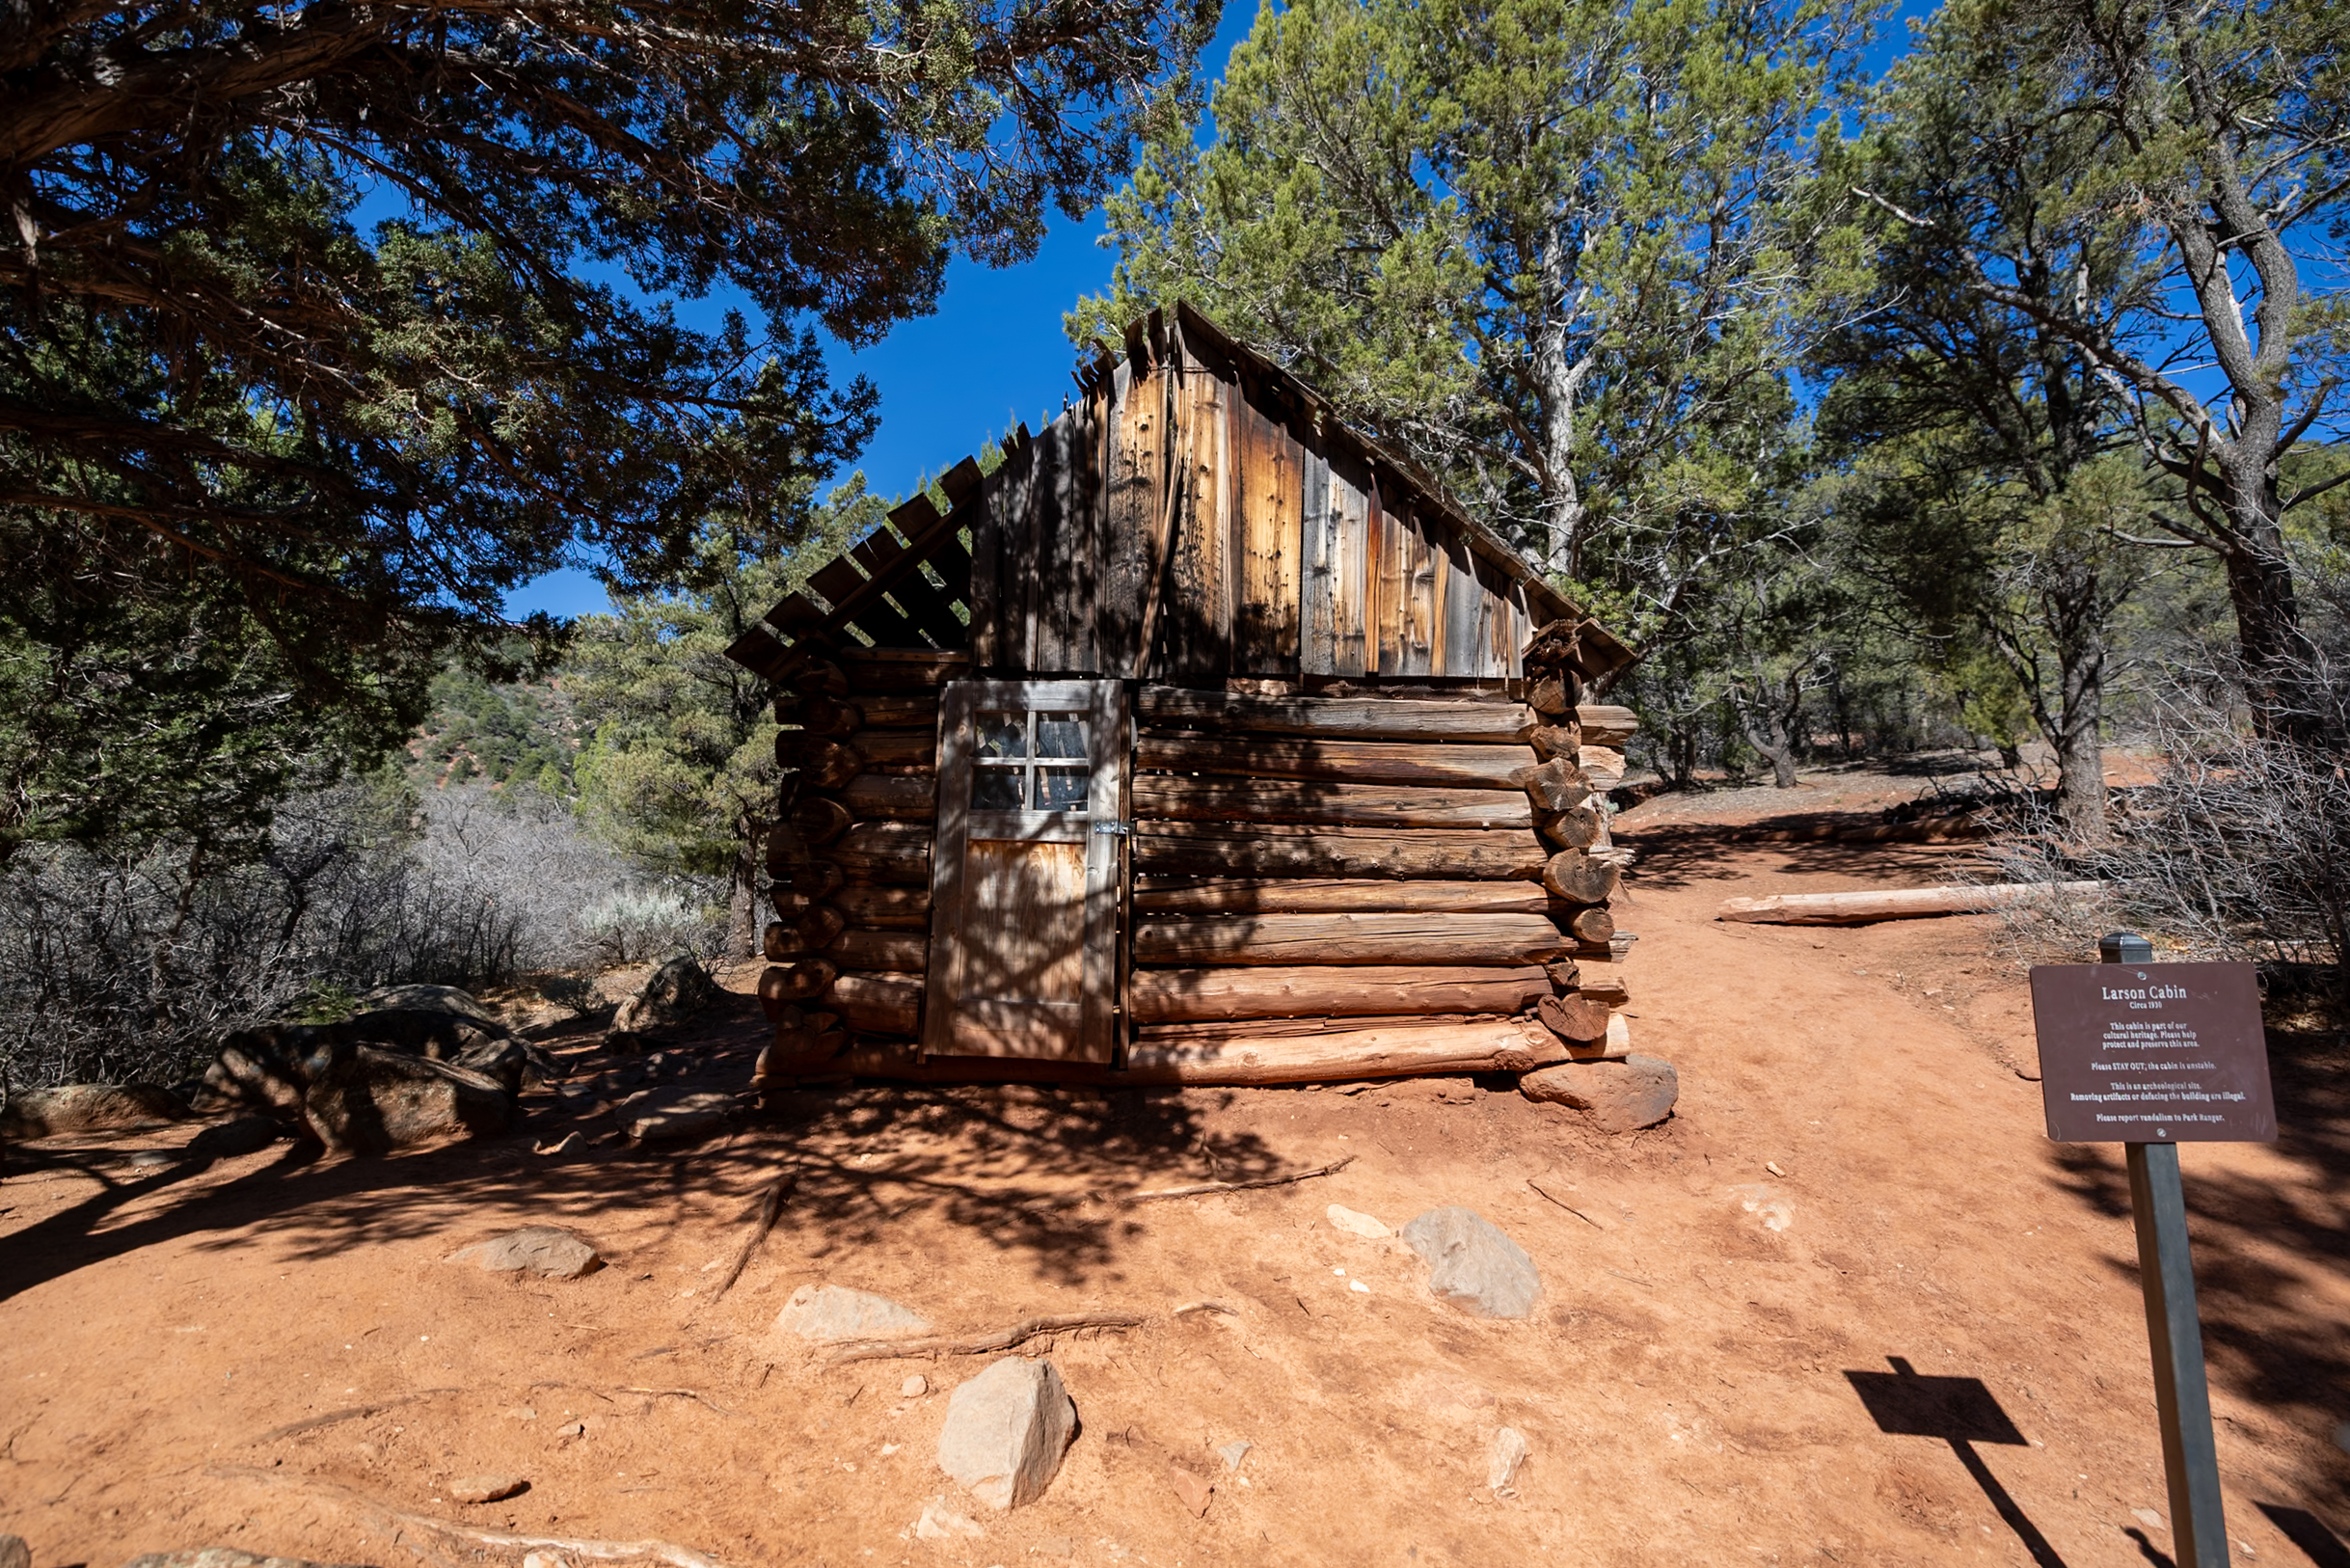
The path leads through a beautiful canyon to the impressive Double Arch Alcove, a massive sandstone formation tucked into the cliffside. Along the way, we also passed by two old homestead cabins, which we peeked into. We were lucky to hike alongside a knowledgeable NPS volunteer who shared geological insights along the way.
Distance: 5 miles / 8 km
Difficulty: Moderate
Estimated Time: 2-3 hours
Permit Required: No
10. Scout Lookout via West Rim Trail
The Scout Lookout via West Rim Trail is a solid challenge with rewarding views. You can reach the trailhead by hopping off at Shuttle Stop 6. This trail is a great option for hiking partners who want to split up, or are looking for an alternative to Angel’s Landing. If splitting up, one can tackle Angel’s Landing, while the other waits at Scout Lookout and enjoys the views (and the restrooms). That said, if you’re picking between this and Observation Point, we recommend the views of Observation Point!
Distance: 3.6 miles / 5.8 km
Difficulty: Hard
Estimated Time: 2-3 hours
Permit Required: No
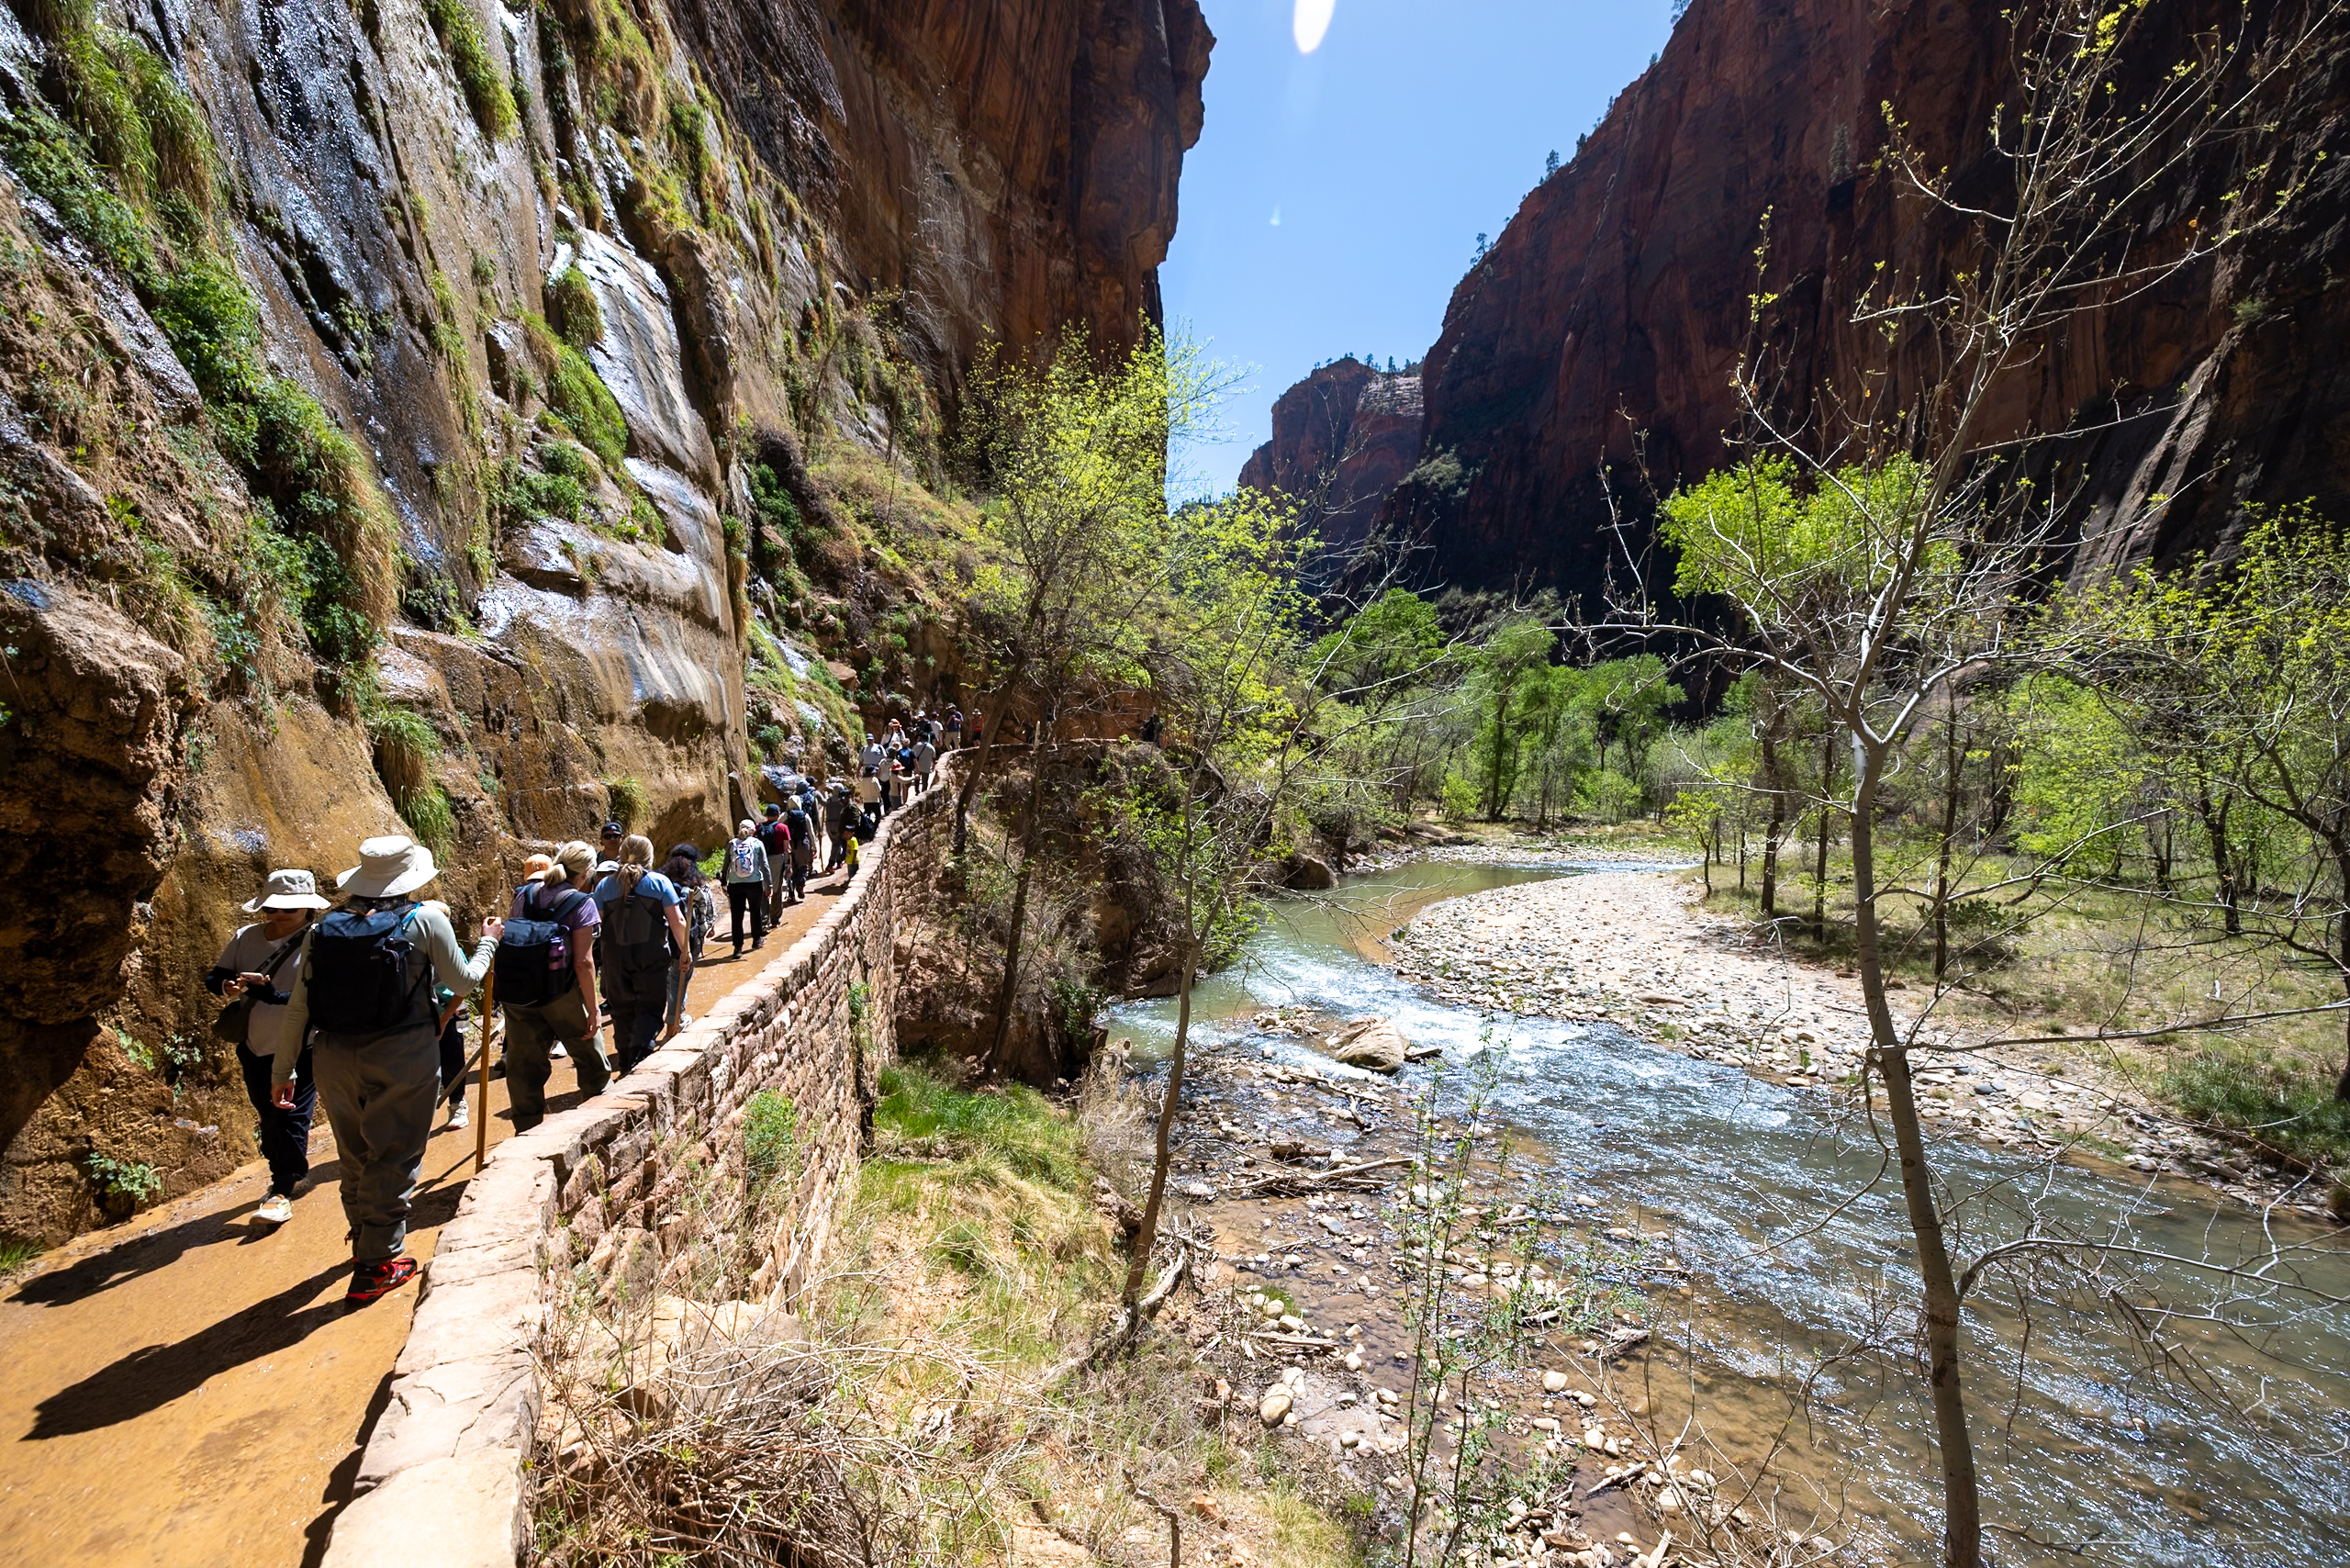
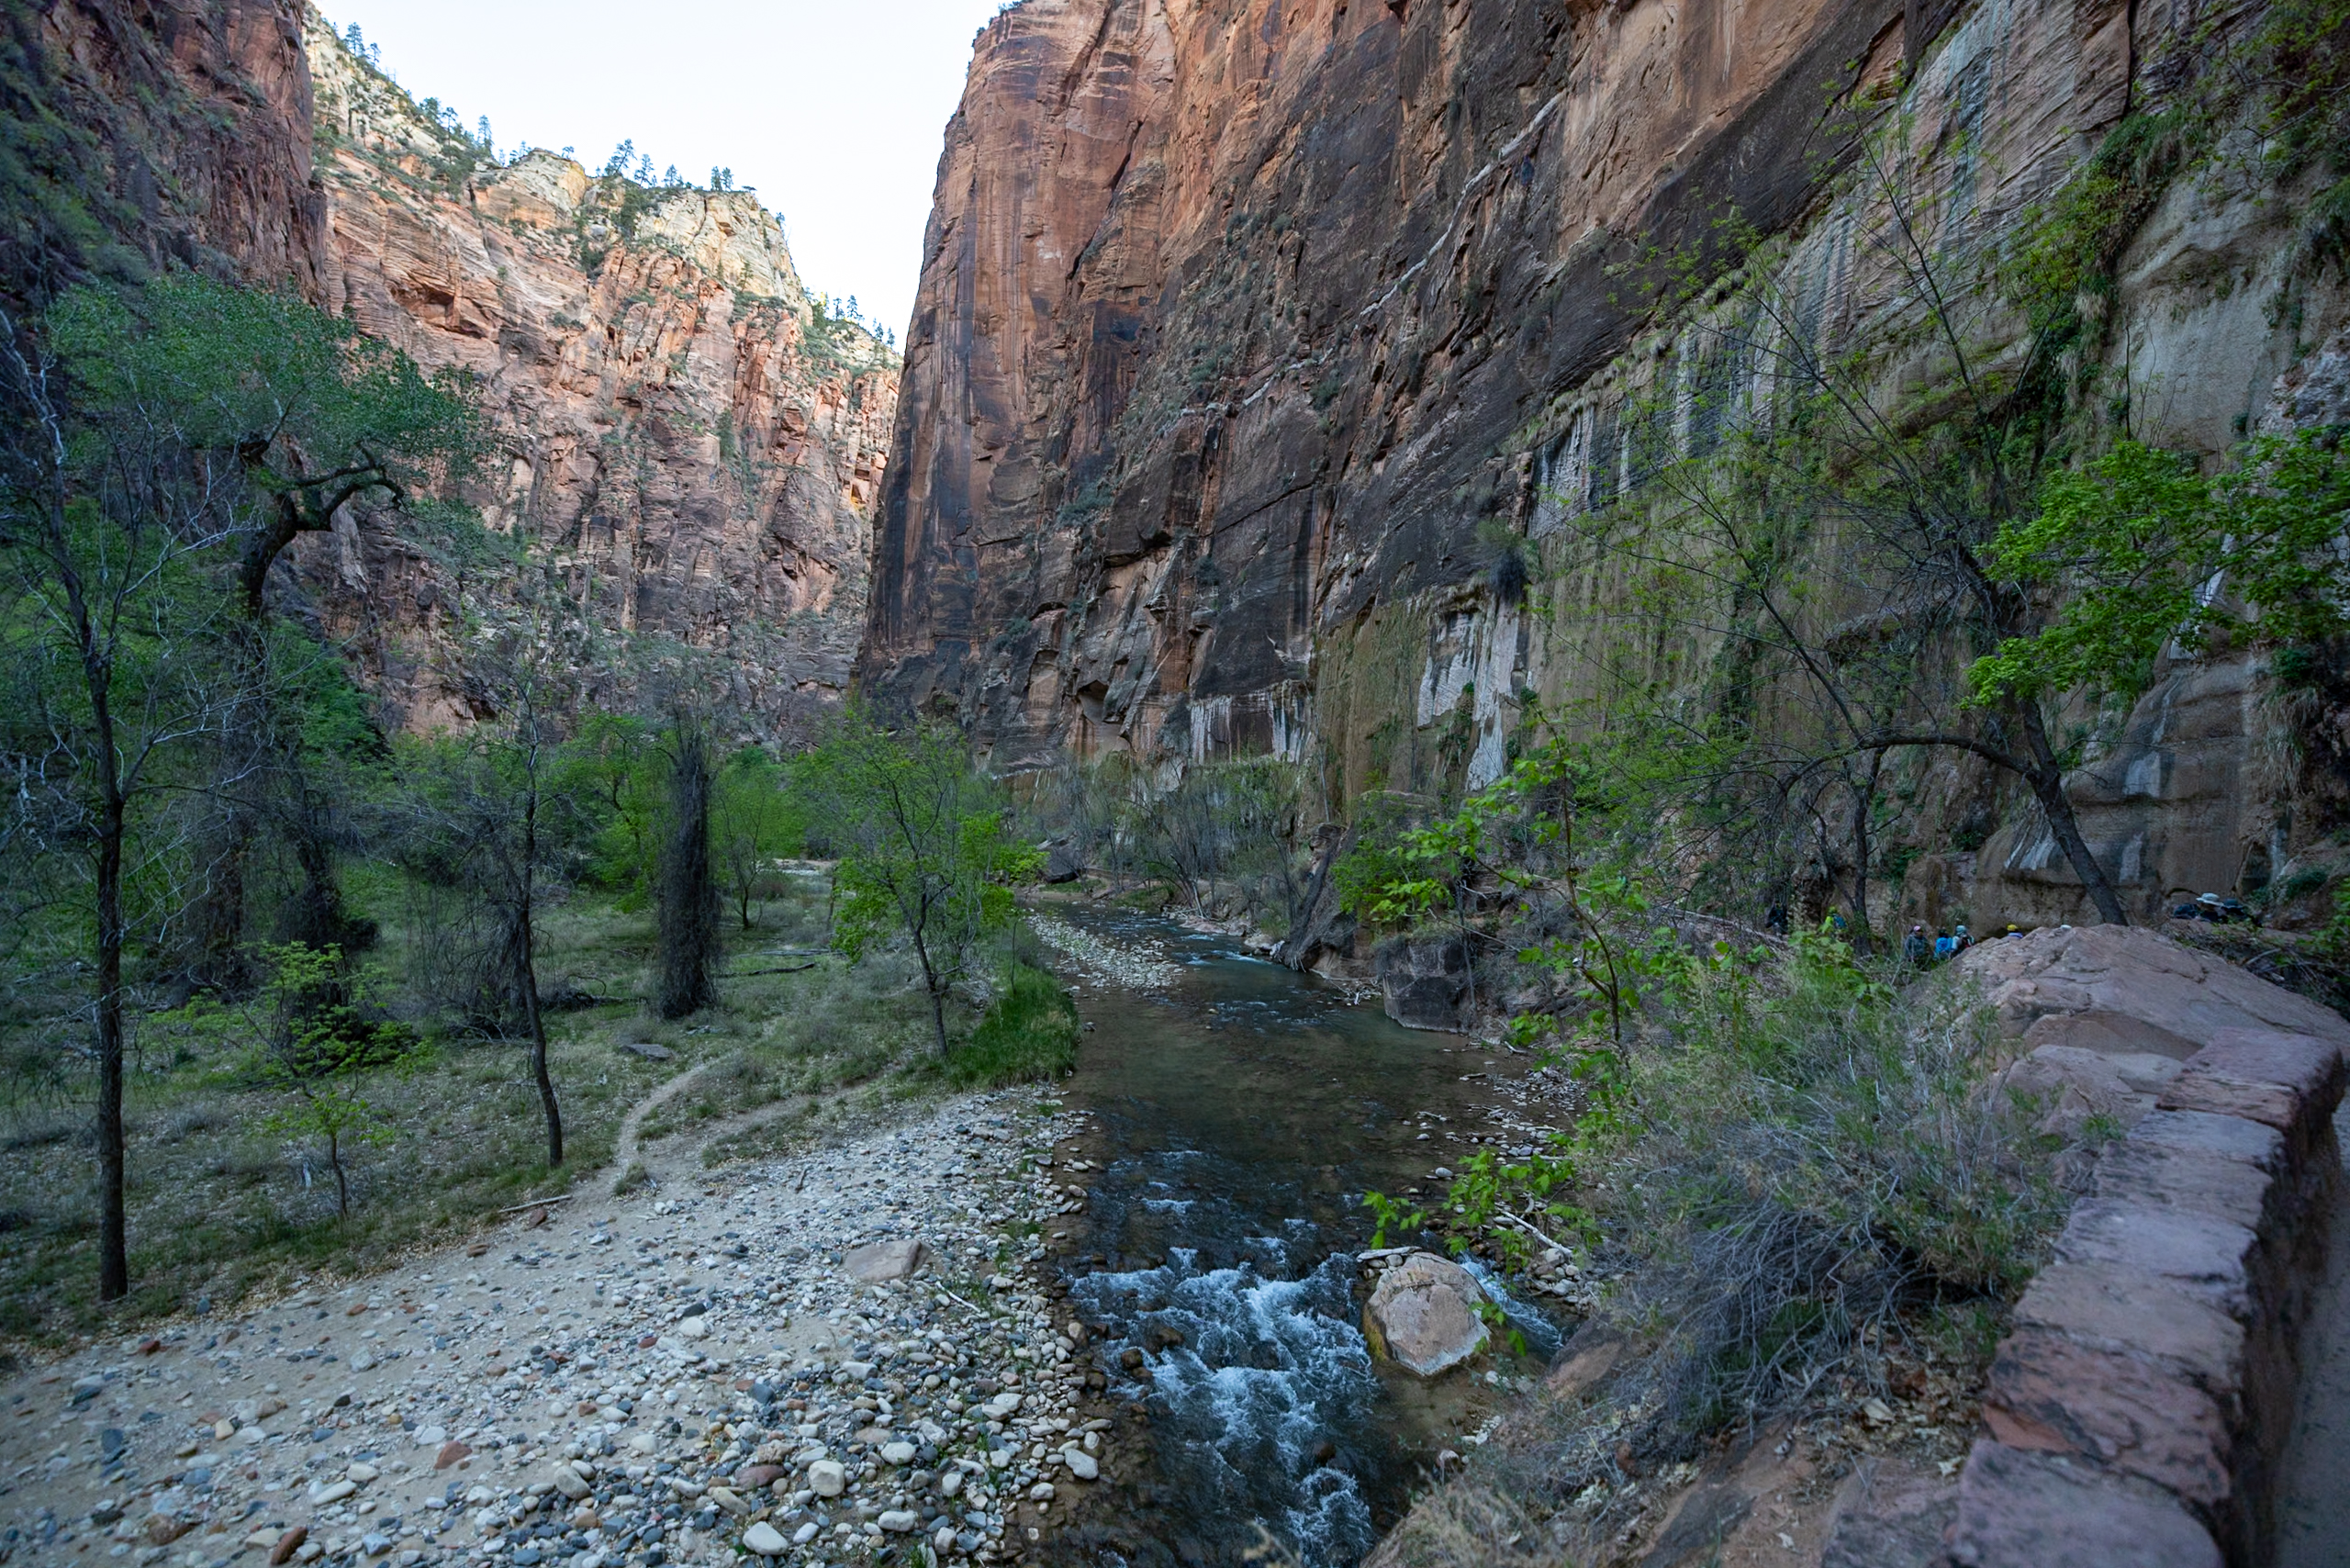
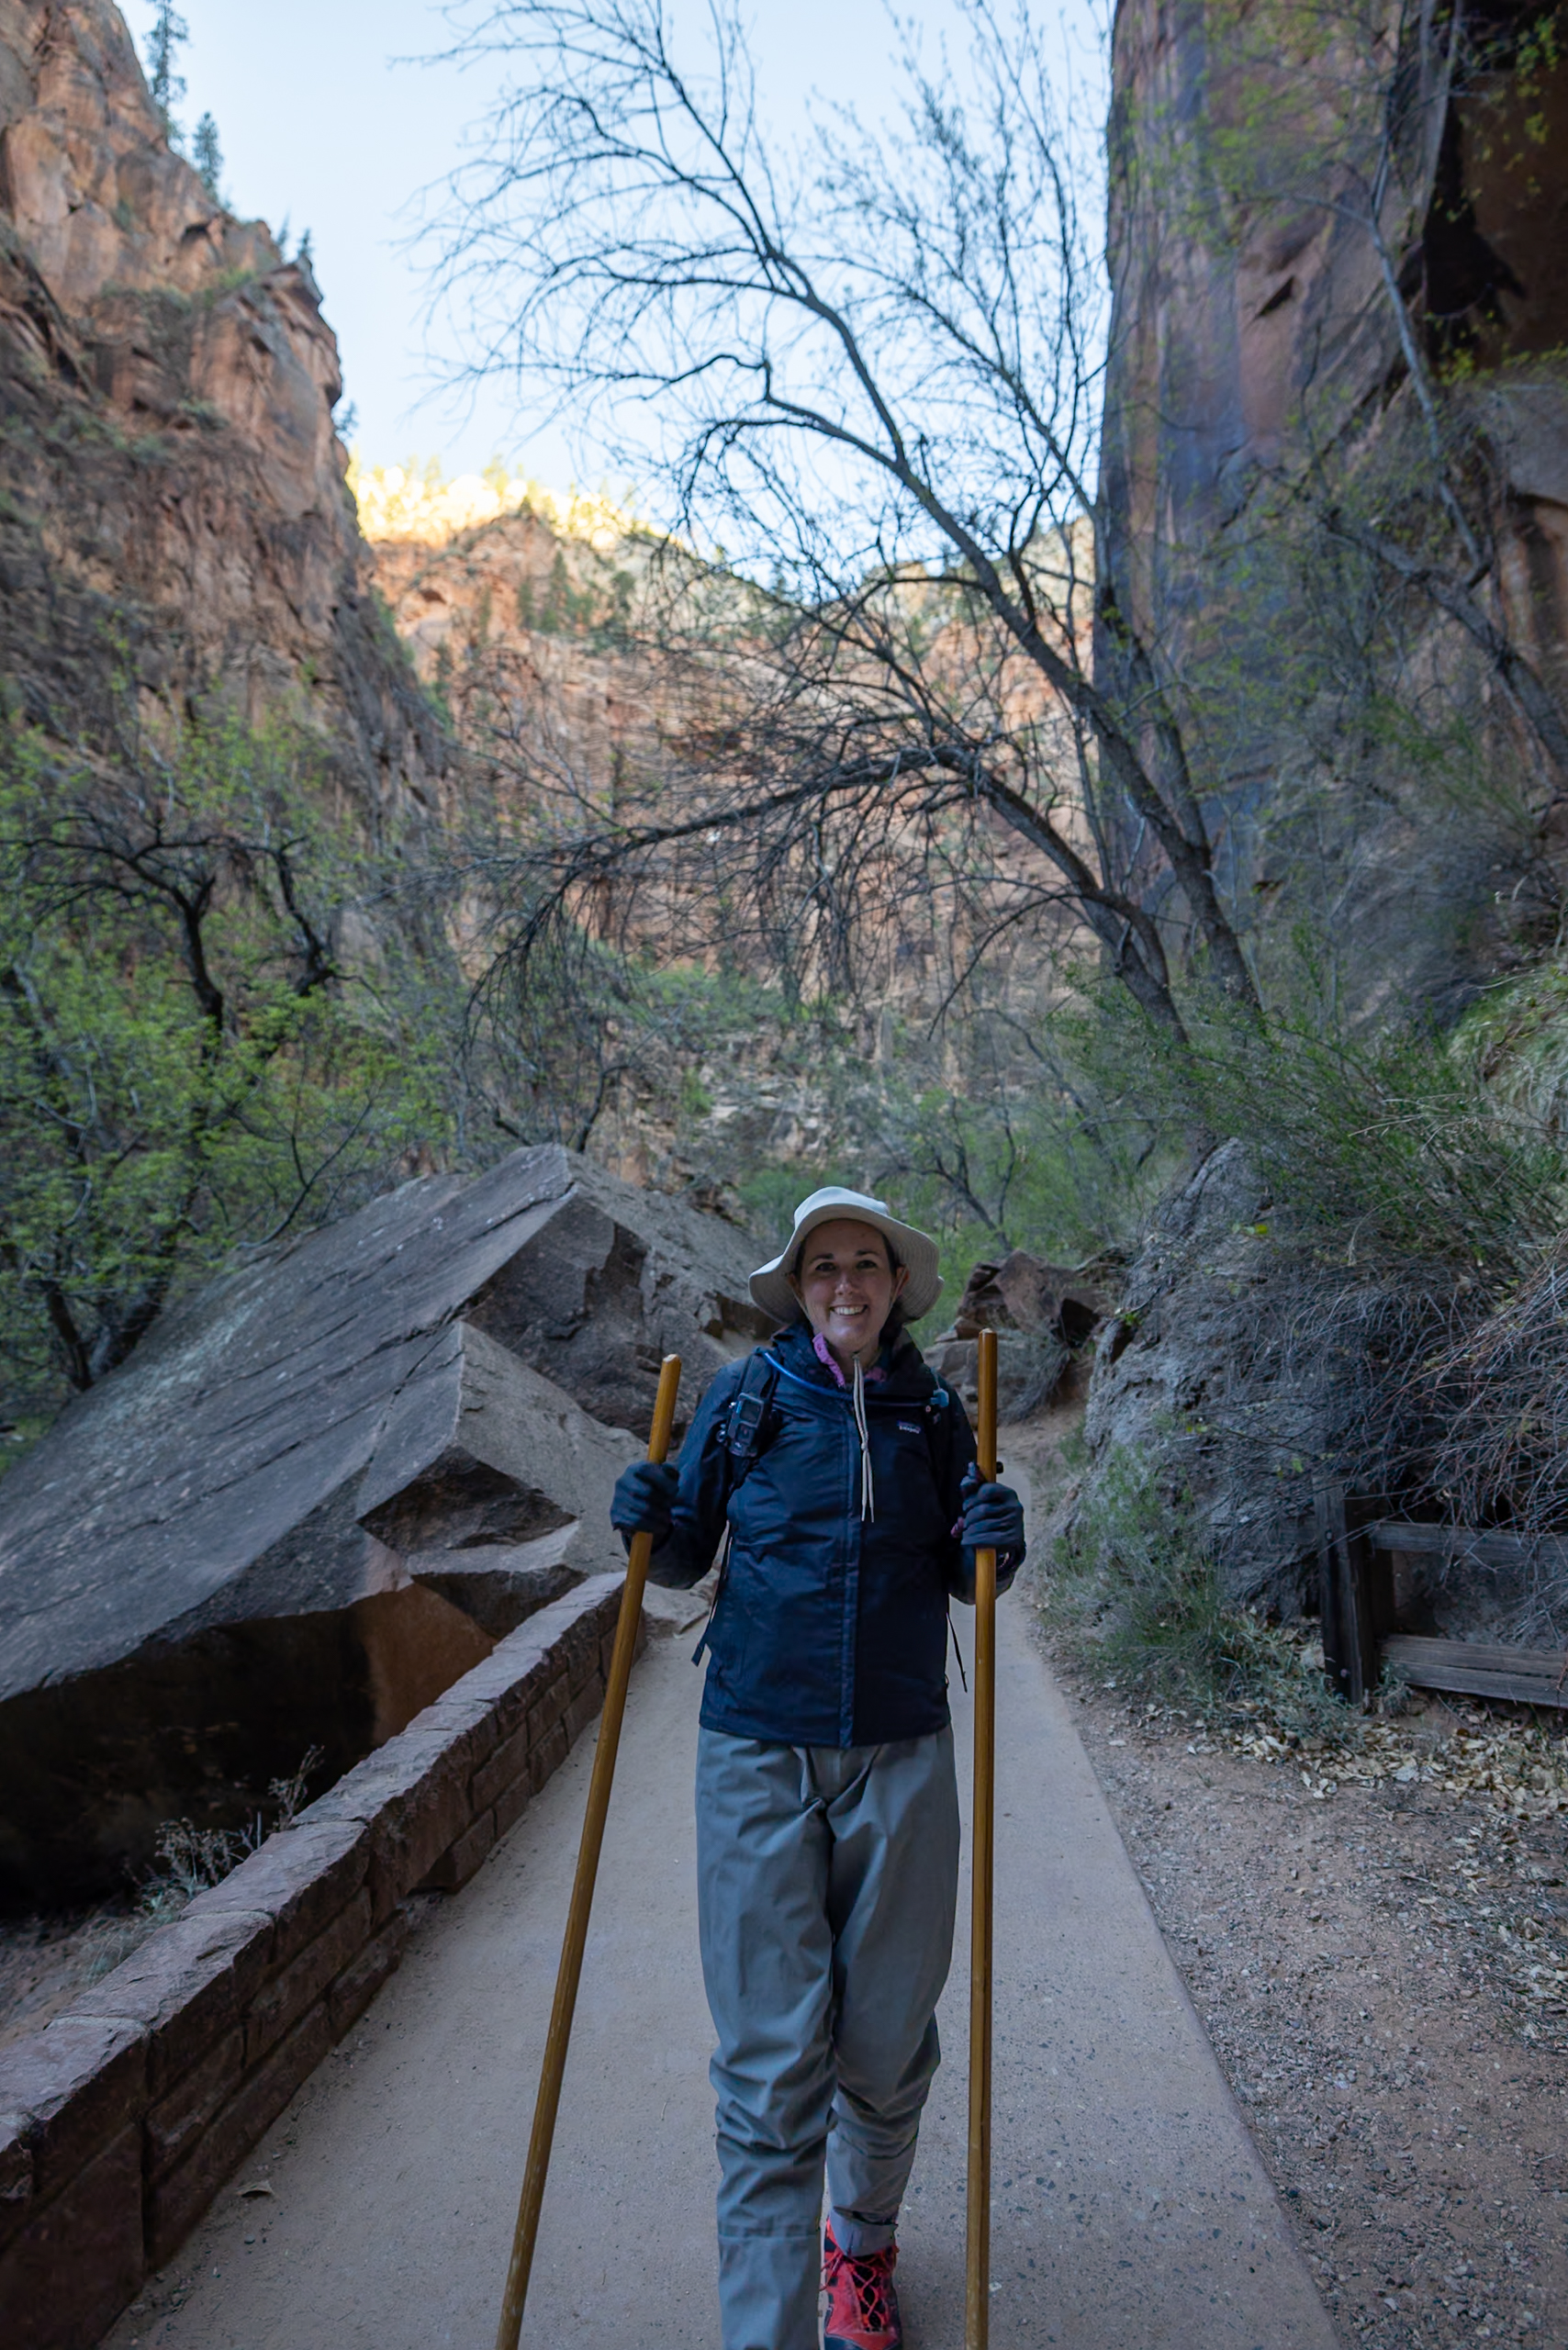
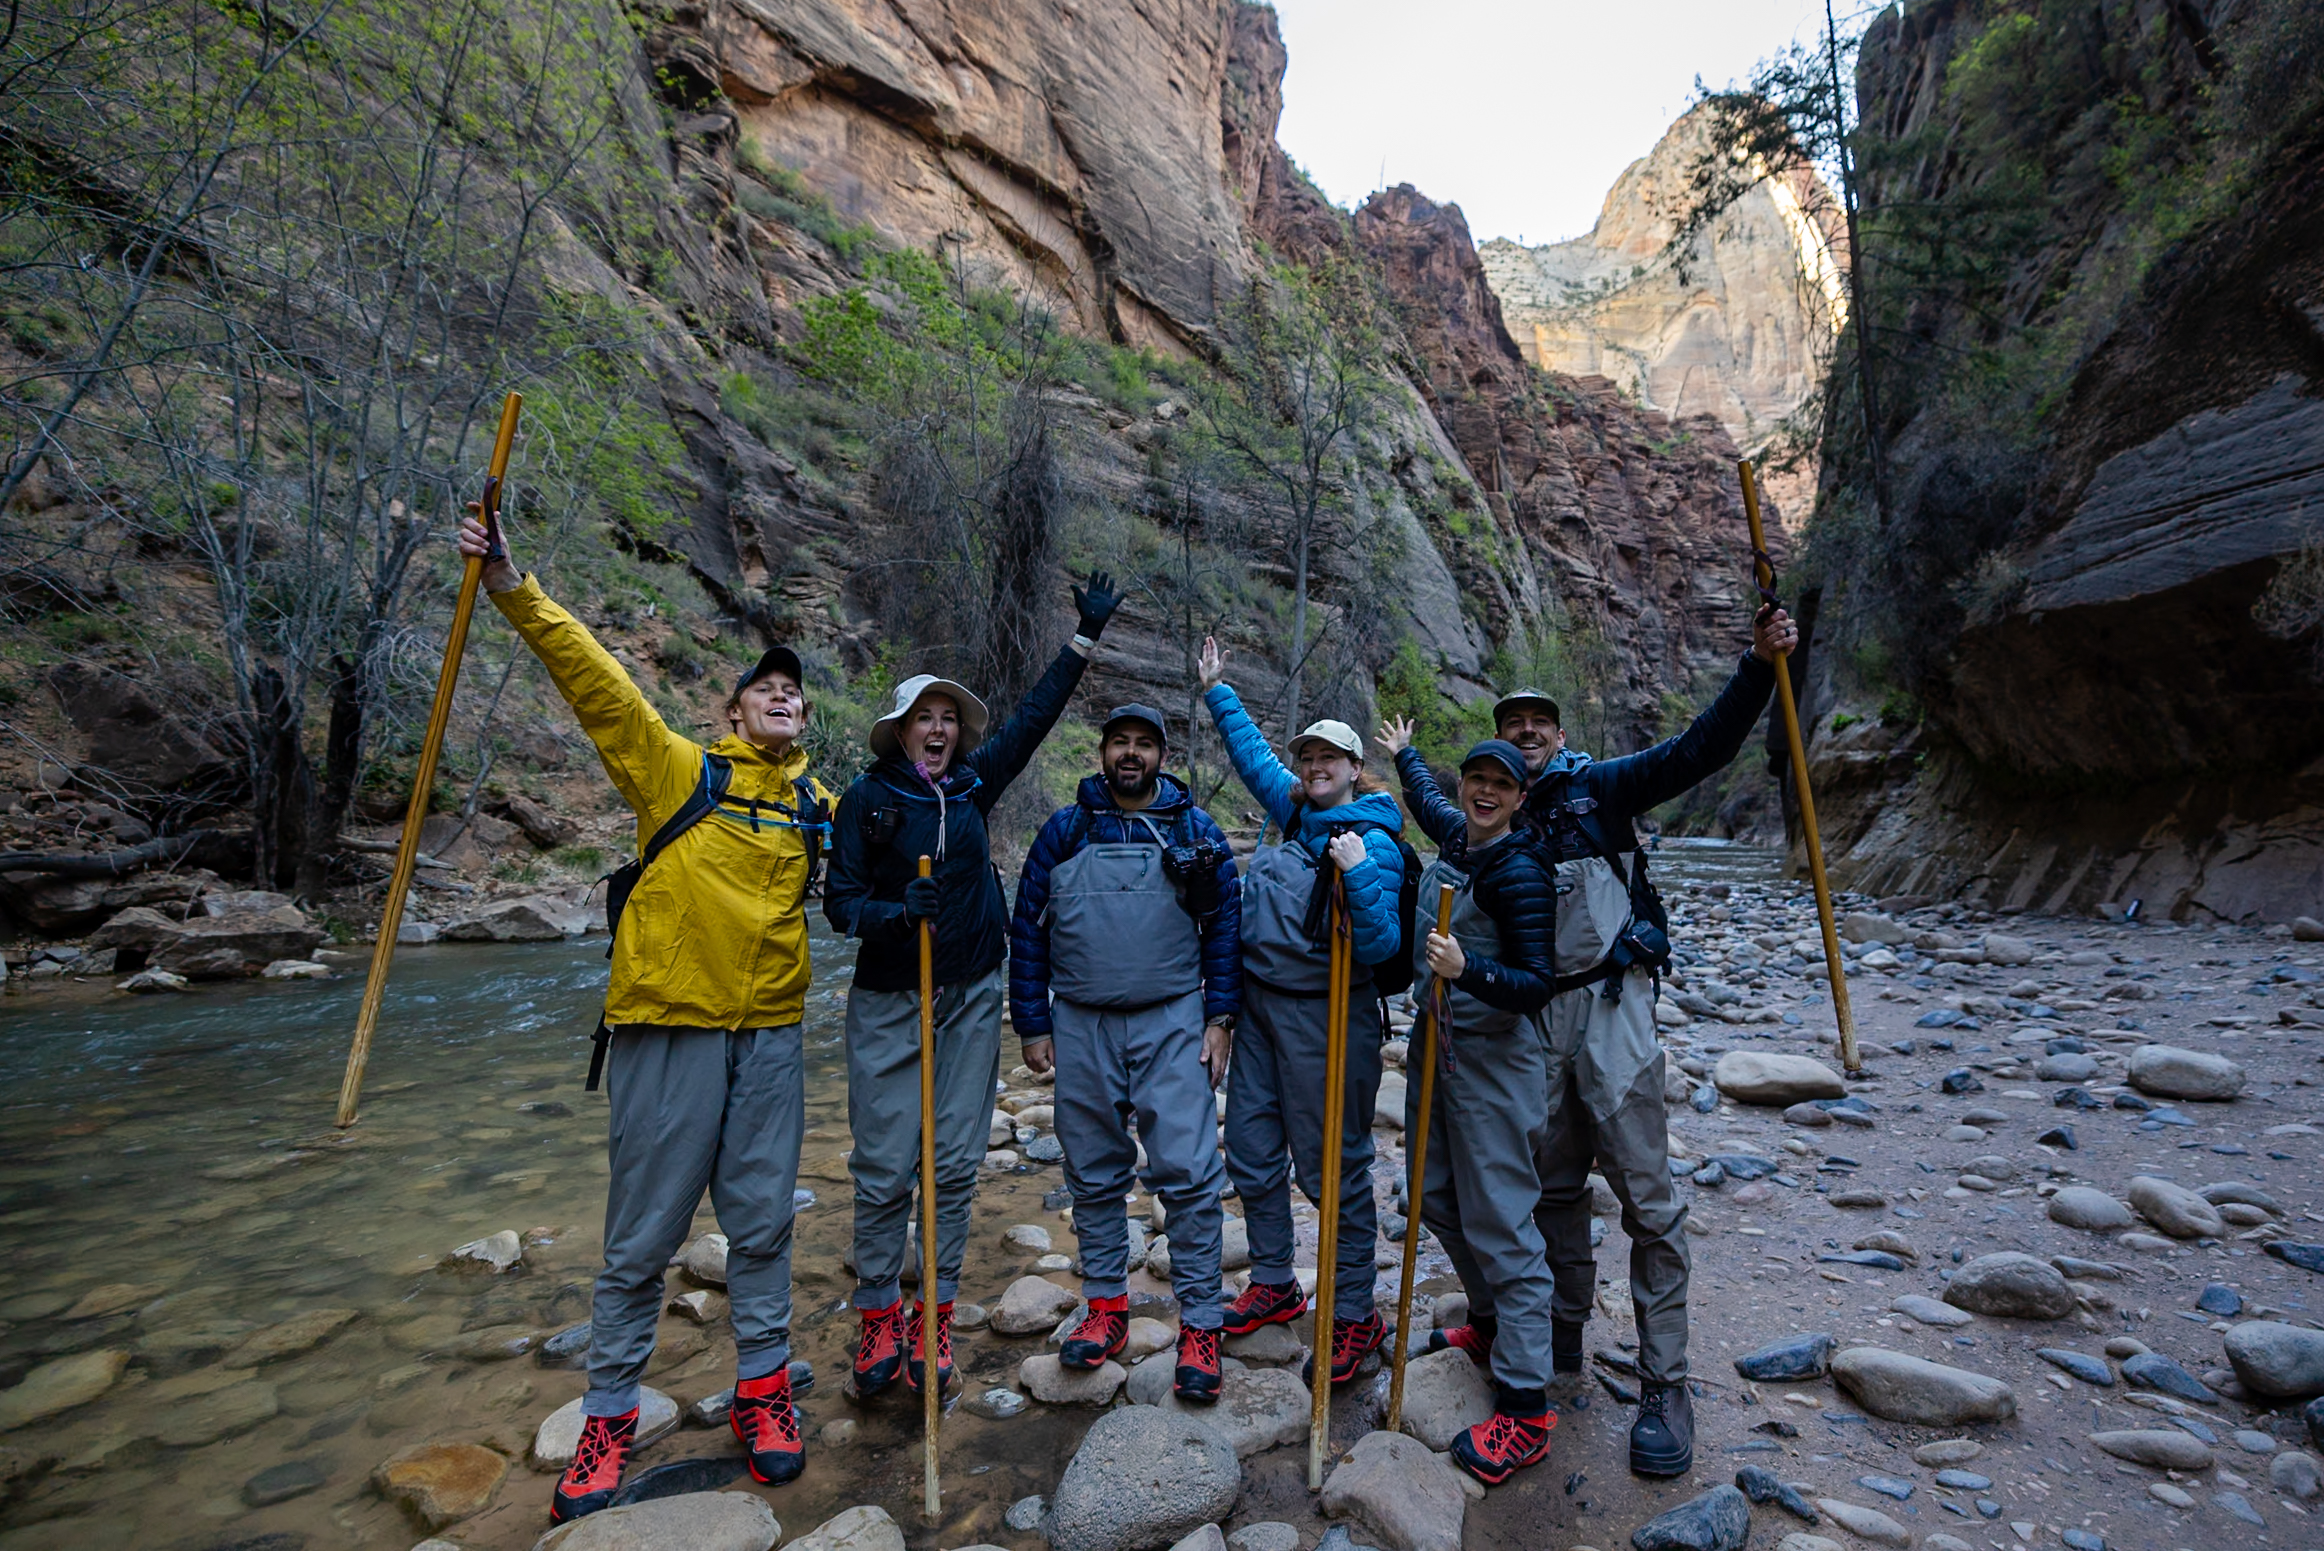
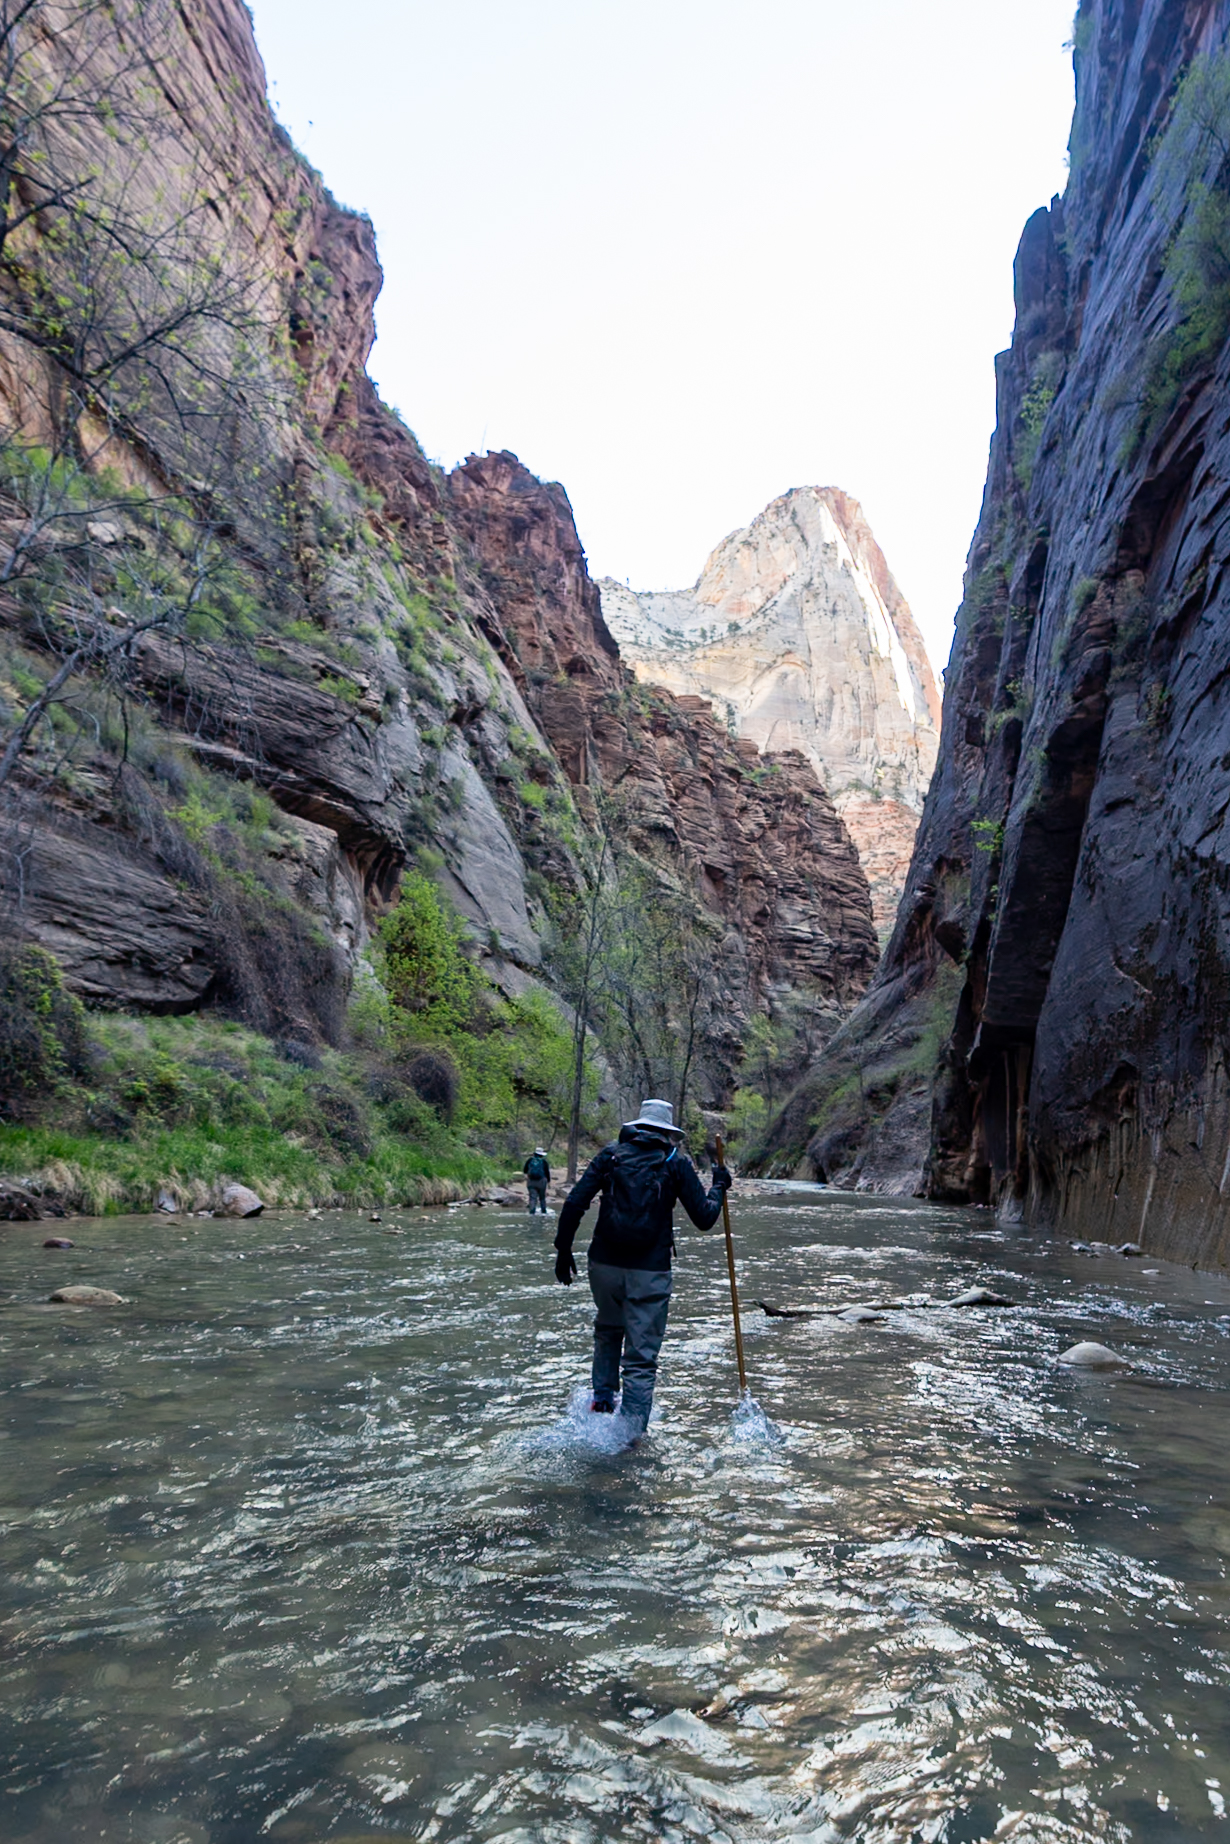
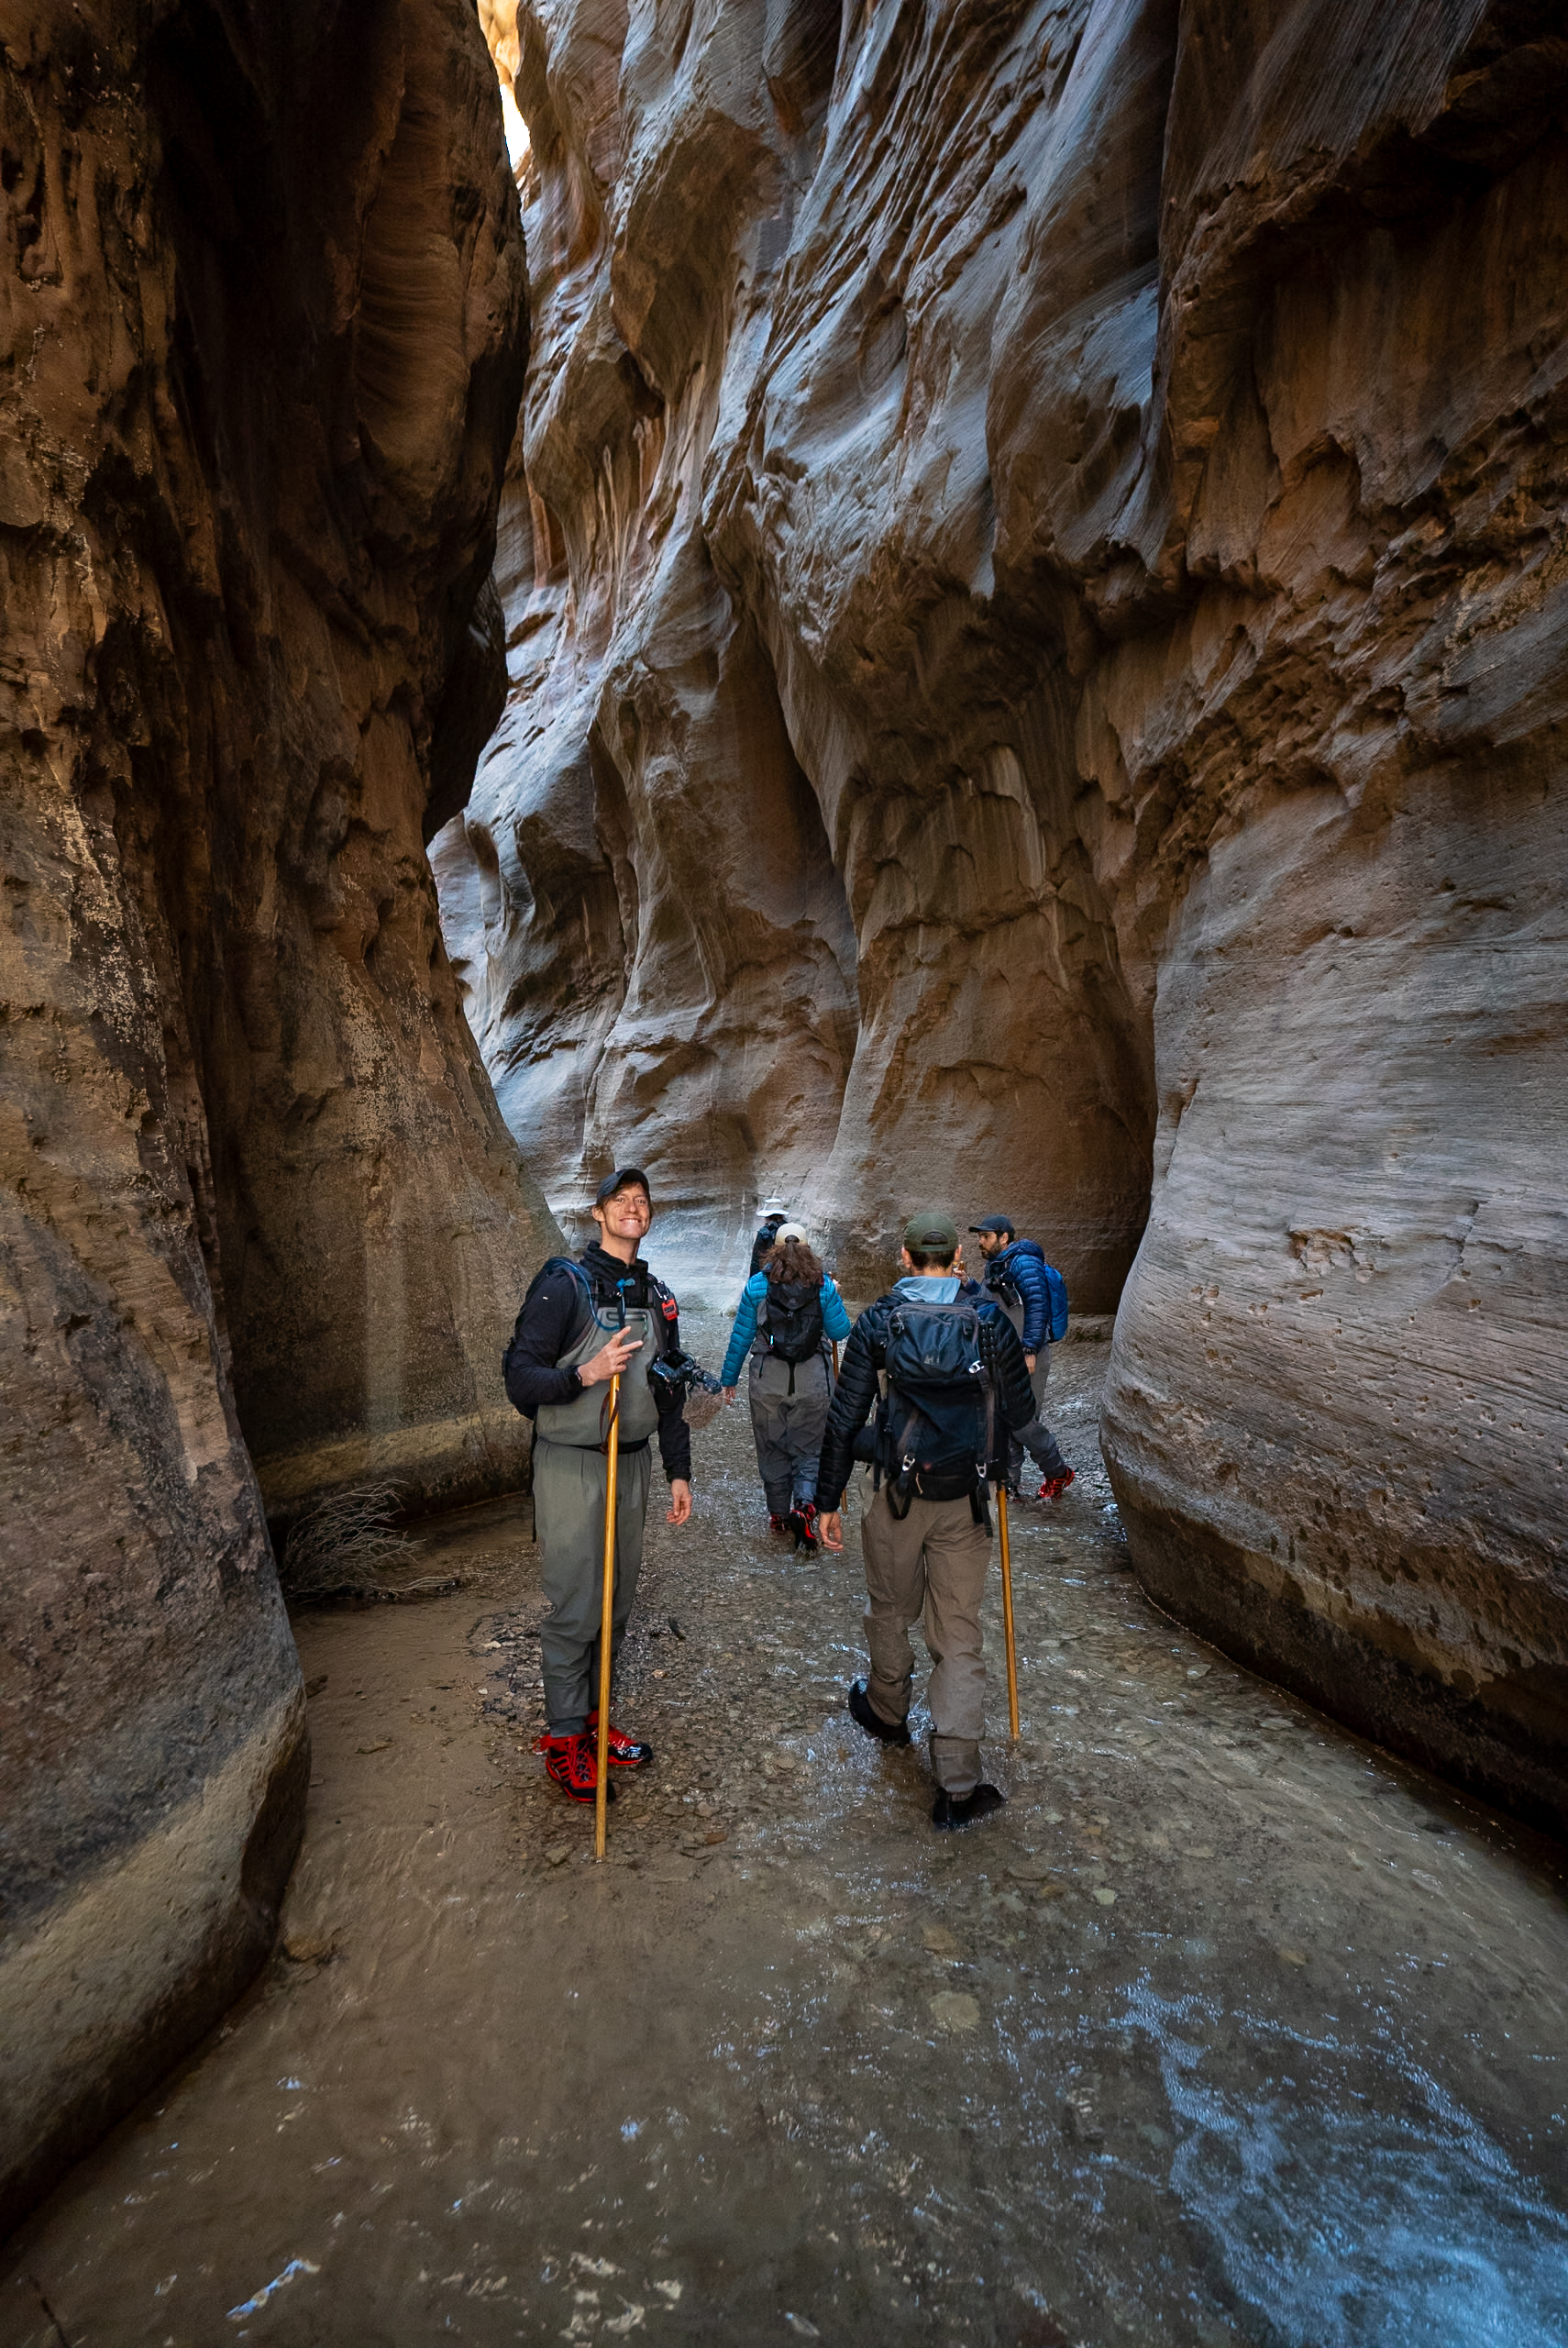
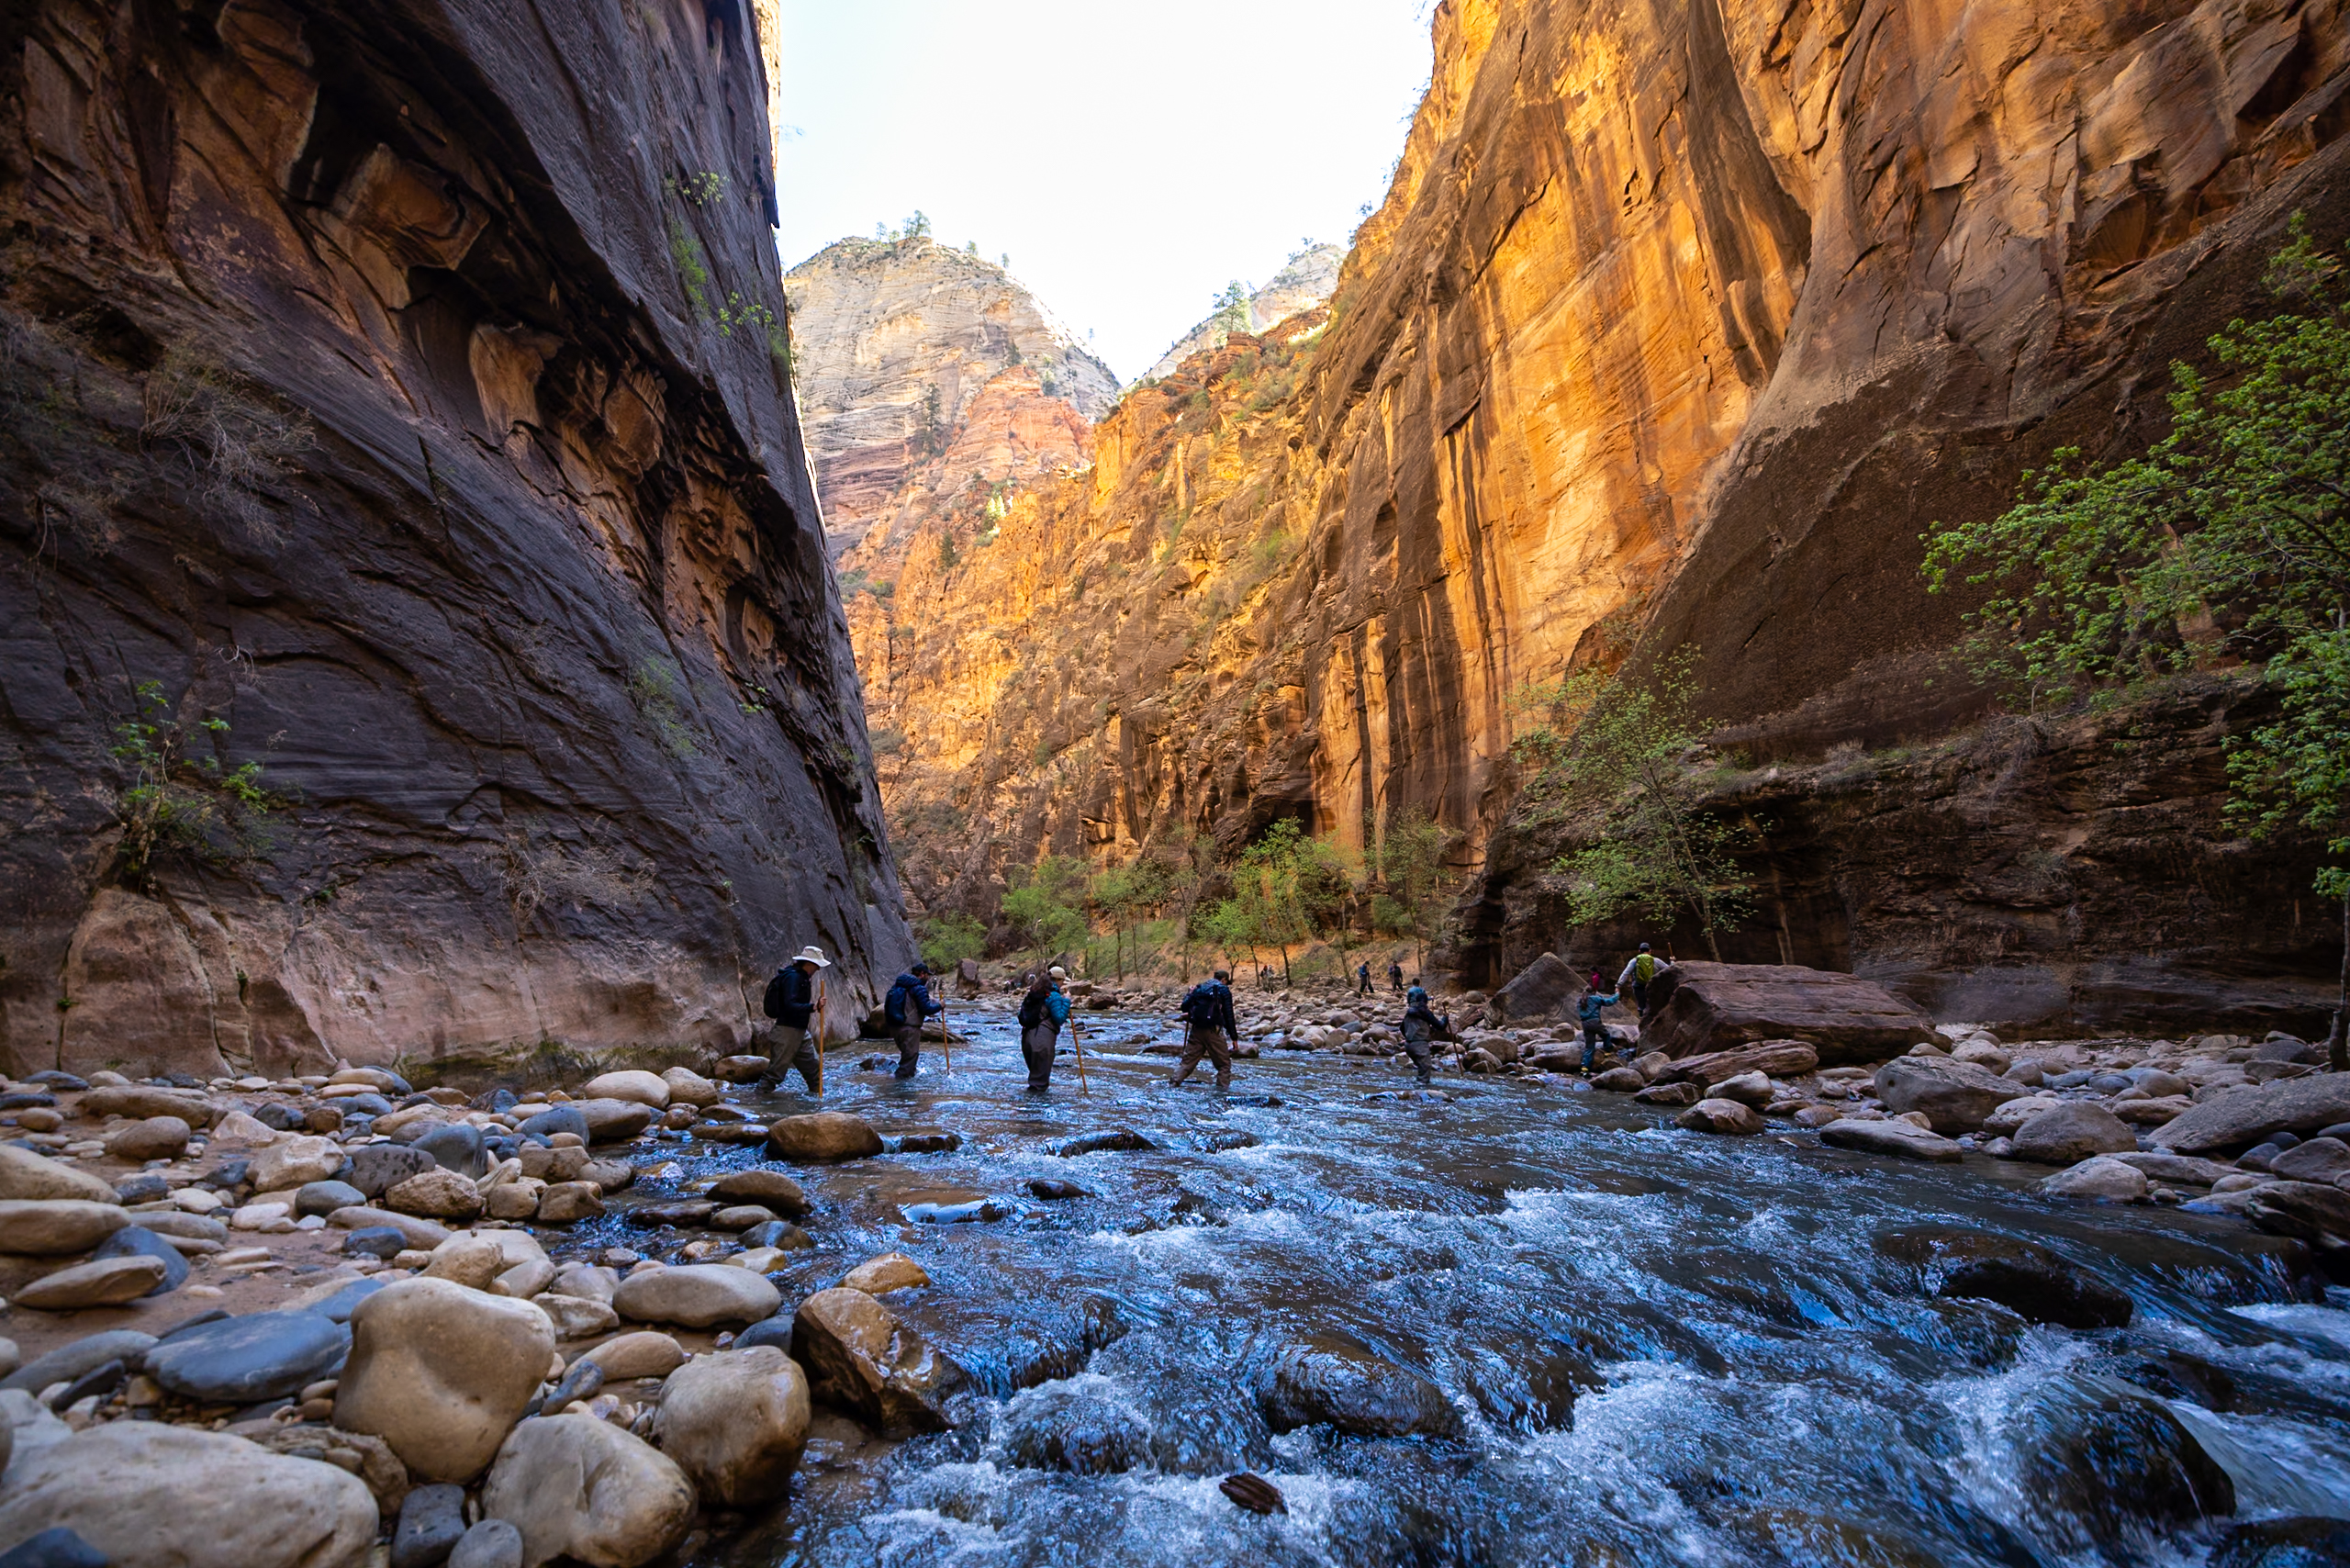
11. The Narrows (Bottom Up)
The Narrows (Bottom-Up) is hands-down one of Zion’s most iconic hikes. You’re hiking directly through the waters of the Virgin River, as towering canyon walls rise on either side of you. Around mile 3, the canyon tightens into its most dramatic, photogenic stretch—and from there, it just keeps getting better. Seriously, we couldn’t stop taking photos!
💡 Check out our complete guide on How to Hike the Narrows as a Beginner!
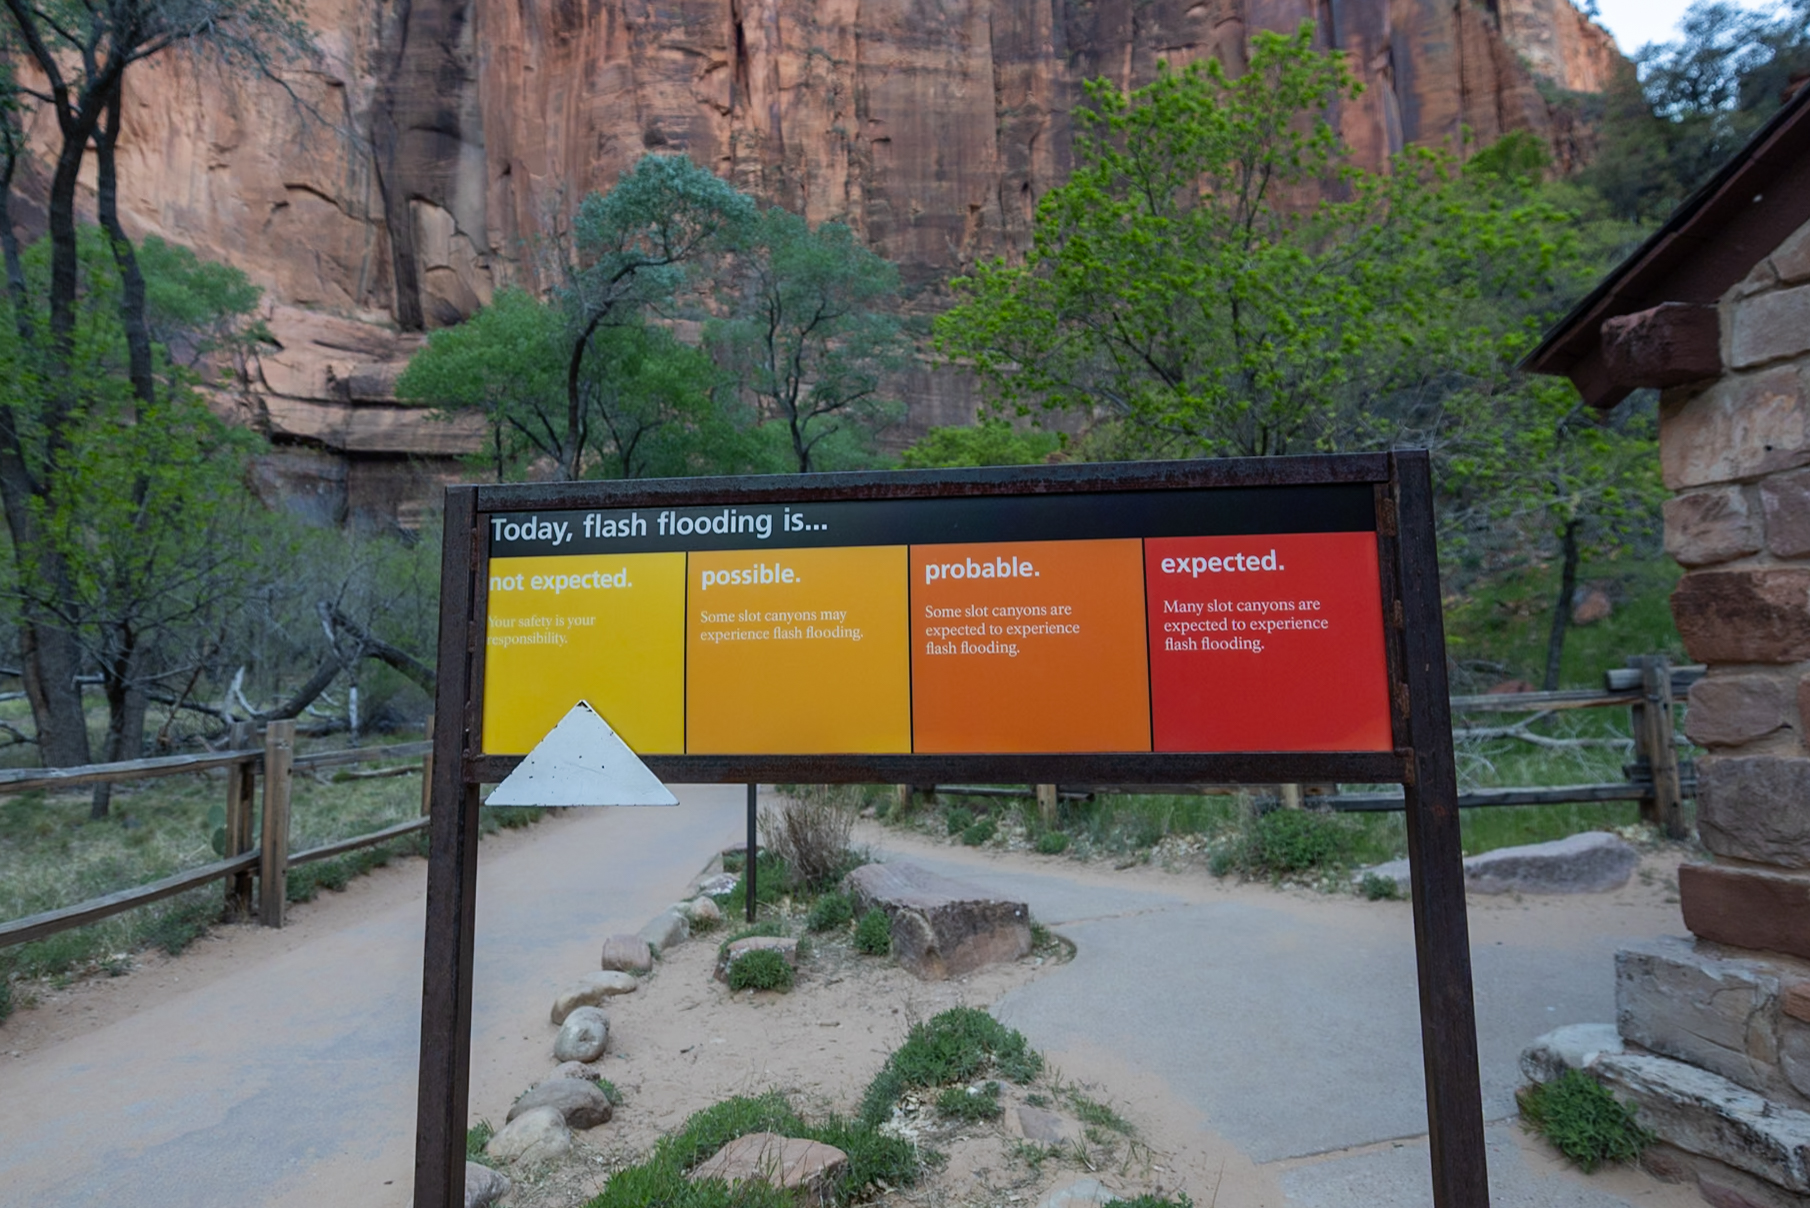
On the morning of the hike, we caught the 7:30 a.m. shuttle to Stop 9, hiked the scenic Riverside Walk, and entered The Narrows by 8:00 a.m. We highly recommend starting early to avoid the crowds. Check the shuttle schedule to hop on the earliest bus, 6 a.m. or 7 a.m. depending on the season.
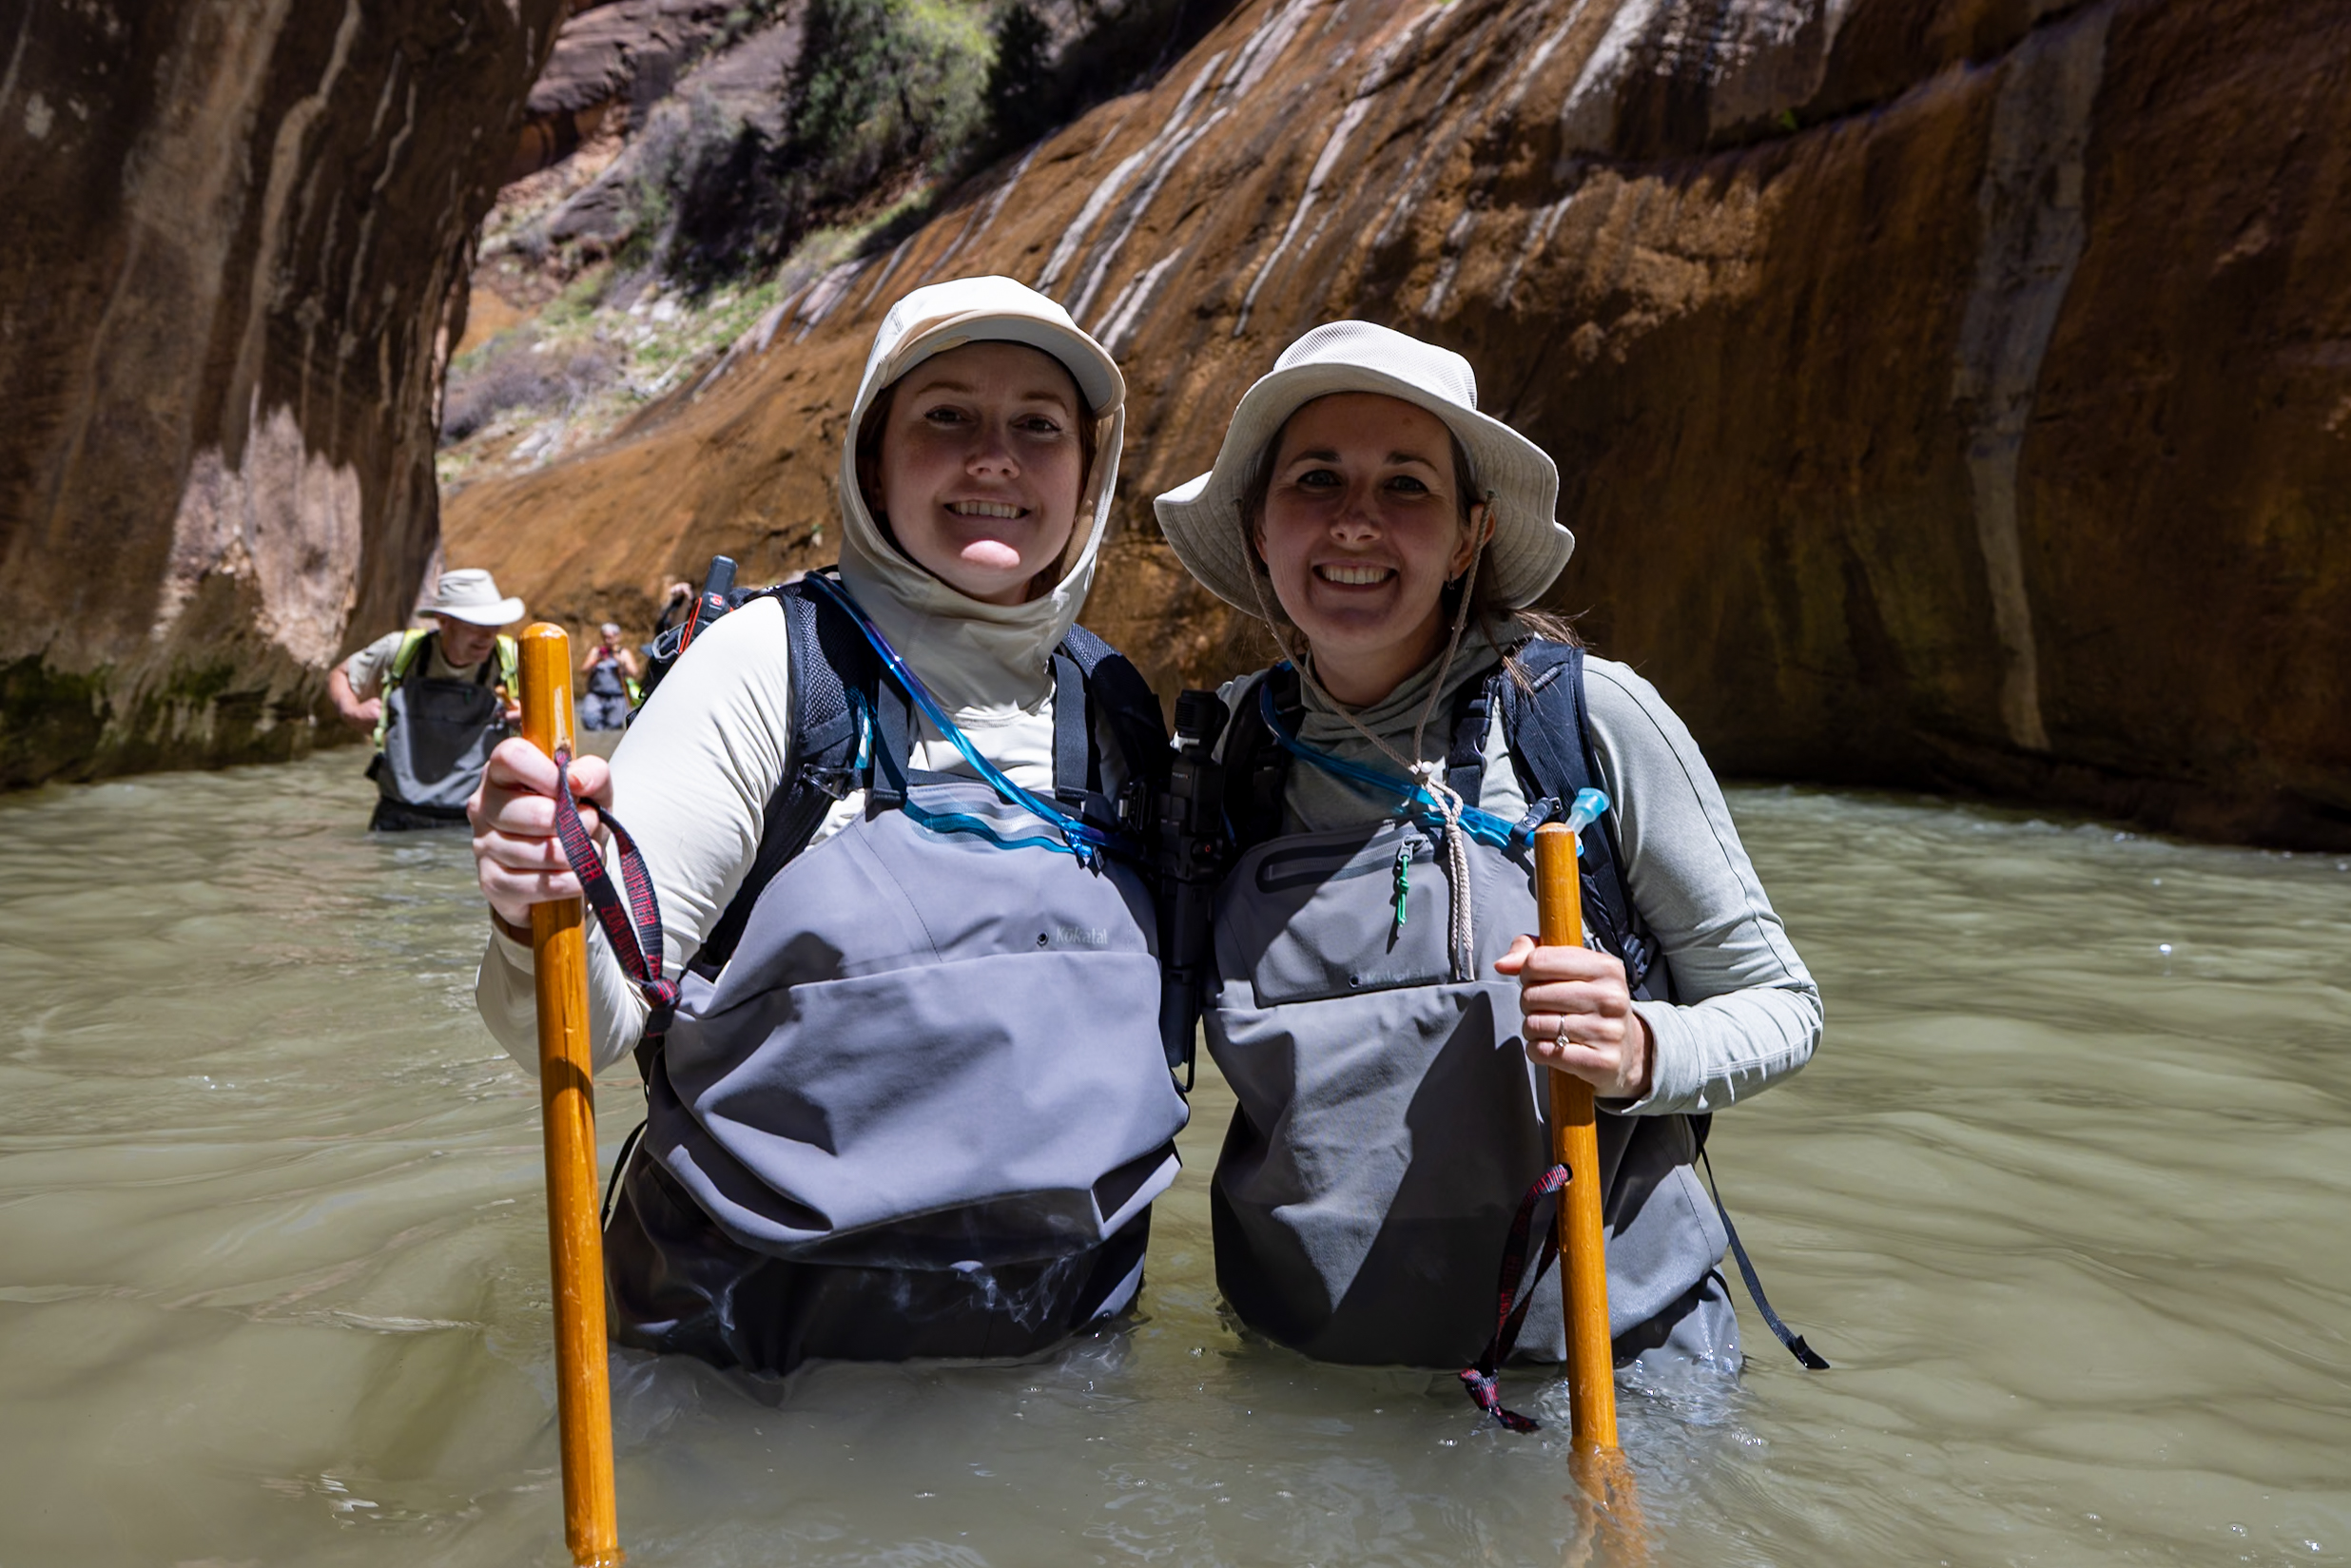
No permit is required for the Bottom-Up route, and you can hike as far as you’d like—up to 9 miles one-way. We did nearly the full stretch, and it took us about 7 hours total (though we’ve read reviews where people finished anywhere from 5 to 8 hours). If you’re interested in the top-down version of the trail, which does require a permit, you can apply for one here—select “Virgin Narrows Day Use Trail From Top.”
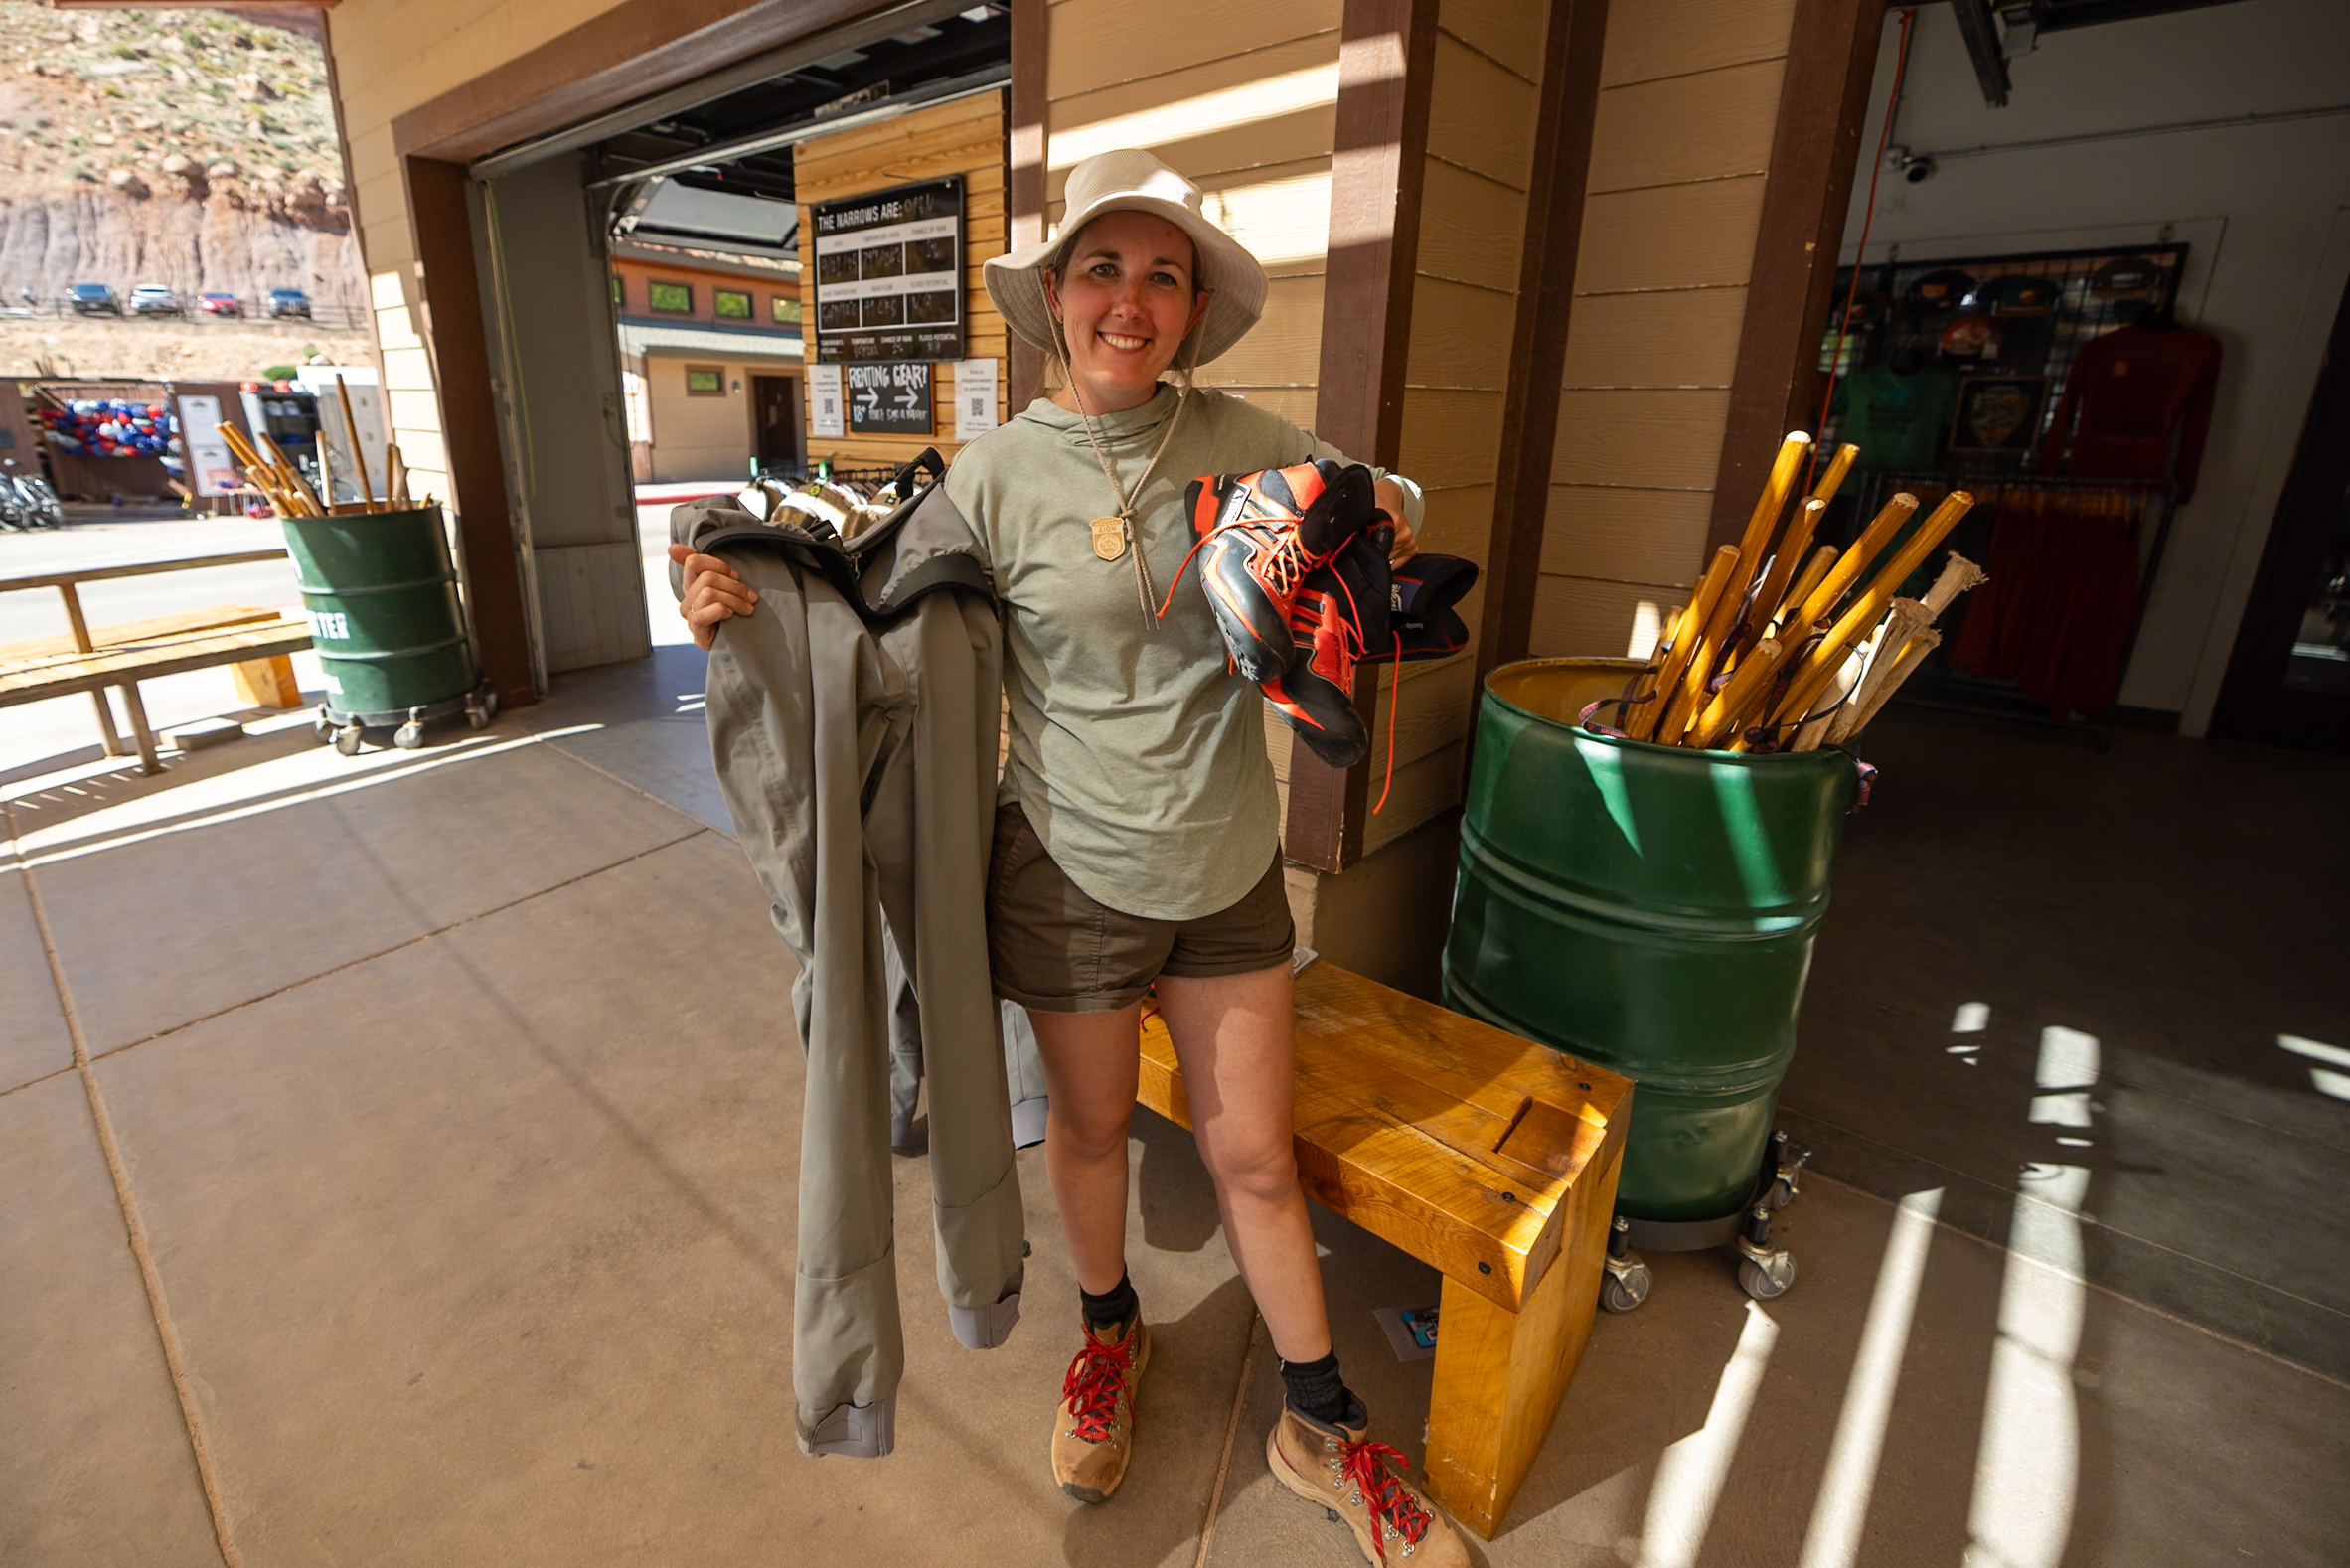
ℹ️ Gear Tip: In colder months (when the water’s 50°F or below), we recommend renting full-length waders and trekking sticks from Zion Outfitters like we did. In summer, once the river warms up, water shoes and trekking sticks should be plenty.
Distance: 8.9 miles / 14.3 km
Difficulty: Hard
Estimated Time: 6-8 hours
Permit Required: No (Top-Down Yes)
12. The Subway
The Subway is another one of Zion’s top 3 iconic hikes, known for its tubular canyon formations that resemble—you guessed it—a subway tunnel. This strenuous, full-day hike takes you through twisting slot canyons, stream crossings, slick rock, and boulder scrambles. A permit is required, so be sure to apply through this permit link in advance.

We didn’t get the chance to do this hike on our last trip, but it’s definitely on our Zion bucket list. From what we’ve learned, this trail is best done between late spring and early fall when water levels are lower and temperatures are manageable.
💡 What to Wear: We recommend two pairs of shoes—sturdy hiking boots for traction in the dry parts and water shoes with neoprene socks for the wet parts (if you want to avoid soaking wet boots). Hiking poles are also highly recommended to help your balance.
Distance: 7.2 miles / 11.6 km
Difficulty: Hard
Estimated Time: 6-9 hours
Permit Required: Yes
13. Angel’s Landing
The Angel’s Landing Trail is arguably Zion’s most infamous—and adrenaline-pumping—hike. Known for its narrow spine and sheer drop-offs, this technical route involves scrambling along chains bolted into the rock. A permit is required year-round, and you can apply on Recreation.gov. If you’re lucky enough to snag one, download your permit while you still have service, they do check!
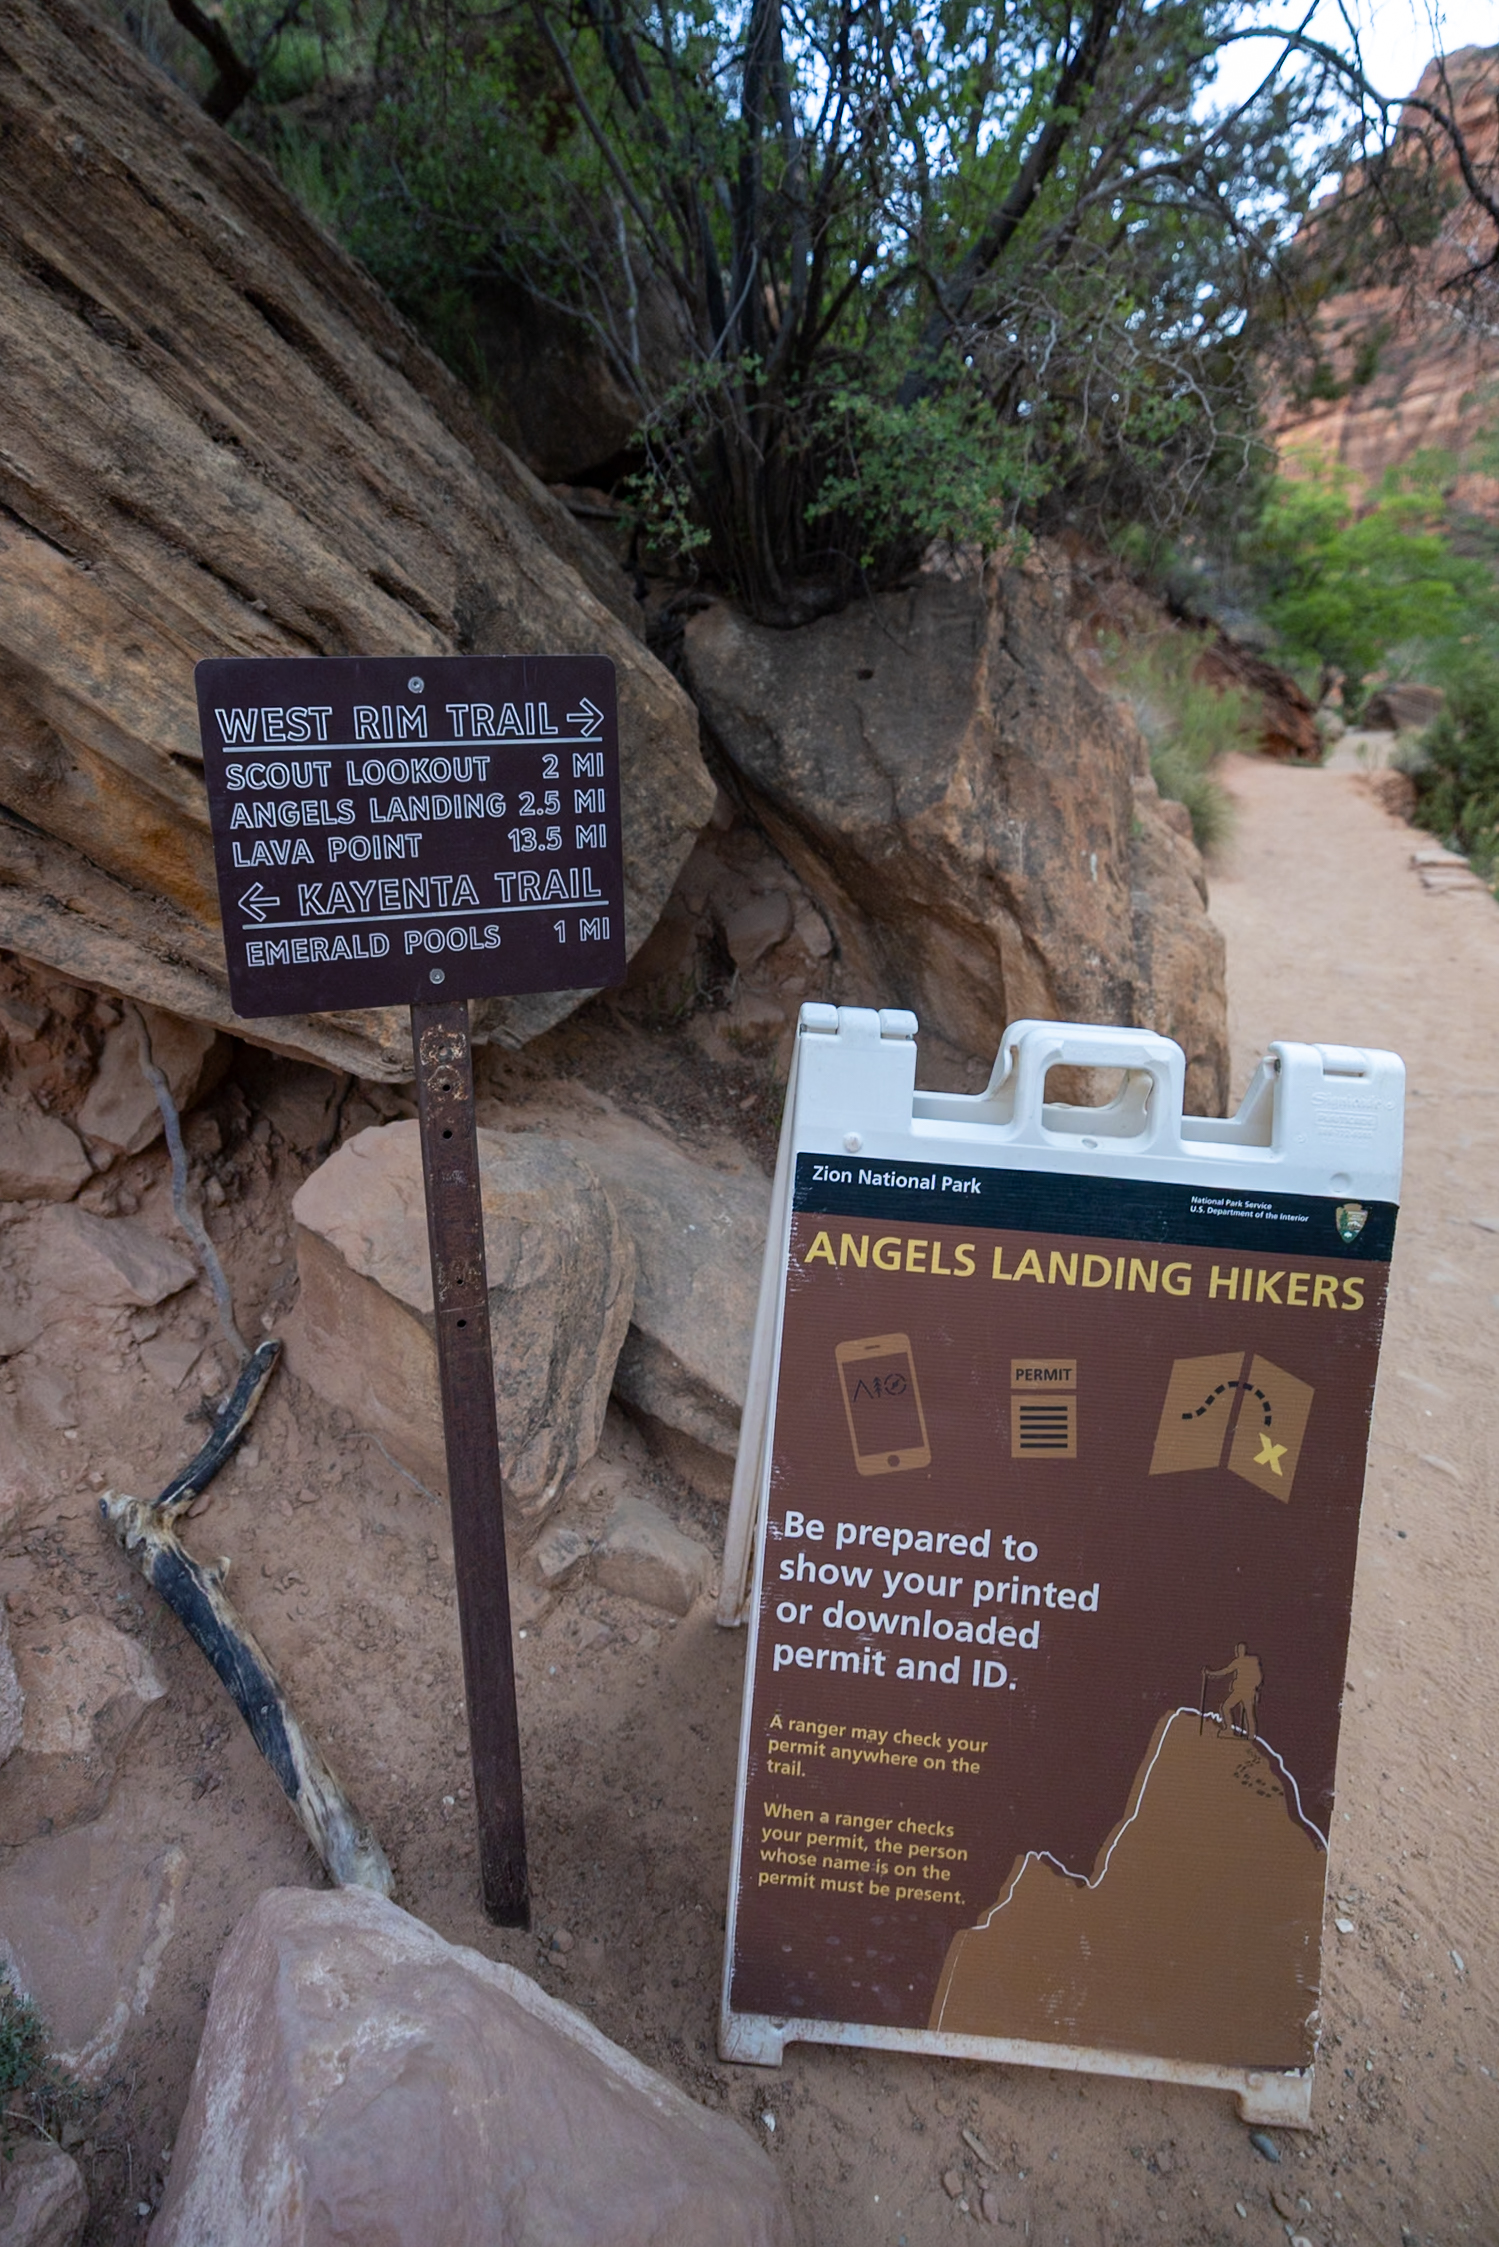
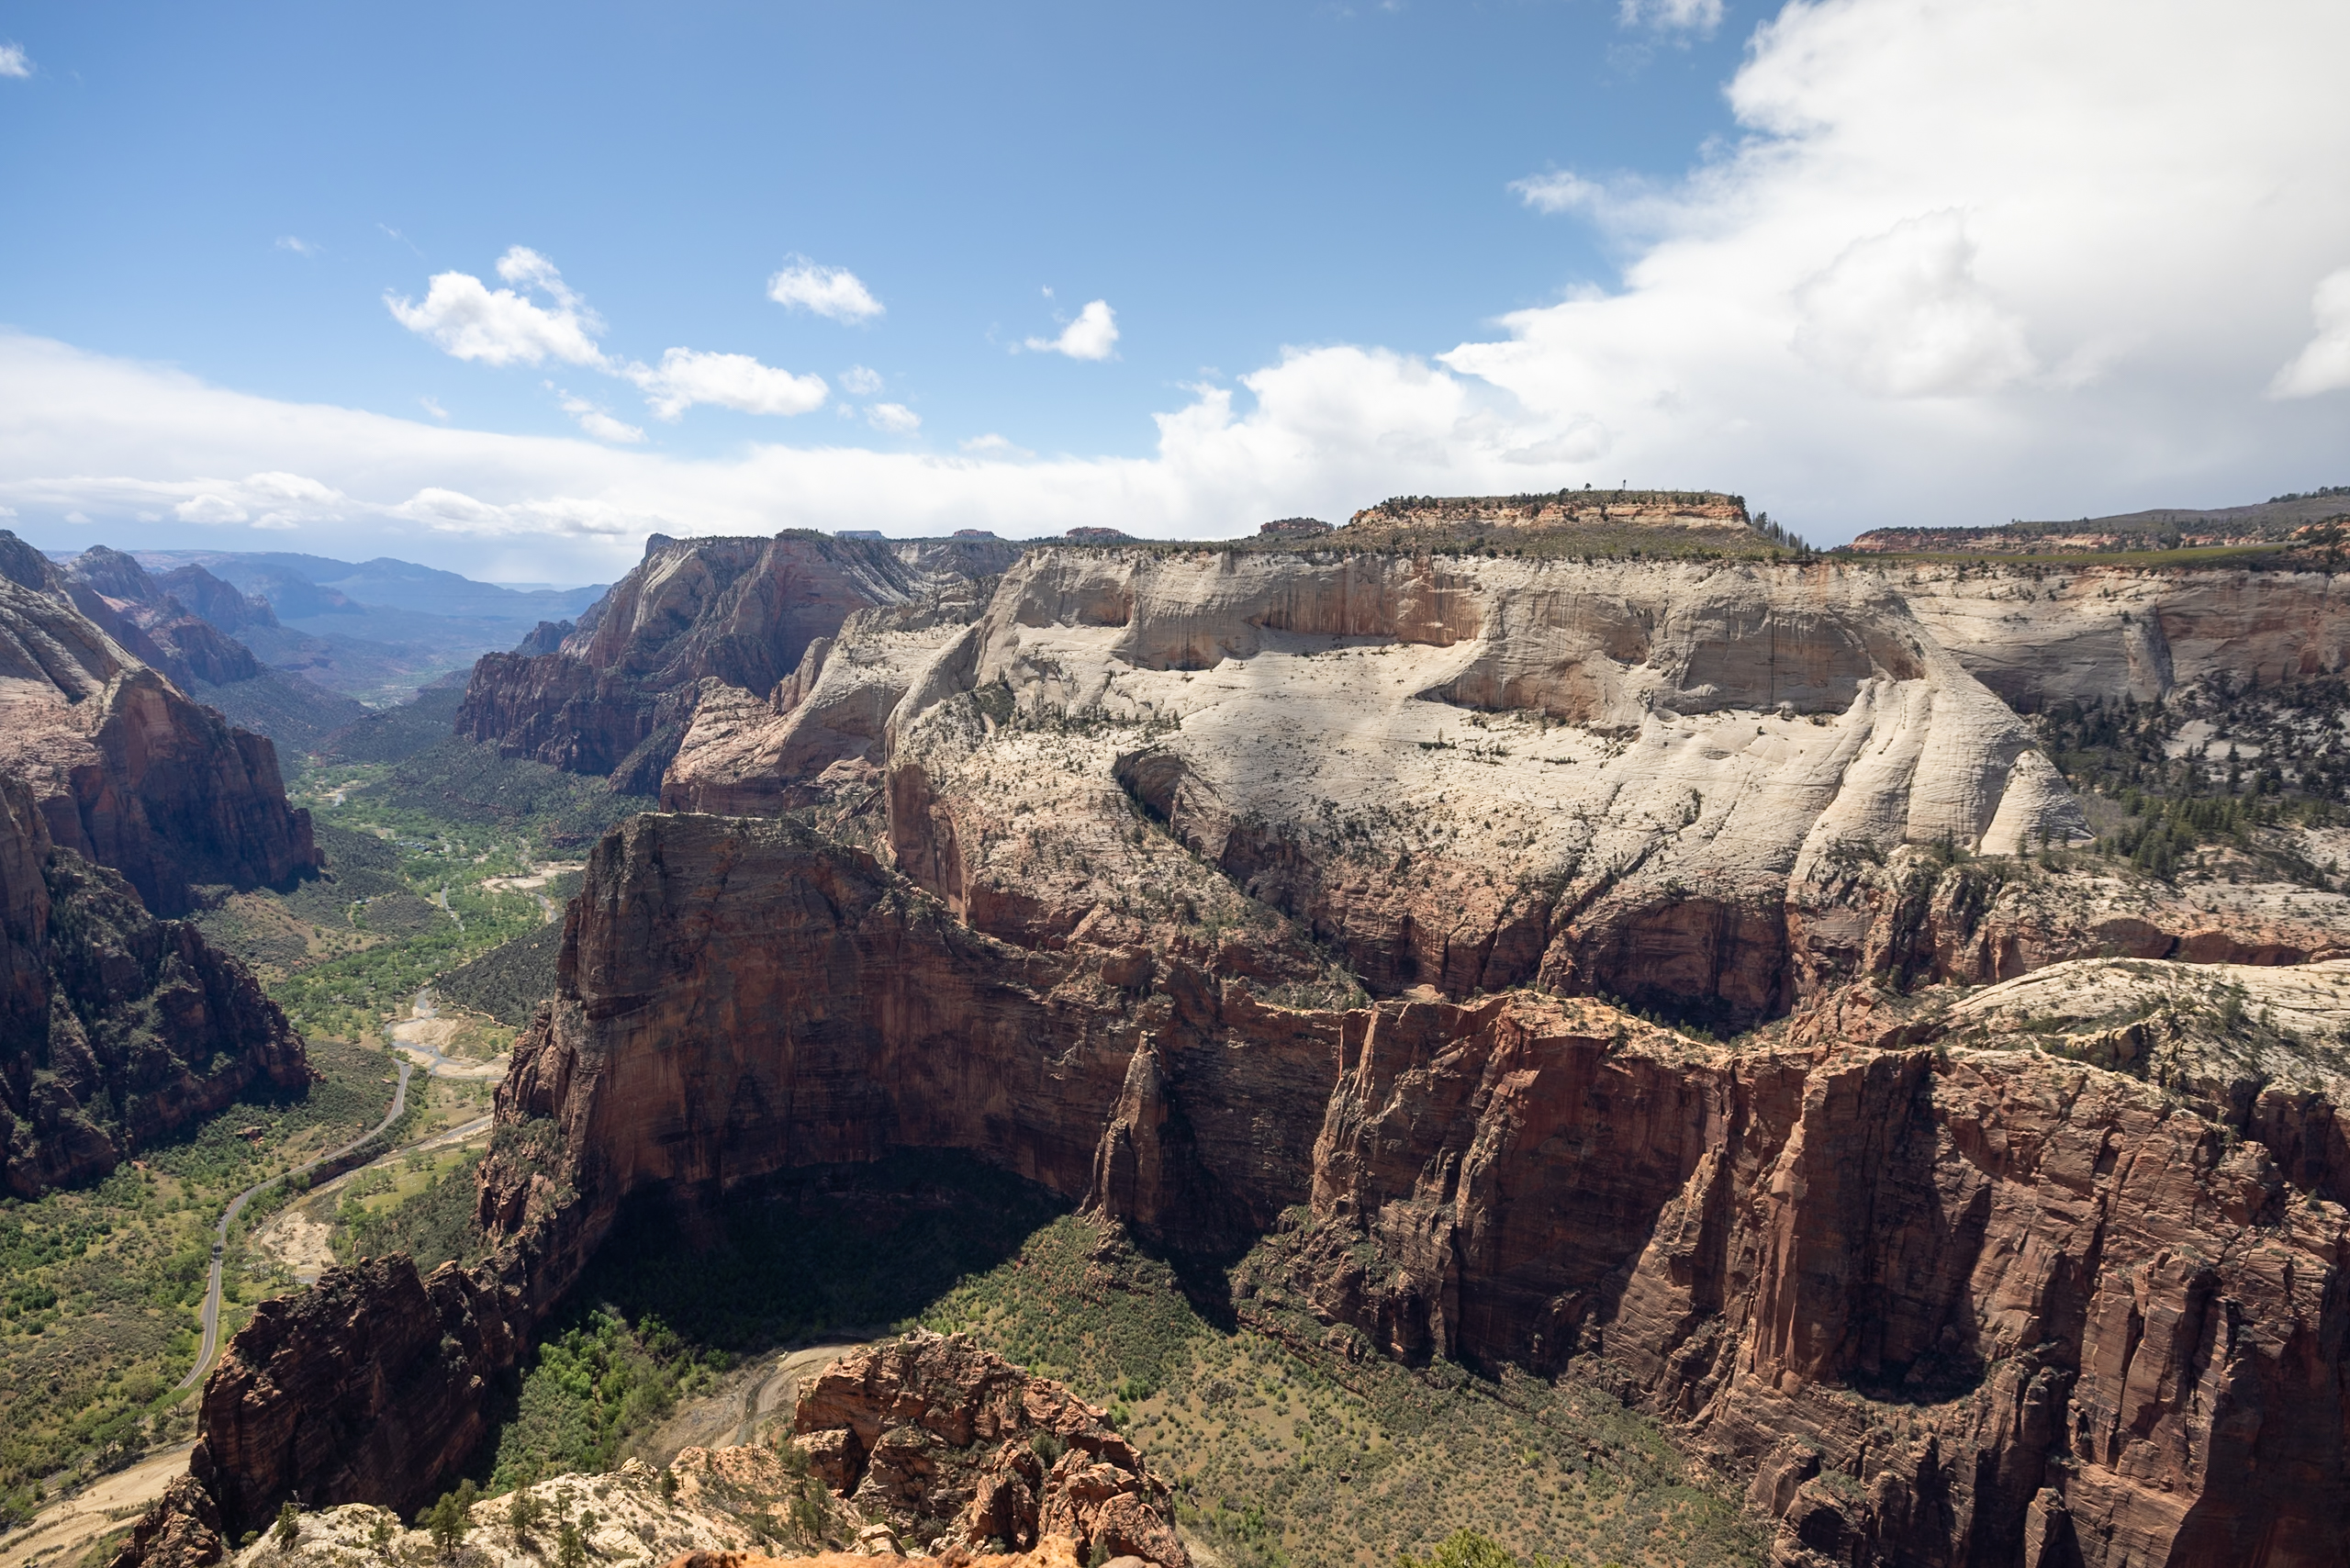
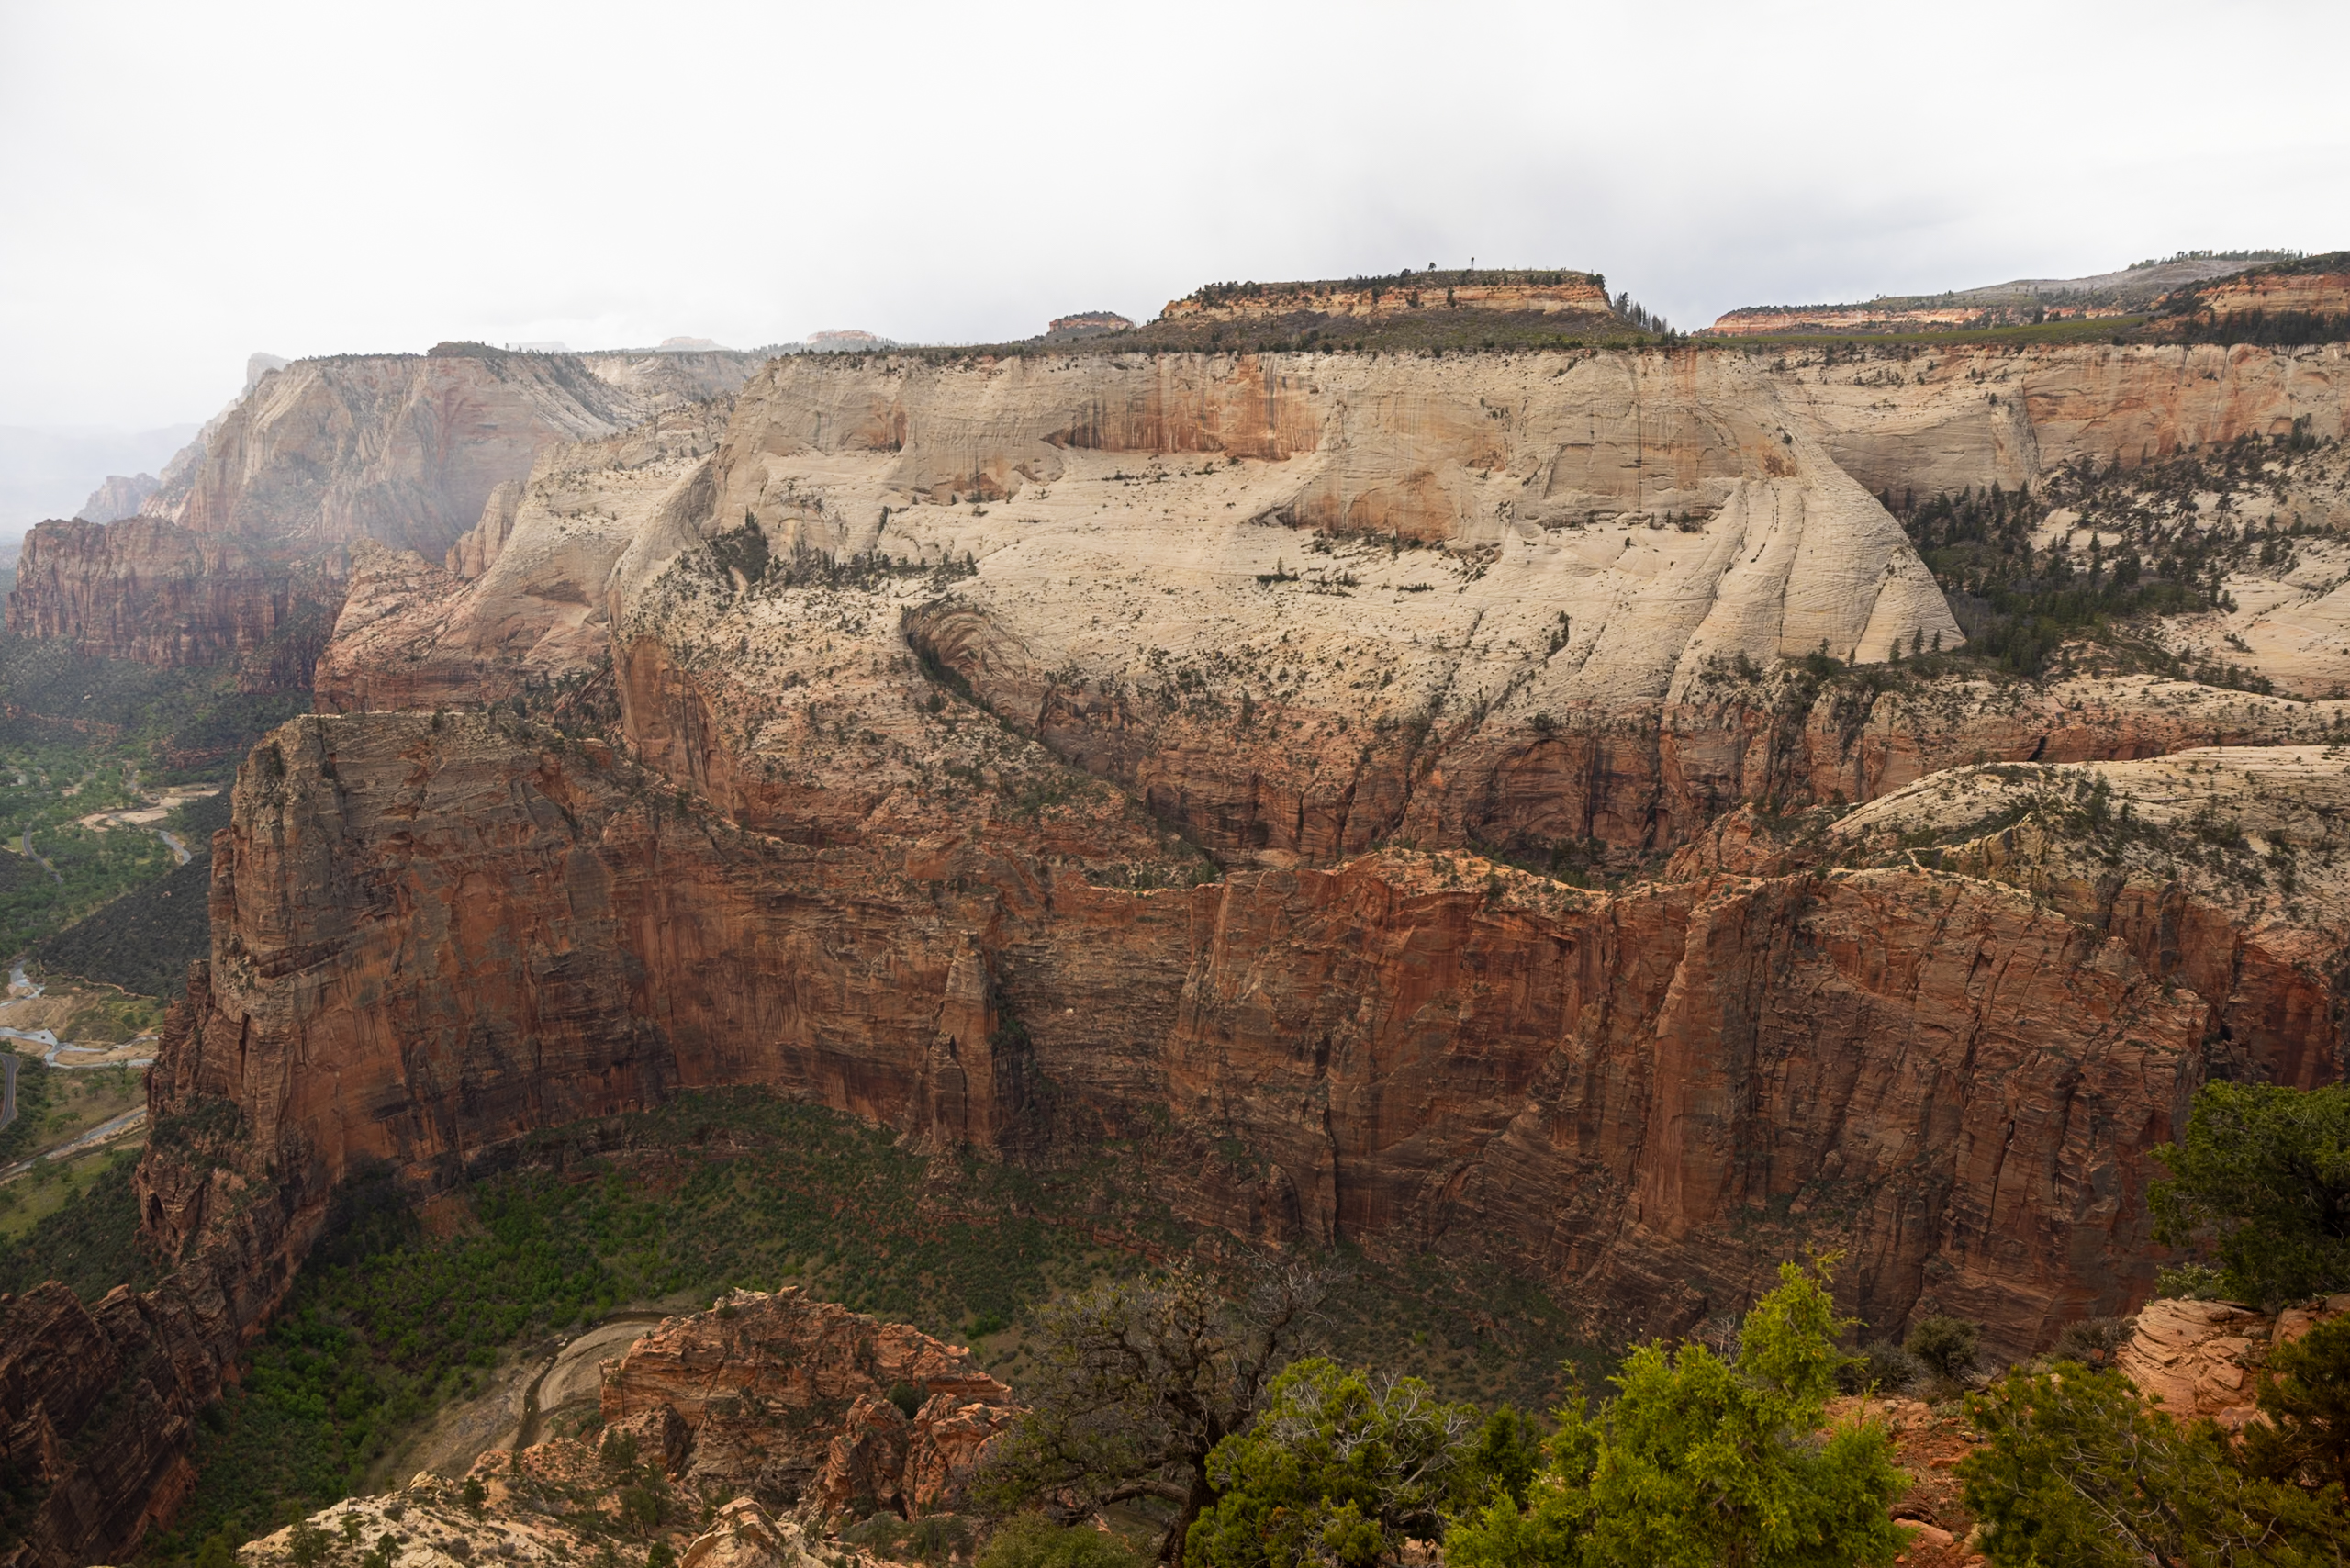
We didn’t hike Angels Landing on this trip, but it’s high on our Zion bucket list. Based on research and recommendations, the best time to hike is early in the morning to beat both the heat and crowds. If you’re unable to get a permit, we highly recommend Observation Point instead—it offers a similar panoramic view looking south over Zion Canyon, including a stunning perspective of Angel’s Landing from above.
Distance: 4.3 miles / 6.9 km
Difficulty: Hard
Estimated Time: 2.5-3 hours
Permit Required: Yes
With offline maps, wrong-turn alerts, and extra planning features, make the most of every outside adventure with AllTrails Plus. Get 7 days of AllTrails Plus for free!
🗺️ Map of Zion National Park’s 13 Best Hikes
Here’s a map showing the general location of all 13 of Zion’s best hikes featured in this guide. It’s meant to give you a quick sense of where each trail is within the park, which can be super helpful for planning your route and minimizing drive or shuttle time. For detailed trail navigation, though, we recommend deferring to AllTrails or a dedicated GPS app.
How to use this map: We have saved the locations from this guide on this map. You can save this map to your Google Maps by pressing the star icon. In your Google Maps, click the menu icon and then Saved Maps, where this map will appear.
🌤️ When To Visit Zion National Park
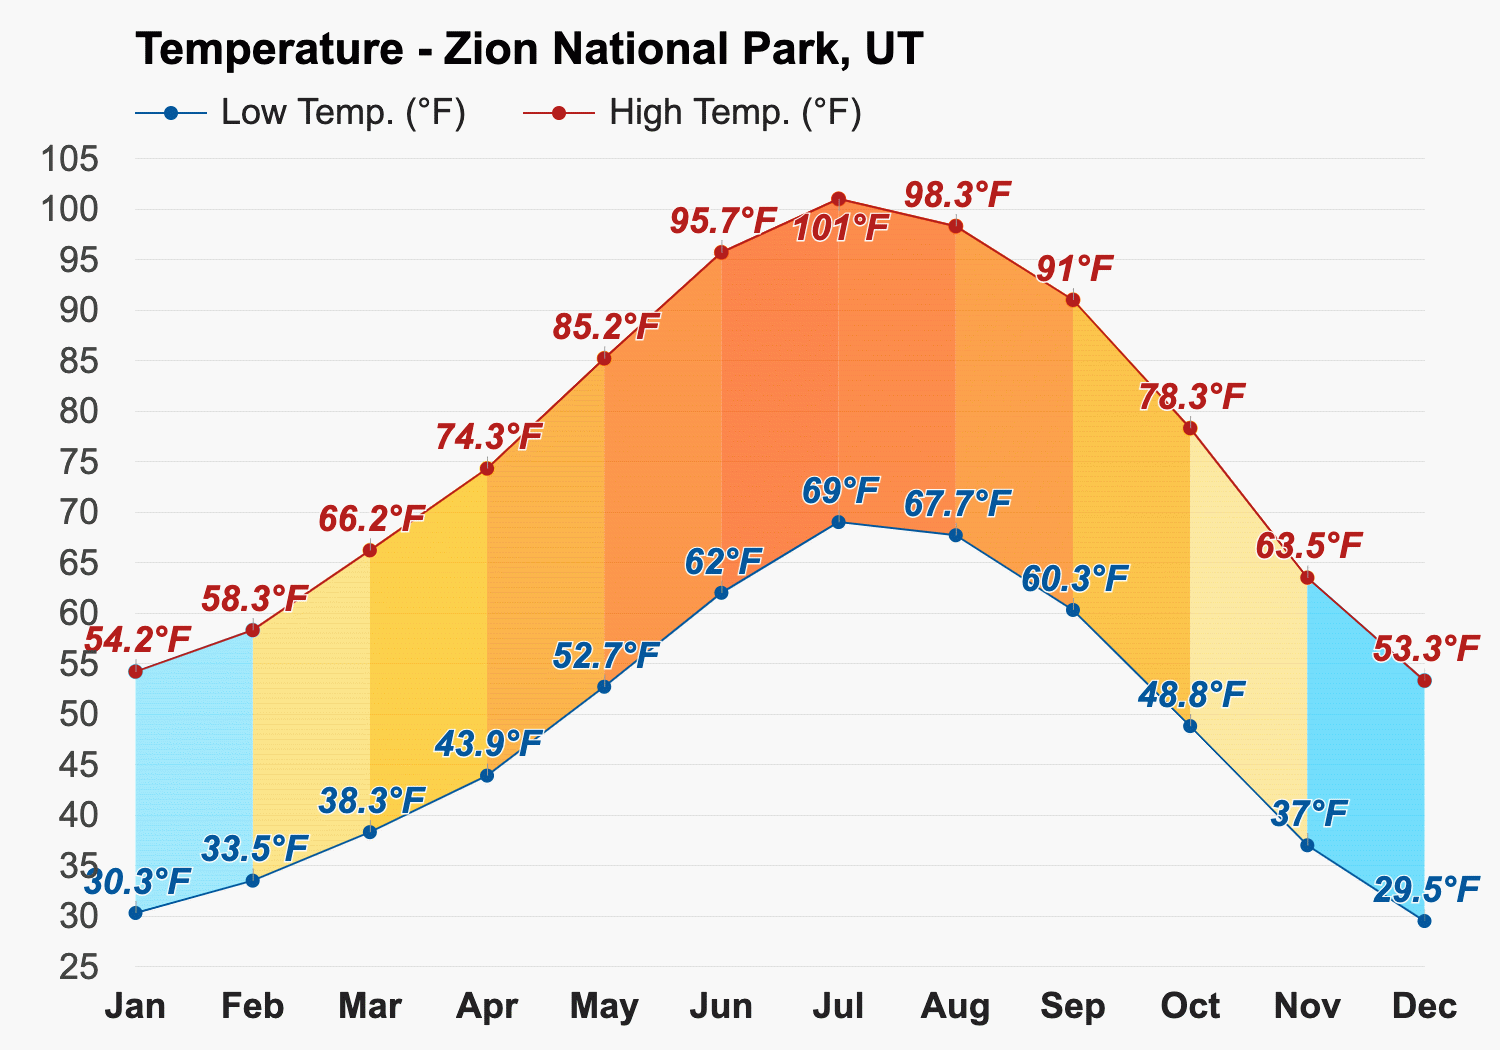
For ideal weather and fewer crowds, we recommend planning your trip for April in the spring or October to early November in the fall. Summer brings intense heat and large crowds, but with an early start and plenty of water, it’s still doable. Winter tends to be cold and muddy, with limited access to some trails due to snow or ice.
We visited in mid-April and found it to be a perfect balance—mild temperatures, moderate crowds, and trail conditions that allowed us to hike even the seasonal ones like The Narrows, which sometimes close if the snow melt causes the river to rise too much.
🥾 What to Pack (and Rent) for Zion
Here’s everything we recommend packing—or renting—if you plan to tackle any of the hikes mentioned above. Some gear is specific to certain trails (like waders for The Narrows), so feel free to skip items that don’t apply to your plans.
Sun Protection
- Sunscreen – No matter the time of year you visit, sunscreen is essential to protect your skin from the sun.
- Wide-brimmed hat – As part of sun safety, we love pairing sunscreen with wide-brimmed hats.
- Sun Shirts – Light, sunshirts are great for protecting against the sun! Here is Elliot’s favorite long-sleeve sun shirt and Jen’s favorite long-sleeve sun shirt.
- Refillable Water Bottle – Staying hydrated is a key part of sun safety. We love this water bottle featuring all of the US National Parks with stickers to check off your visits. There are water fill-up stations throughout all of Zion National Park.
Hiking Essentials
- Hiking shorts or pants – We recommend hiking pants to protect against the sun and trails with higher grasses. Elliot’s favorite hiking pants and Jen’s favorite hiking pants.
- Rainjacket – You never know what weather awaits you when travelling in a national park. If you’re looking for a new rain jacket fit for hiking, this is Elliot’s favorite rain jacket and Jen’s favorite rain jacket.
- Hiking Boots – Solid footwear is a must whenever hiking. Here are Elliot’s favorite trail runners and Jen’s favorite hiking boots.
- Water Shoes – If you’re attempting a watery trail (like The Narrows or The Subway), we also recommend water shoes. We rented ours from Zion Outfitters.
- Waders – Waders (waterproof pants) are almost necessary for hiking The Narrows when the water temperature dip below 50. You can rent them from a local outfitter like Zion Outfitters.
- Hiking Poles – Thicker poles are also recommended for hikes like The Narrows (available for rent), but your average thin hiking poles are okay for the rest of the hikes. We recommend asking a ranger a day before you set out on a hard-level hike what they recommend.
- Lightweight backpack – Elliot carries this backpack with the included rain cover, while Jen carries this backpack.
- Snacks – We always make sure to pack protein-rich, lightweight snacks with us while hiking.
Safety Essentials
- Trail Maps – We love using AllTrails+ to download maps ahead of time.
- GPS – We carry the Garmin InReach Mini 2 with us on all trails for safety.
- First Aid Kit – This first aid kit is one of those items we hope to never have to use but always carry, just in case.
- Headlamp – A headlamp is especially useful when going on sunrise, sunset, or night hikes!

Read Next:
How to Spend One Day in Zion National Park
📰 Related Articles
- 5 Short and Easy Hikes in Zion National Park
- 9 Fun Things to Do in Zion National Park in 2025
- Zion Packing List: What to Bring and What to Rent
- Our 7 Favorite Viewpoints in Zion National Park (No Hiking Required)
- How to Hike the Narrows as a Beginner: Zion National Park
- 5 Things You Need to Know Before Visiting Zion National Park
- How to Spend One Day in Zion National Park
- Zion Itinerary: How to Spend 3 Days in Zion National Park
- The 4 Scenic Drives of Zion: Top Pull-Offs and Nearby Trails
- Our 9 Favorite Things to Do in Zion National Park Besides Hiking
📺 Watch on YouTube
🔍 Ready to Explore Zion National Park?
Pin this Zion National Park Best Hikes Guide to make planning your upcoming trip a breeze!


Leave a Reply
You must be logged in to post a comment.