

Hiking The Narrows in Zion National Park can feel intimidating, especially if it’s your first time. Instead of a typical dirt trail, you’re trekking through a cold, rocky river with water possibly reaching as high as your waist (or higher). But trust us—although this hike in southwestern Utah requires some preparation, it’s one of the most unforgettable hikes in the entire U.S. National Park system.
Based on what we learned, we’ve compiled this beginner-friendly guide to help you confidently prepare for hiking the Narrows. From what gear you need to when to go and how far to hike, we’re sharing everything we wish we knew before we did this hike!
Note: We use affiliate links which provide us a little kickback each time you use one of our links and make a purchase, without any additional cost to you. We do not recommend products that we don’t already love or have heard great things about, so you can trust we’re only suggesting great products to you.
ℹ️ About the Narrows Hike
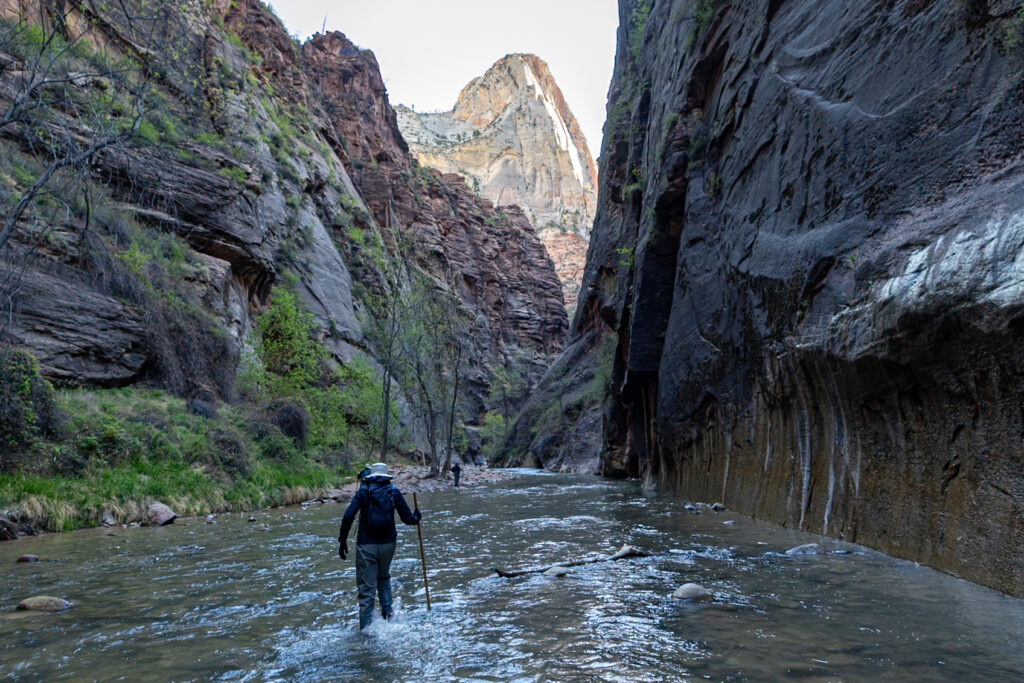
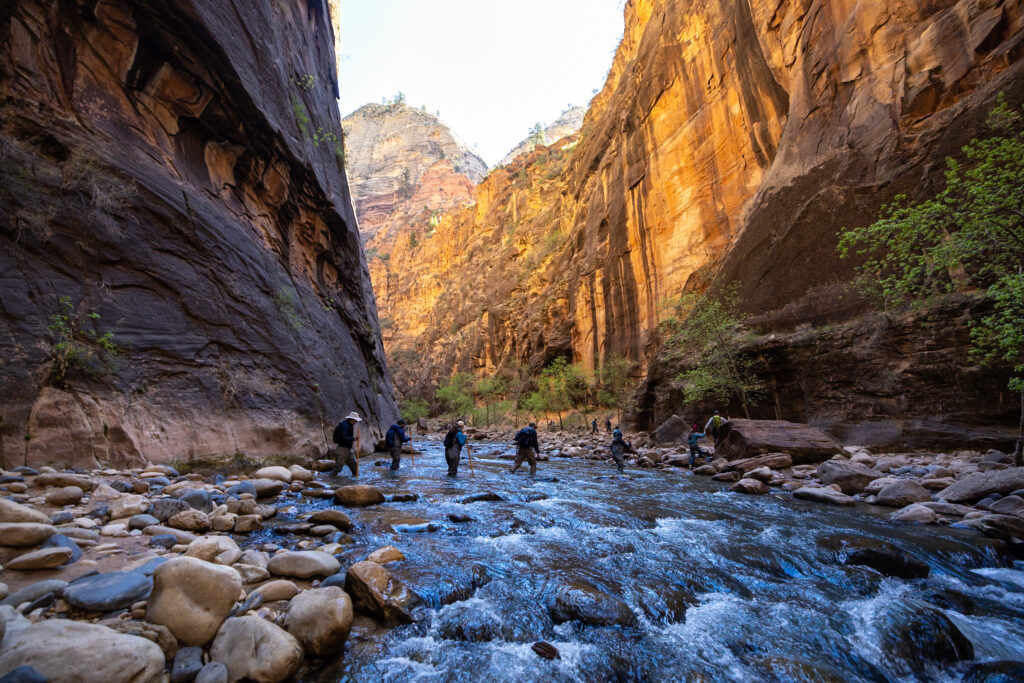
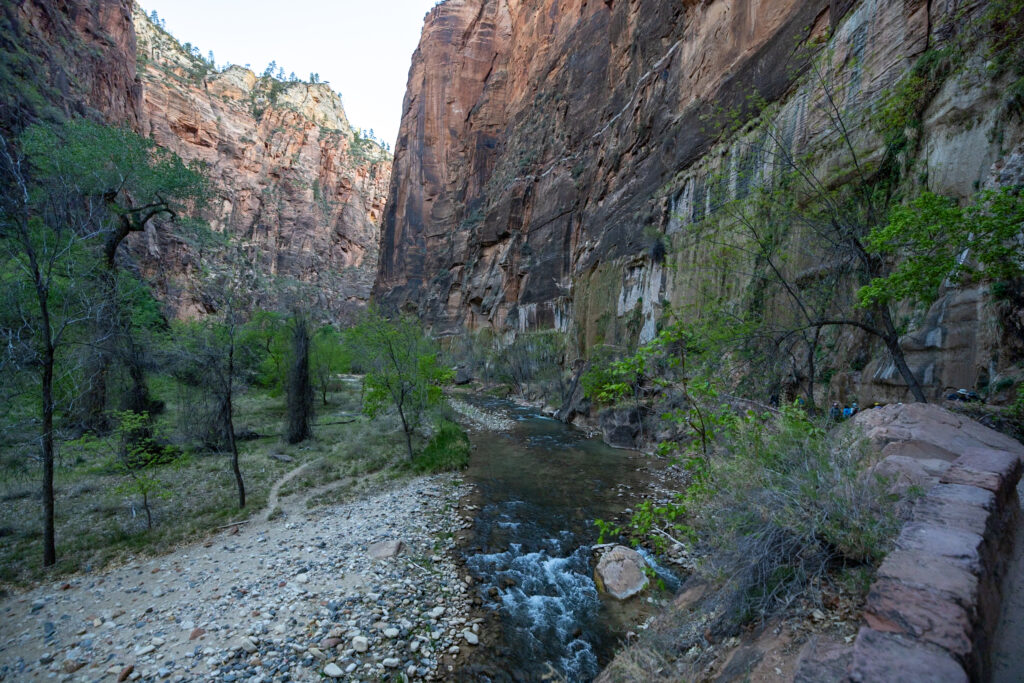
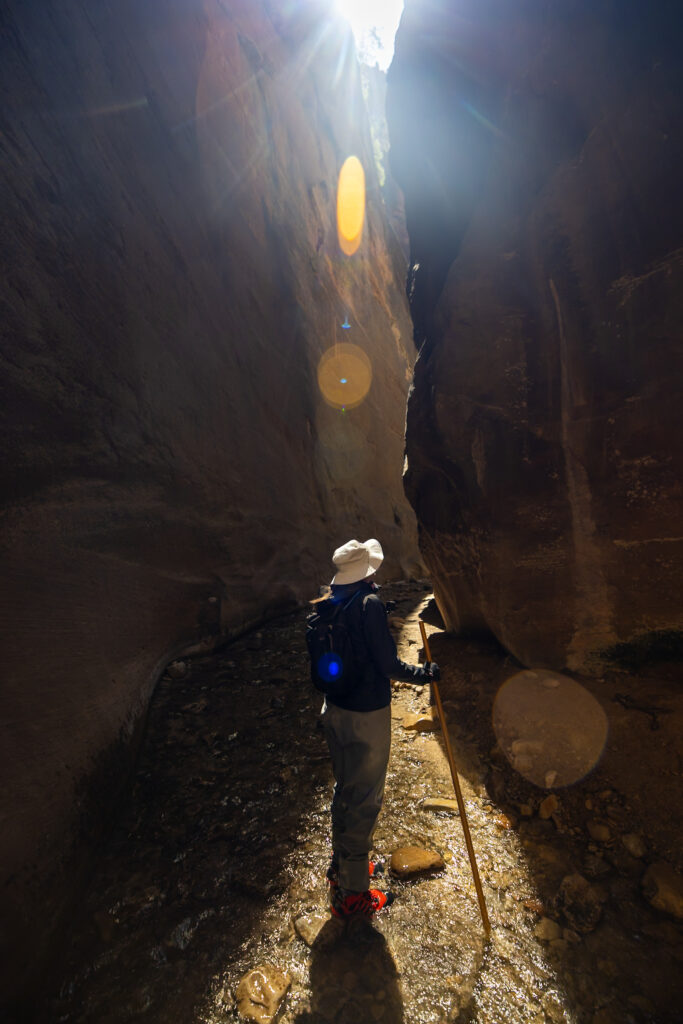
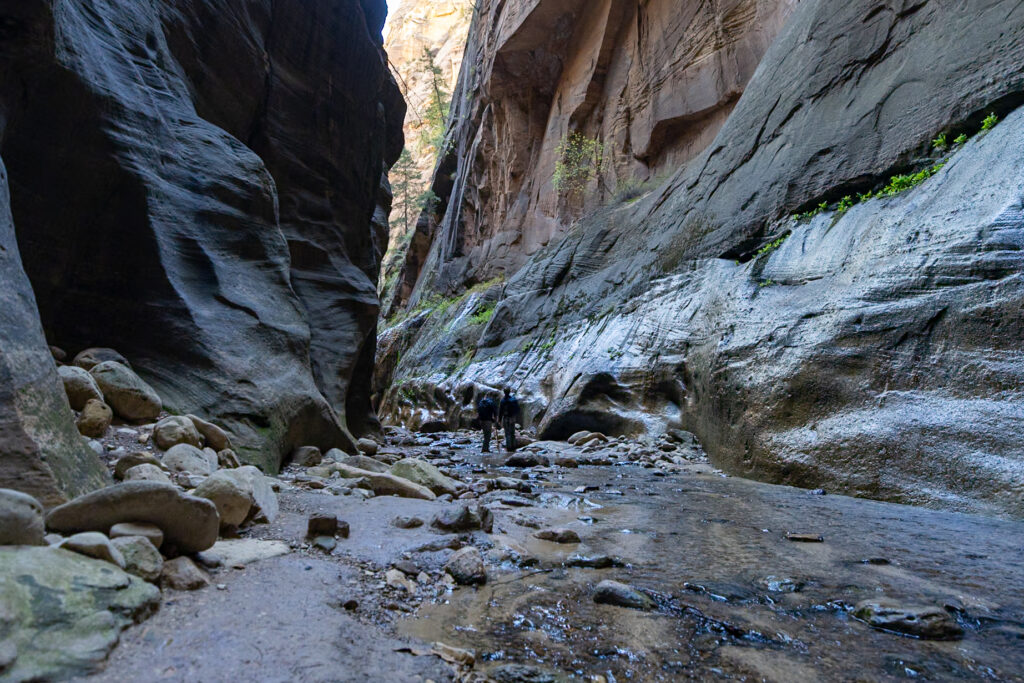
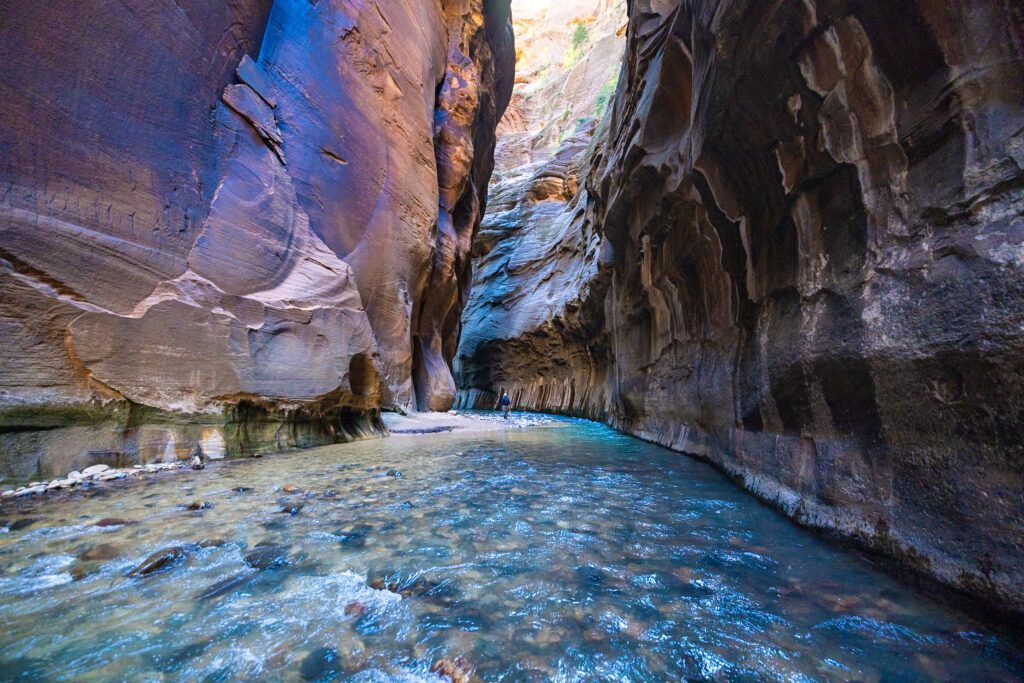
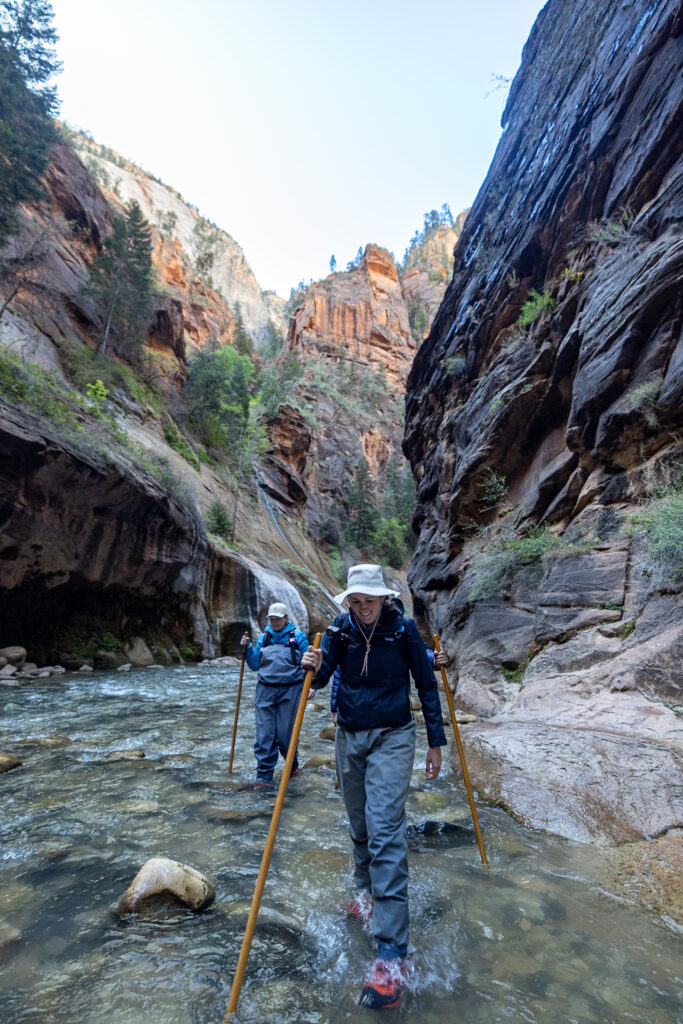
The Narrows is an up-to 16-mile hike that runs through the Virgin River, winding between the towering red walls of Zion Canyon. At times, the canyon squeezes in to just 20 feet wide, with water levels ranging from ankle-deep to chest-high, depending on the water levels that day. There are two main ways to hike The Narrows:
- Bottom-Up, which starts from the Riverside Walk and doesn’t require a permit. This hike is an out-and-back, and typically you’ll hike around 6-8 miles from the bus stop.
- Top-Down, a more intense 16-mile route starting from Chamberlain’s Ranch that does require a permit and is sometimes split into two days.
💡 Most people (us included) opt for the Bottom-Up route as it’s more flexible, beginner-accessible, and a lot less technical.
🎒 The Day Before: How to Prepare for The Narrows
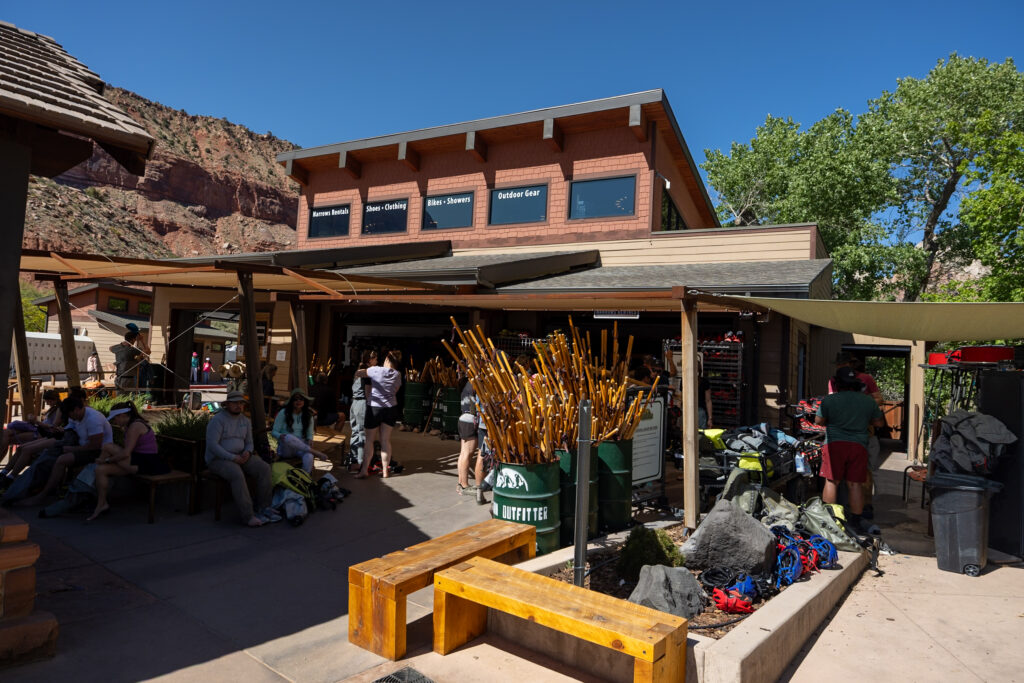
Prepping the day before makes all the difference when it comes to hiking The Narrows. First things first: if you’re planning to rent gear, pick it up the afternoon or evening before your hike. Outfitters in Springdale will set you up with waders, sturdy walking sticks, and more—and they’ll also give you updates on current conditions and water levels. More info on what and where to rent your gear in the Narrows Gear Section.
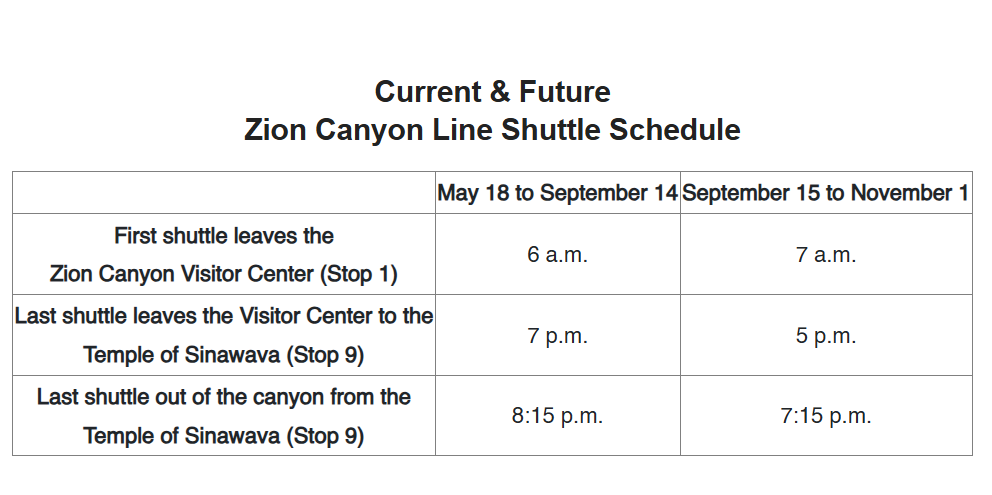
The second thing you want to plan for is an early start, which starts by getting to bed early the night before. The first shuttle into Zion Canyon leaves the Visitor Center around 7 a.m. (6 a.m. during peak season), and you’ll want to be on it. The earlier you get on the trail, the fewer people you’ll be sharing it with—and trust us, having those quiet moments in the canyon is 100% worth the alarm clock.
Please respect the outdoors and Leave No Trace! Before embarking on your outdoor adventure, review the seven principles of Leave No Trace, which include planning ahead and preparing, traveling and camping on durable surfaces, disposing of waste properly (pack out what you pack in), leaving what you find, minimizing campfire impacts, respecting wildlife, and being considerate of others. Abiding by these principles helps keep these places beautiful so others can enjoy them for years to come!
🗺️ How to Get to the Narrows
1. Start at the Zion Canyon Visitor Center
Start your day off by parking at the Zion Canyon Visitor Center located near the park’s South Entrance in Springdale, Utah. We recommend starting out early (6/7 a.m.) to avoid the crowds, and hop on one of the first shuttles. We recommend exploring the visitor center after you’re back (if you haven’t already).
2. Take the Free Zion Canyon Shuttle to Stop 9
From there, hop on the free Zion Canyon Shuttle and ride to the final stop, Temple of Sinawava (Stop #9). This bus runs from February to November and is the only way to access the trailhead during peak months. This is because private vehicles aren’t allowed on Zion Canyon Scenic Drive. The first shuttle leaves either at 6 a.m. or 7 a.m., depending on the season.

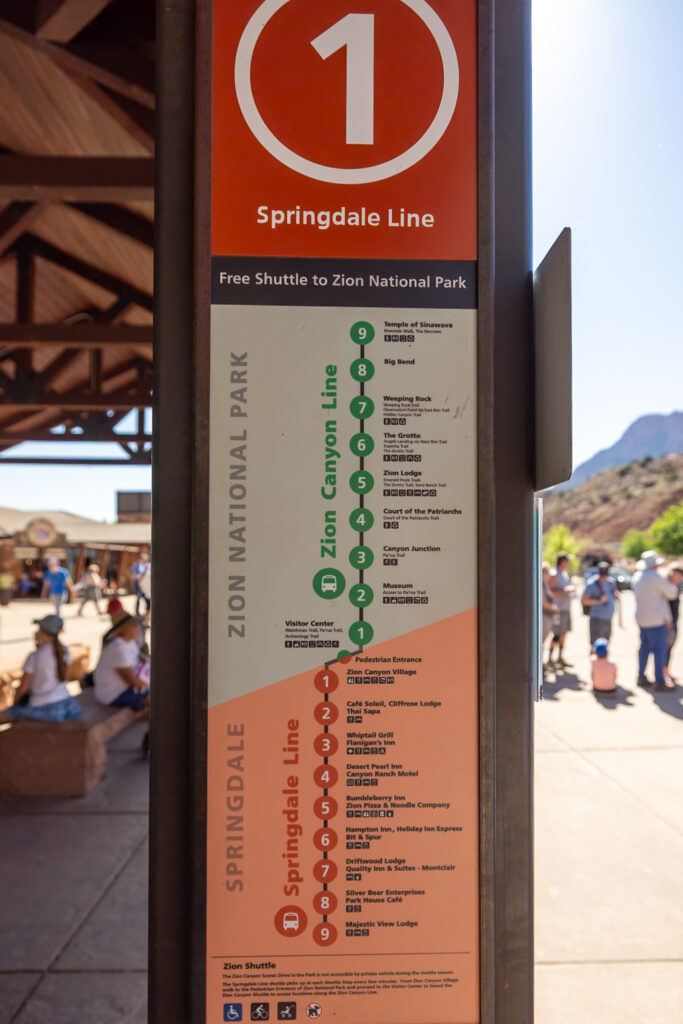
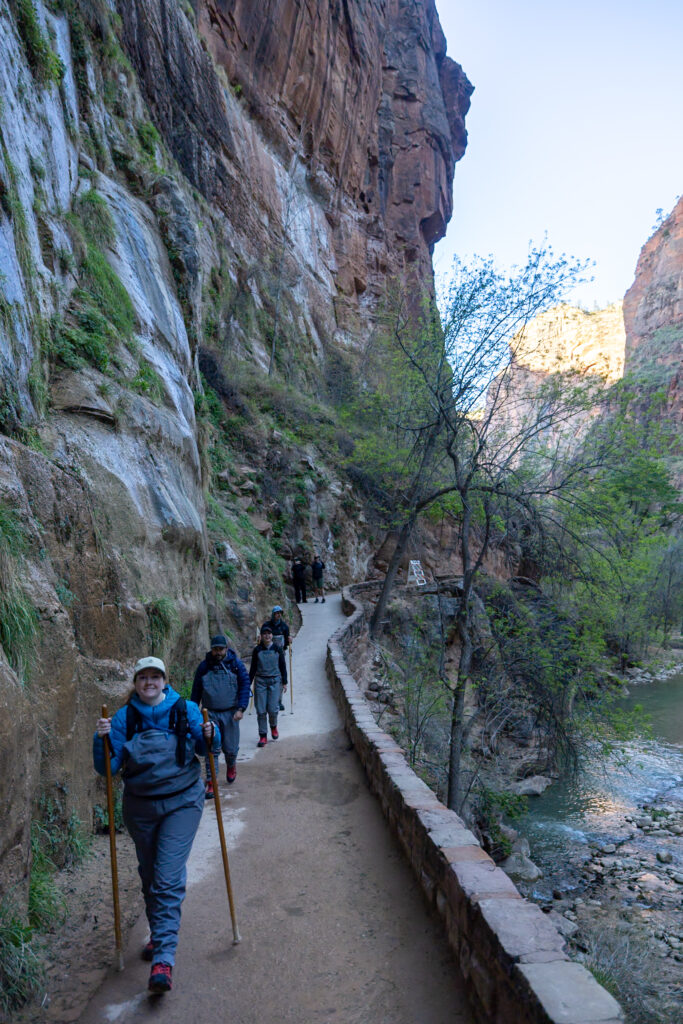
3. Access the Narrows Trailhead via the Riverside Walk
Once you arrive at Temple of Sinawava, start on the Riverside Walk, a beautiful one-mile trail that leads you directly to the river entry point, where the real Narrows hike begins. Many visitors in the park walk this gorgeous trail even if they aren’t planning on doing the Narrows!
💡 If you’re planning the more advanced Top-Down route, you’d start from Chamberlain’s Ranch. You’ll need to arrange a private shuttle and secure a wilderness permit in advance.
🥾 How to Hike the Narrows
By now, you know there are two ways to hike The Narrows: Bottom-Up and Top-Down. Below, we’ll break down what to expect from each route, plus how to apply for a Top-Down permit if you’re considering the extended trek.
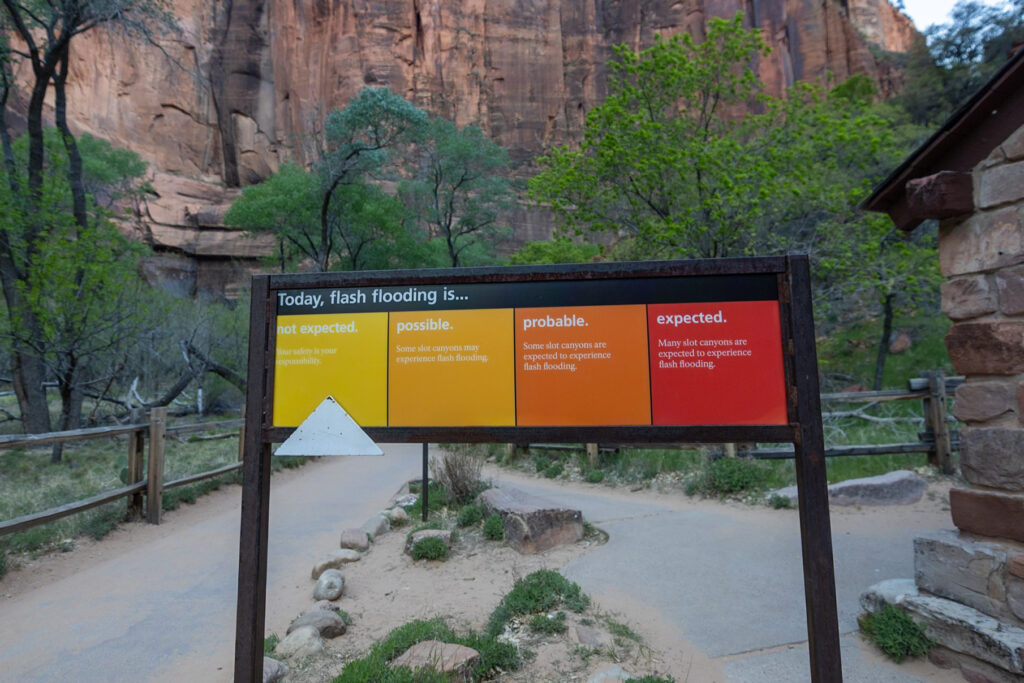
⚠️ Check Flash Flood Probability
Before hiking The Narrows, it’s crucial to check the flash flood risk. Even on clear days, upstream storms can cause sudden and dangerous flooding in the narrow canyon. You can check the flash flood probability online or by asking a ranger in person at the Visitor Center the day before your hike. If the risk is moderate or high, do not attempt the hike.
Option 1: The Narrows Bottom-Up (No Permit Necessary)
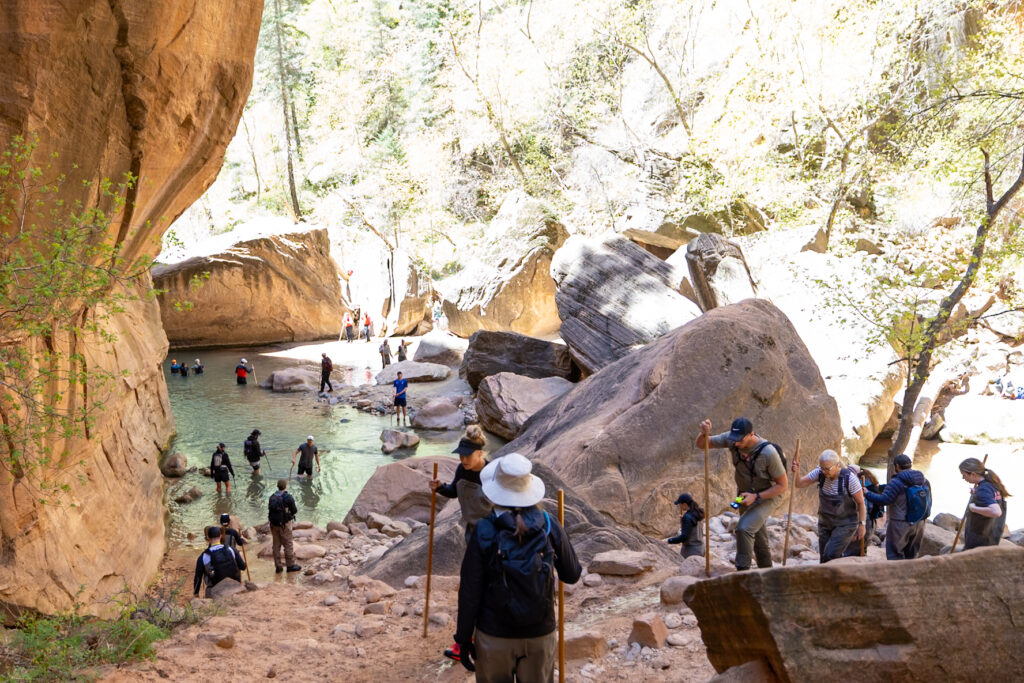
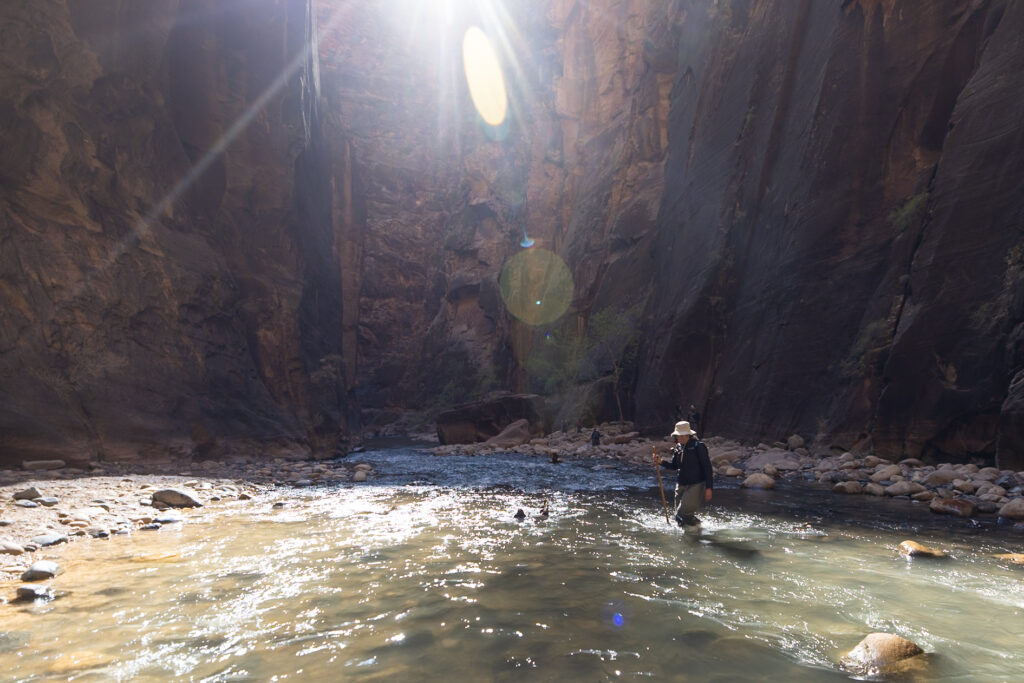
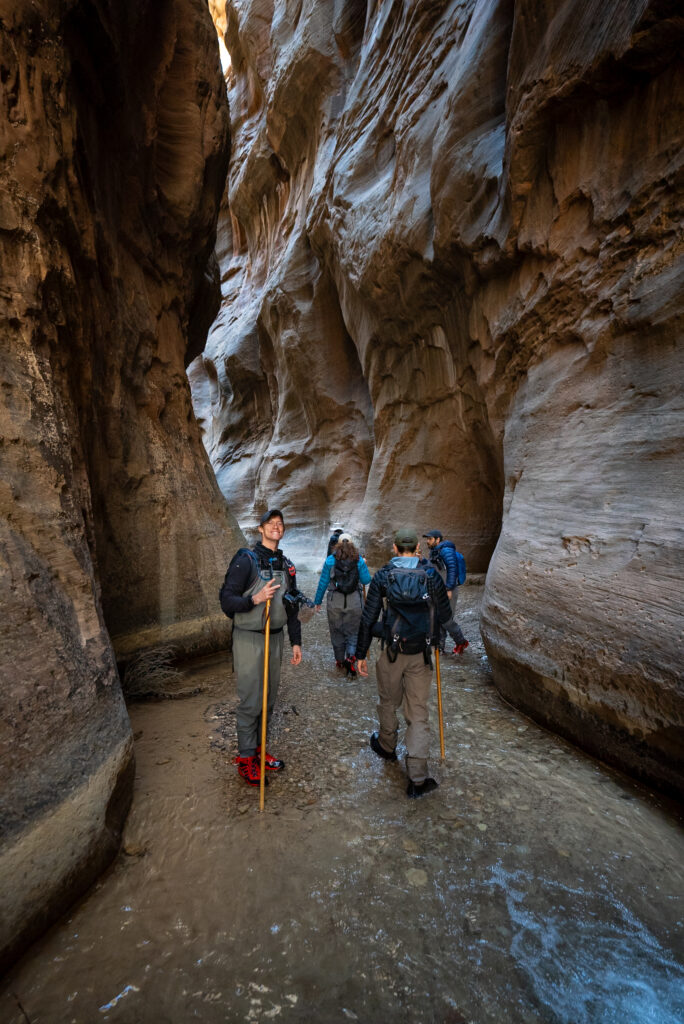
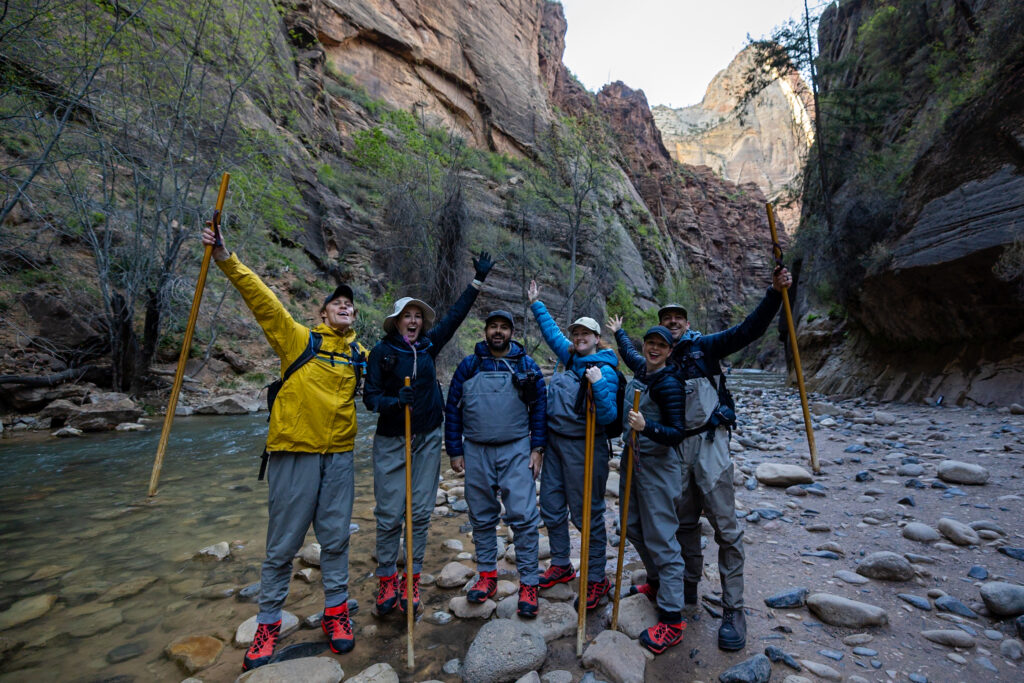
The Narrows Bottom-Up Route stretches a total of 8.9 miles (14.3 km) and gives you the freedom to hike as far as you want. We went nearly the full distance, and it took us around 7 hours total, including plenty of stops for photos and snack breaks. We’ve seen people finish in as little as 5 hours or take up to 8, depending on their pace.
💡 We strongly recommend going at least 3 miles in before turning around as that is the start of the really good stuff!
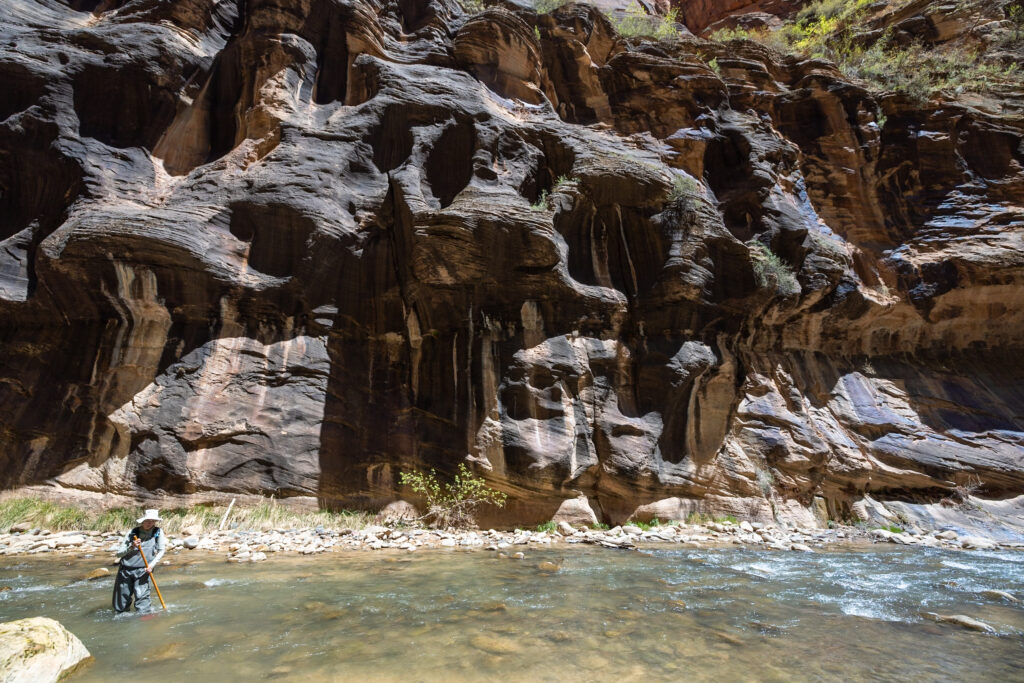
From the moment you step into the Virgin River, you’re surrounded by massive canyon walls that seem to grow taller the farther you go. The scenery is incredible the entire way, but around mile 3, the walls narrow dramatically into the most jaw-dropping section of the hike. That stretch alone was worth the effort—we seriously couldn’t stop taking photos.
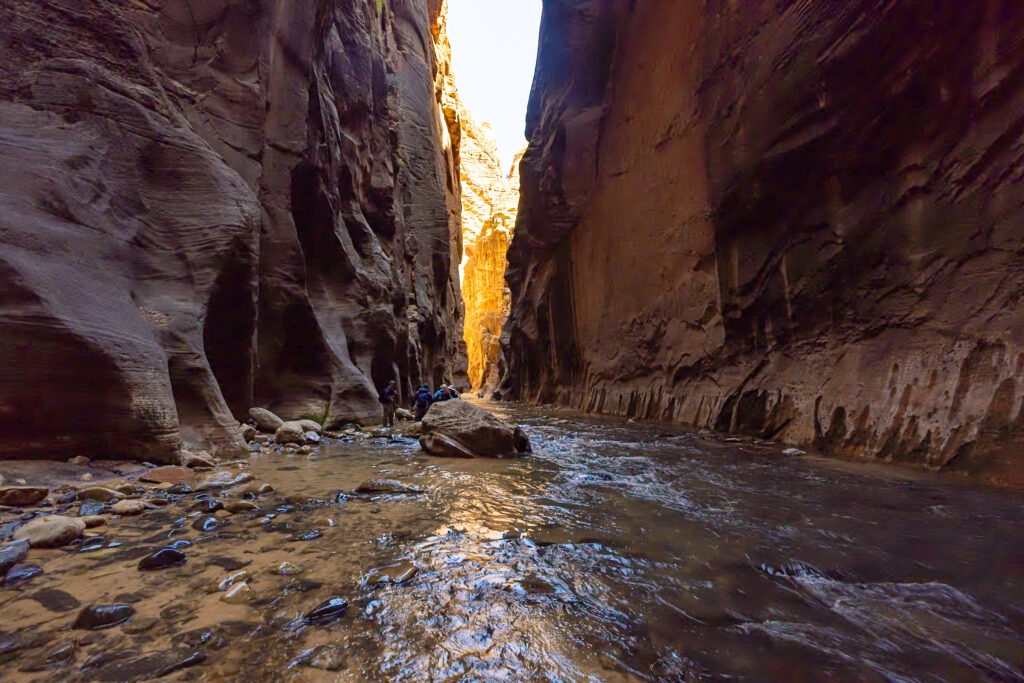
The crowds definitely thinned out the further we hiked on, and are known to be the most sparse if you make it all the way to the final few miles where there’s a waterfall before turning back.
With offline maps, wrong-turn alerts, and extra planning features, make the most of every outside adventure with AllTrails Plus. Get 7 days of AllTrails Plus for free!
Option 2: The Narrows Top-Down (Permit Necessary)
The Narrows Top-Down Route is the full 16-mile (25.9 km) version of The Narrows, starting at Chamberlain’s Ranch and ending at the Temple of Sinawava. This option is best suited for experienced hikers and can be done as either a long day hike or split into a two-day backpacking trip. Read below for a breakdown of each.
🚐 Private Shuttle Rental: To reach the top-down trailhead, you’ll need to hire a shuttle to bring you to Chamberlain’s Ranch. We found this one for $55-60 per person. The fees for this type of shuttle seem to hover around this price range.
Top-Down in 1 Day
The top-down route as a day hike requires you to apply for one Canyoneering Day Trip permit for your entire group. You can apply for your permit up to 3 months in advance here—select “Virgin Narrows Day Use Trail From Top. You can also enter the daily lottery two days before your desired hike for any spots that might have opened up.
The group reservation fee is $6, whether in advance or via the lottery, and then there is a $10 per person fee if you grab a spot. Also, keep in mind that you’ll be spending around $60/person for the shuttle to Chamberlain’s Ranch.
Top-Down in 2 Days (Overnight Stay)
If you opt to split this 16-mile (25.9 km) trip into two days, there is a slightly different permit process. You’ll only need a permit for your campsite for the night of your trip, instead of the other permit. This permit allows your group to start at the Chamberlain’s Ranch Trailhead, spend the night in a designated Narrows backcountry campsite, and then exit the next day at the Temple of Sinawava.
This campsite permit can be reserved up to three months in advance here. The fees in this case are $20 for the group and then $7 per person, per night. Also, keep in mind that you’ll be spending around $60/person for the shuttle to Chamberlain’s Ranch.
🩳 Do You Need Special Gear to Hike The Narrows?
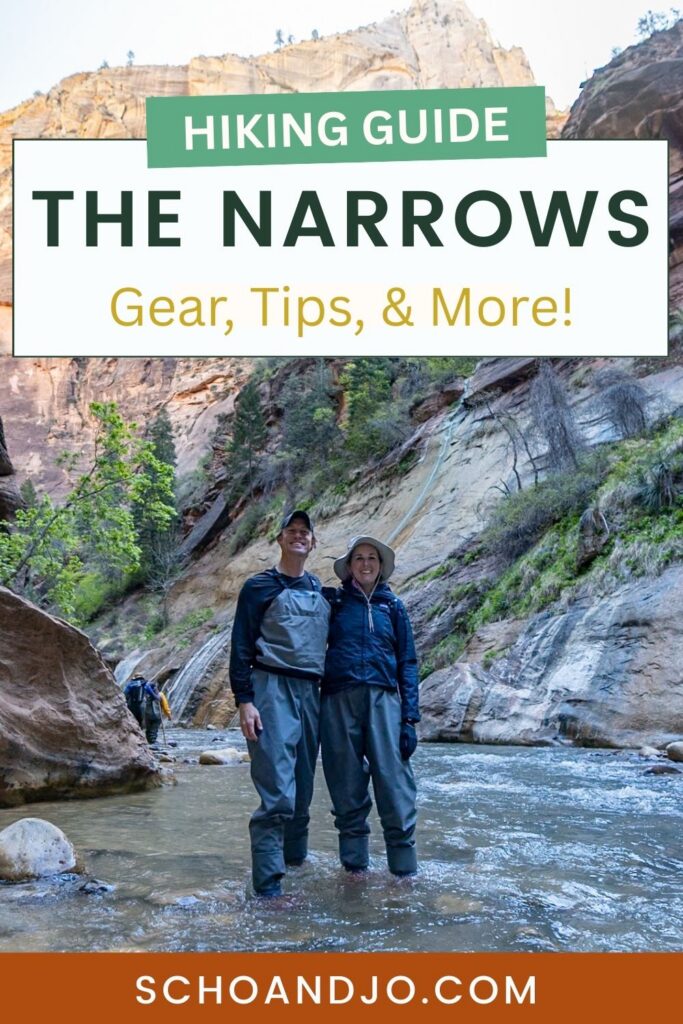
Yes—especially if you want to stay safe and comfortable. Since you’ll be hiking through flowing water over slippery rocks, a mix of standard hiking attire and specialized gear is recommended. Here’s a breakdown of what you’ll most likely need to rent:
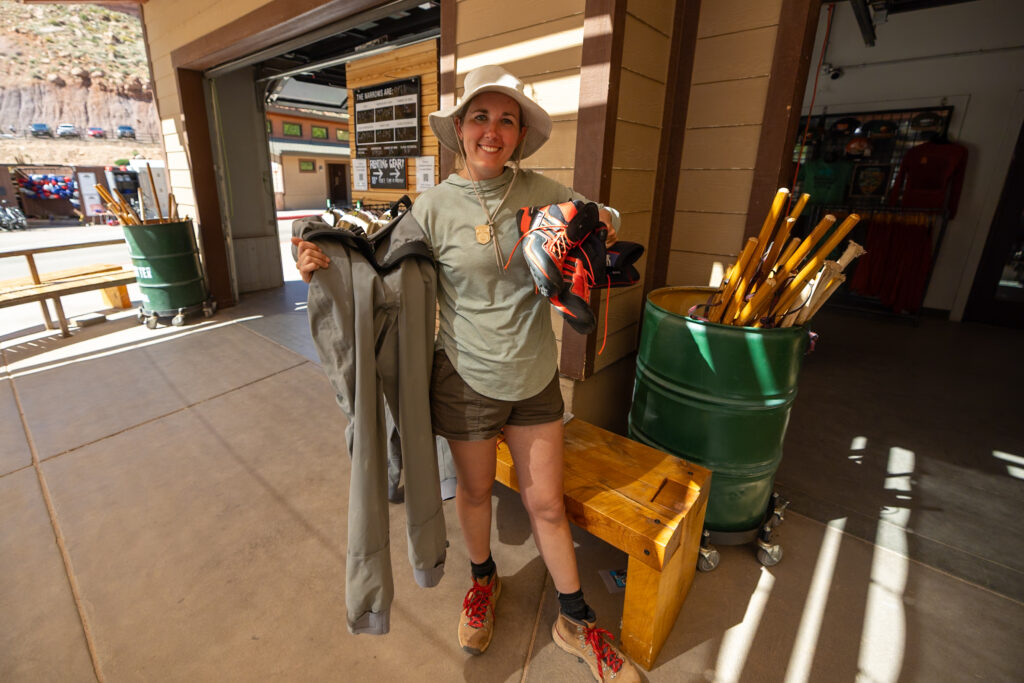
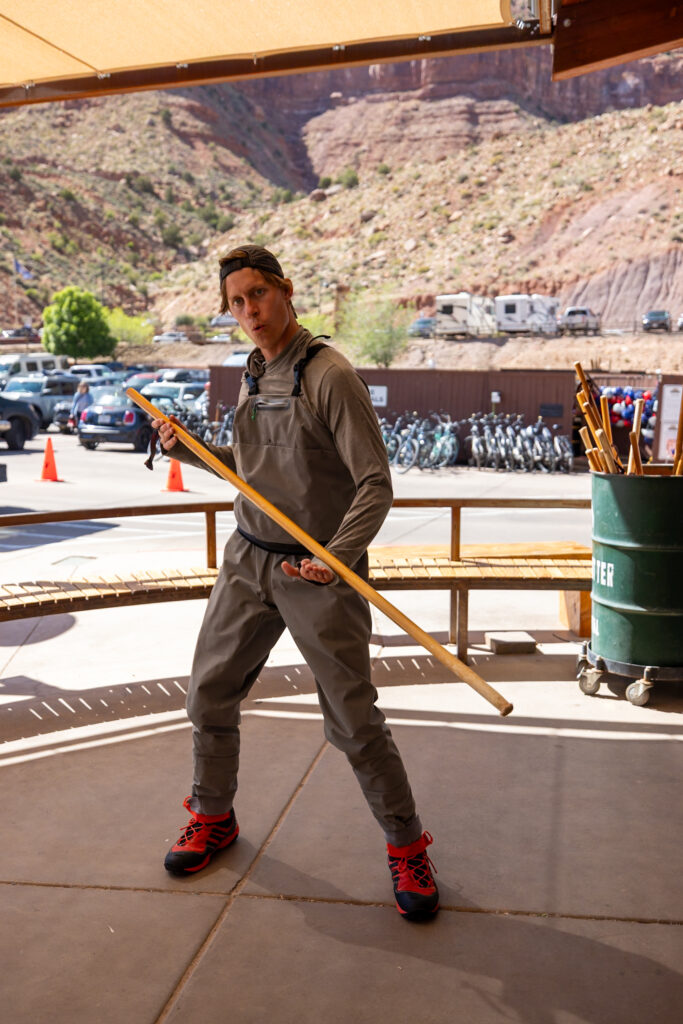
- Sturdy Shoes – In summer, we recommend Keens, which offer toe protection and solid traction in the water. When the water is colder (41°–53°F / 5°–12°C), opt for fully closed waterproof shoes with strong ankle support. If you don’t have a pair that fits the bill, local outfitters have great rental options.
- Trekking Poles (Sturdy Ones!) – Standard hiking poles might not cut it here. The Narrows calls for thicker, sturdier trekking poles to help you balance against the river’s current. Rentable from all outfitters in the area.
- Waders – Waterproof pants that keep you dry from the waist down, waders are especially helpful in cooler months. We rented them in April when the water temperature was around 50°F and were very glad we did! In the warmer months (June–September), they’re usually not necessary—quick-dry clothes and water shoes will do the trick. Also available for rent.
Where to Rent Special Gear for The Narrows
If you don’t have some of the above gear, don’t worry. Springdale (the town outside the park entrance) has three main reputable outfitters that rent gear packs for The Narrows—Zion Outfitters, Zion Adventures, and Zion Guru. We went with Zion Outfitters and had a great experience, but honestly, all three are solid and well-reviewed:
What to Wear & Bring for the Narrows Hike (Besides Rental Gear)
Aside from the special gear you might rent, here’s what else you’ll want to wear and bring:
- Quick-Dry Clothing – Wear moisture-wicking layers like a long-sleeve sun shirt (this is Elliot’s and this is Jen’s), lightweight shorts, and a sports bra or swimsuit underneath. These dry faster and stay more comfortable in and out of the water. If you’re wearing Waders, you have a bit more flexibility in regards to clothing, as those will keep you dry. In cooler months (before May and after September) you may need to wear warmer layers like a thermal or fleece sweater to keep you warm on top.
- Rainjacket – Although it didn’t rain during our time visiting Zion National Park, we threw on rain jackets on top of our sunshirts and sweaters for an extra layer. This is Elliot’s favorite rain jacket and Jen’s favorite rain jacket.
- Sun Protection – Bring a wide-brimmed hat, sunscreen, and sunglasses. Even in the canyon, you’ll be exposed to sun at times.
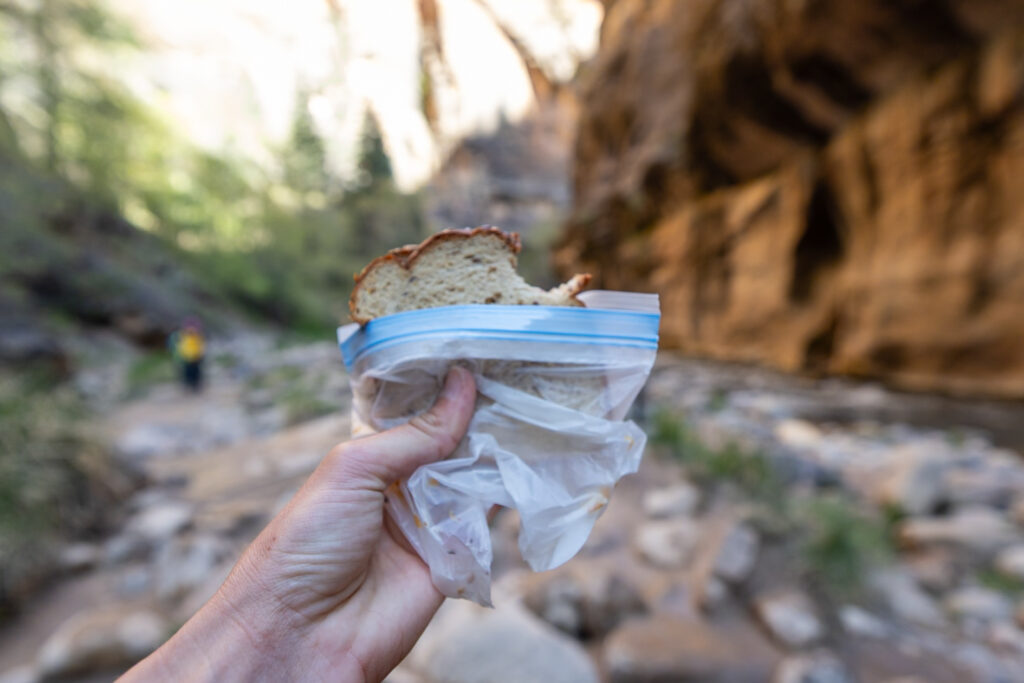
- Water & Snacks – Pack at least 3 liters of water per person (we split ours into a 2-liter bladder and a 1-liter bottle) and bring energy-boosting snacks or a packed lunch. There are no water sources or food along the trail.
- Waterproof Storage – Use a small dry bag, waterproof backpack, or even a Ziploc to keep essentials (like your phone, map, and ID) dry.
- Toilet Kit – No bathrooms on the trail! Bring a small kit with TP and a waste bag, or use a reusable cloth like a Kula Cloth.
- Basic First Aid – A portable first aid kit is a must on all of our hikes. More often than not, we end up using it for others on the trail.
🎒 Check out our Zion Packing List: What to Bring and What to Rent for a complete list of everything you might need!
🌤️ Best Time to Hike the Narrows
The best time for hiking The Narrows is late spring through early fall, typically mid-May to September, when the water levels are almost always safe and the weather is warm enough to make the river crossings more enjoyable. Summer is the most popular, but also the most crowded, though the cool river is a great relief from the heat.
Early spring (especially April and early May) can be tricky because snowmelt has been known to raise water flow rate, and the hike occasionally closes for safety. We lucked out in mid-April with safe water levels, but it is still a risk to keep in mind if you’re traveling from far and are very set on doing this hike.
💵 How Much Does It Cost to Hike The Narrows?
The Bottom-Up Narrows hike (the most popular route) is free with your Zion National Park entrance fee and doesn’t require a permit. However, if you rent gear like waders, neoprene socks, or trekking poles, expect to spend around $40–$60 per person, depending on how many pieces of gear you rent.
If you’re hiking the Top-Down route (from Chamberlain’s Ranch), there are a few additional costs:
- Permit Fee: $6 for the permit application, plus $10 per person (1-day hike) or $20 for the permit application plus $7 per person per day (2-day overnight hike)
- Shuttle to Trailhead: Around $60 per person for transportation to Chamberlain’s Ranch
- Gear Rentals: Same as above—expect $40–$60 per person, depending on what you need
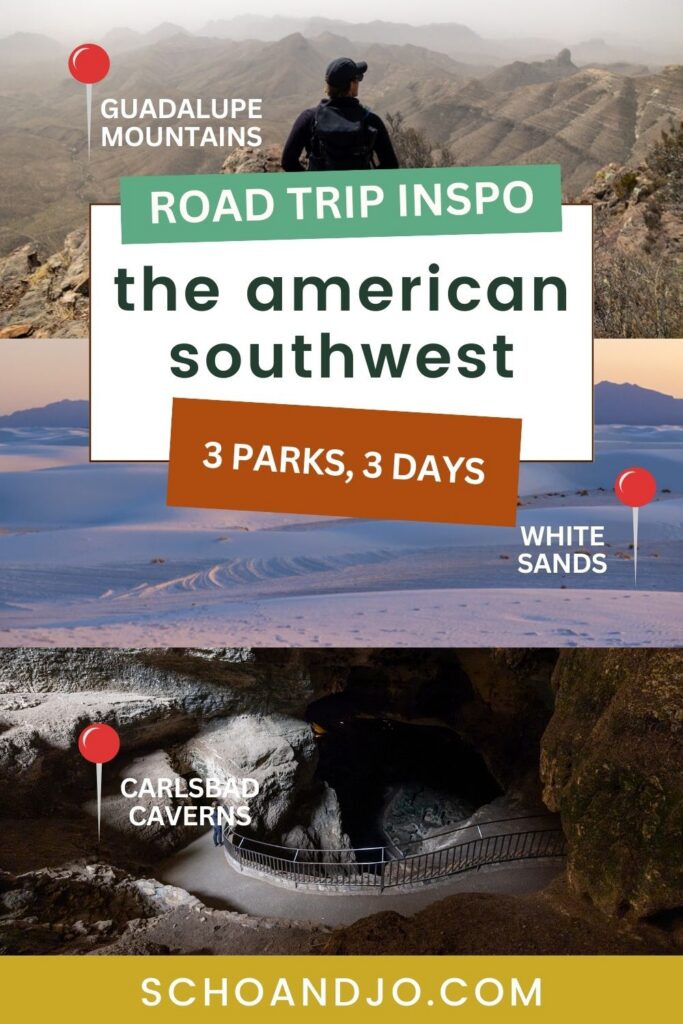
Discover your next adventure, search for National Park guides here at schoandjo.com/national-parks
❓ FAQs
Can you hike the Narrows with kids?
Yes! Many families hike the Narrows via the Bottom-Up route from the Temple of Sinawava. Just keep in mind that water depth, current strength, and the rocky riverbed can be tough for younger kids. Children should be strong walkers, comfortable in water, and outfitted with proper gear (including sturdy footwear and possibly a drysuit in cold months).
How long does it take to walk the Narrows?
Hiking the Narrows Bottom-Up typically takes 5–8 hours round trip, depending on how far you go—many people turn around at Orderville Canyon or Big Spring.
Hiking the Narrows Top-Down covers 16 miles from Chamberlain’s Ranch. It takes 10–14 hours to complete in a single day, or can be done as an overnight backpacking trip with a reserved campsite.
Can beginners do the Narrows?
Absolutely. The Bottom-Up route is suitable for beginners in decent shape, as long as you’re comfortable hiking in water and navigating uneven, slippery terrain. We did it with just a few months of hiking experience and had a great time. Proper gear helps a lot. Since it’s an out-and-back, you can always hike a few paces and turn around if you’re uncomfortable.
Do you need a permit to hike the Narrows?
- Bottom-Up: No permit needed. Just pay the Zion National Park entrance fee.
- Top-Down: Yes, a wilderness permit is required whether you do it in one day or as an overnight trip. Refer to our Top-Down section for info on how to reserve your spot.
Can you hike the Narrows in sneakers?
You can, but it’s not ideal. Sneakers get waterlogged quickly, have poor grip on slippery rocks, and offer little ankle support while hiking the Narrows. It’s better to wear closed-toe hiking shoes (they can be sandals like Keens as long as the toes are covered) or rent canyoneering boots with neoprene socks. Waders sometimes come with their own built-in shoes as well.

📰 Related Articles
- 9 Fun Things to Do in Zion National Park in 2025
- Top 5 Short & Easy Hikes in Zion National Park
- 13 Best Hikes in Zion National Park (Ranked Easy to Hard)
- Zion Packing List: What to Bring and What to Rent
- Our 7 Favorite Viewpoints in Zion National Park (No Hiking Required)
- 5 Things You Need to Know Before Visiting Zion National Park
- How to Spend One Day in Zion National Park
- Zion Itinerary: How to Spend 3 Days in Zion National Park
- The 4 Scenic Drives of Zion: Top Pull-Offs and Nearby Trails
- Our 9 Favorite Things to Do in Zion National Park Besides Hiking
📺 Watch on YouTube
🔍 Ready to Hike the Narrows?
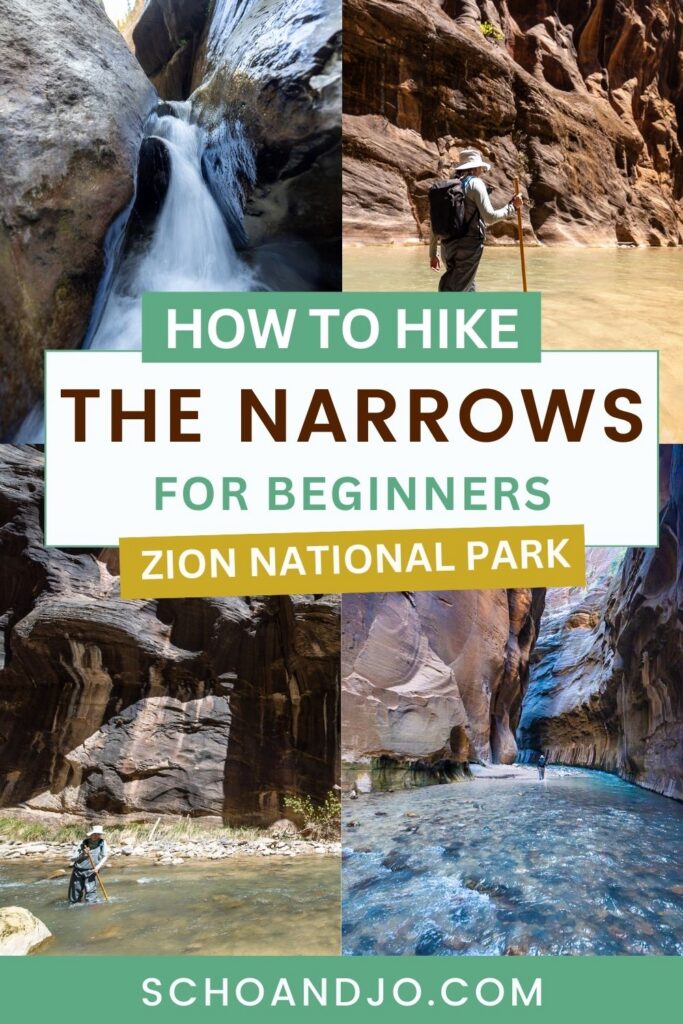
Pin this guide to hiking the Narrows in Zion National Park to make planning your upcoming trip a breeze!
Leave a Reply
You must be logged in to post a comment.